
Hello bead peeps!
Welcome to my first ever “Late Night in the Studio with Erin” video! I am not a very tech savvy person but I thought I would give a live video a shot, inspired by Heather’s Bead Table Wednesday and all the fun the Miss Candie Cooper shares with us on her page. This was totally impromptu… like it was 10pm and I realized I hadn’t written this project up as promised, I was beyond tired and shivering all the way in this deep freeze we are in in Wisconsin, I had no makeup on and the worst lighting in a studio anywhere and more loot than I know what to do with, but I thought, why not? I have to apologize for the state of my studio, but to pretend it isn’t always like this would be a lie (and if you saw the mess that was just at my fingertips, or to my right or left, or even on the floor right behind me, I am sure you would be appalled!) I promise that this is at the top of my very long to do list for the new year (which might make for an entertaining, if not downright embarrassing video subject!) If you like the idea of videos, let me know. I would love to do more of this sort of thing, so if there is anything that people want to learn from me……….or if you hate the idea of videos, just be kind to me in the comments! 😉
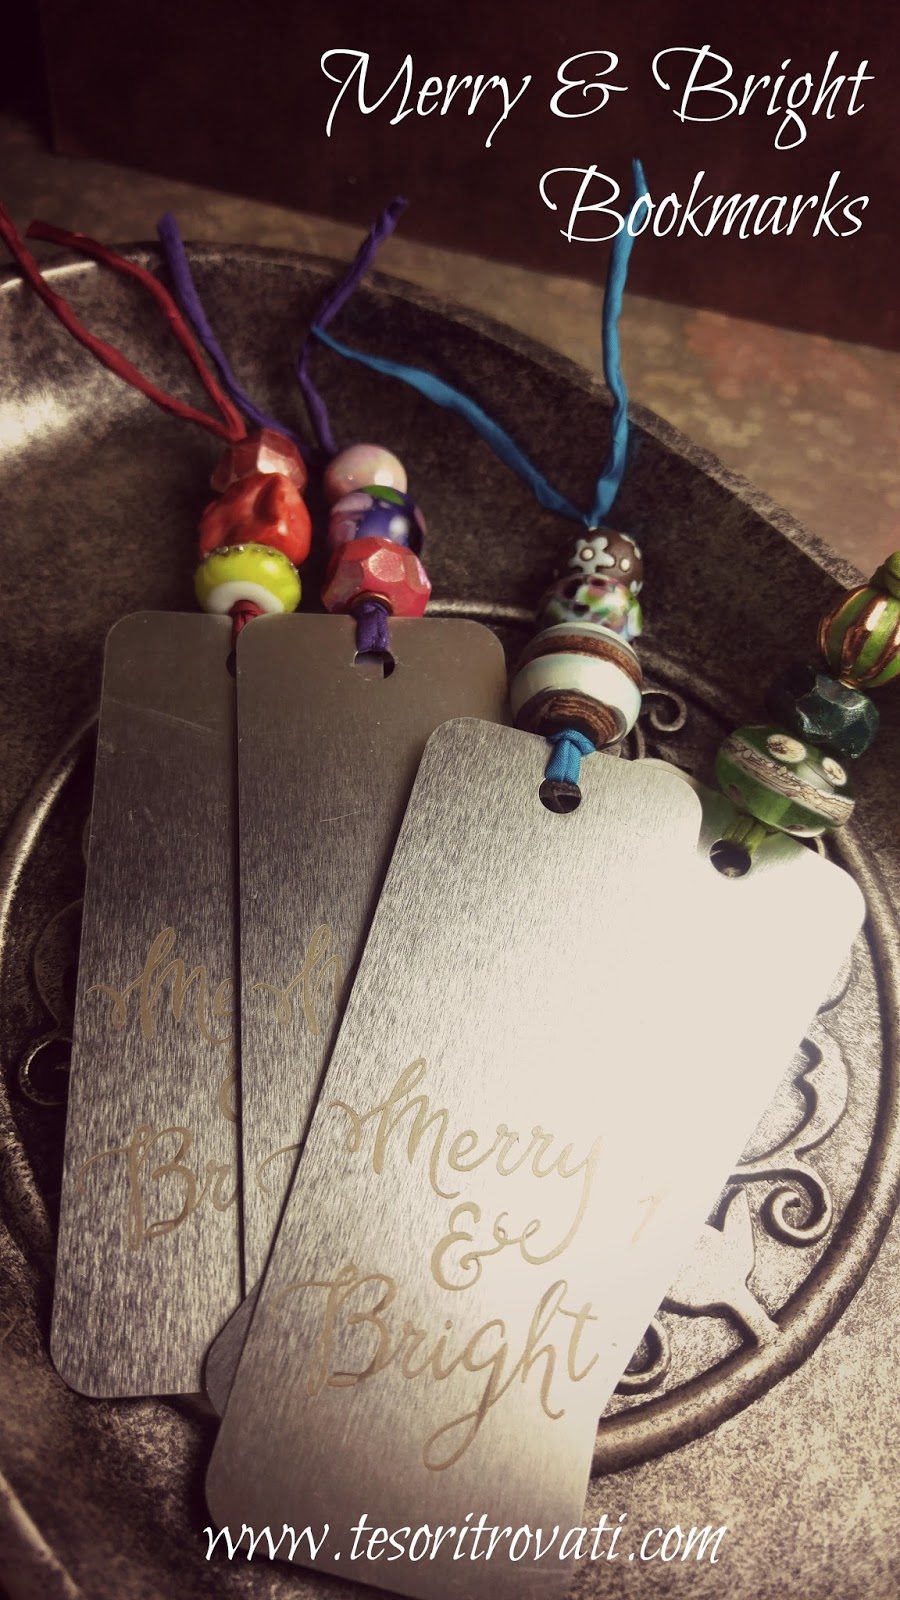
So here is my project – Merry & Bright Bookmarks – and the instructions are below in case you don’t want to listen to me blather on and on and on……..
Merry & Bright Bookmarks
Materials:
- Metal tags, 4 x 1 1/2″ (the ones I used were etched gift tags from Target but you could use copper or brass sheet metal, or how about pieces of old cookie tins for a colorful alternative)
- Colorful cord, about 14″ (I used silk cords from Marsha Neal Studios, but you could use baker’s twine or waxed linen)
- Assorted art beads with larger holes
- Craft wire, 6″, 22 gauge
- Fold the cord in half and pass through the hole on the top of the metal tag. Tie a lark’s head knot.
- Fold the piece of wire in half.
- String the bead onto the wire, holding the tail end so it doesn’t slip out. Open the wire a bit to allow the cord to pass through. Pull the wire with the cord through the bead.
- Repeat Step 3 for the remaining beads.
- Tie an overhand knot at the top of the beads to secure. OPT: if the hole is too large you should tie an additional overhand knot on top for a larger knot to prevent the bead from slipping.
Tuck in your favorite reader’s book gift for them to enjoy the whole year though!
I am feeling generous so in the spirit of giving…..I will send one of these bookmarks to a lucky reader just for answering one of these two questions….
If you think that you might like to see more “Late Night in the Studio with Erin” videos, what would you like to learn from me? 😉
or
If you don’t want to be treated to any more “Late Night in the Studio with Erin” videos, tell me what is the best handmade gift you ever received? *<]:-}}}
Winner will be announced after Christmas.