As promised I have a tutorial to share with you, a bracelet tutorial. With the warmer weather comes bare arms and the chance to show off gorgeous bracelets. I like bracelets that have the stacked look built into them so I designed this bracelet with layered strands to work with the focal toggle clasps from my Natural Impressions line. I am having so much fun designing around the toggle as a focal. I’m also finding a new love in Czech glass beads. Just look at those scrumptious rondelles and leaves!
Materials:
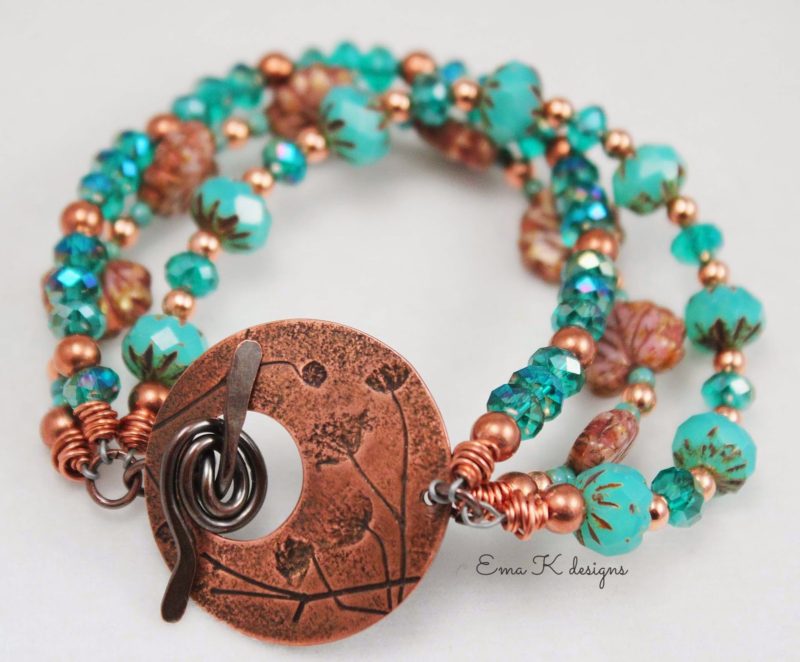
Copper Focal Clasp from Ema’s Natural Impressions Line
8 – 12 mmCzech glass rondelles
7 – 10 mm Czech glass leaves
31- 4 mm Czech glass rondelles
22 – 4 mm copper rounds
13 – 5 mm copper rounds
17 – 8/0 Miyuki glass seed beads
6 – 2×2 copper tube crimps
Stringing wire
Jewelry making pliers
tape measure
Optional:
6 – 3.5 inch lengths of 22 or 24 guage wire
The measurements in this tutorial create a 7 and 1/2 inch bracelet. If you’re creating a different size bracelet adjustments to materials will have to be made. I’d also like to mention that I am a big fan of Soft Flex beading wires. I’ve had problems with other stringing wires slipping out of the crimp tubes rather easily. I never have that problem with Soft Flex. This is a just my personal opinion so please feel free to use the stringing wire you prefer.
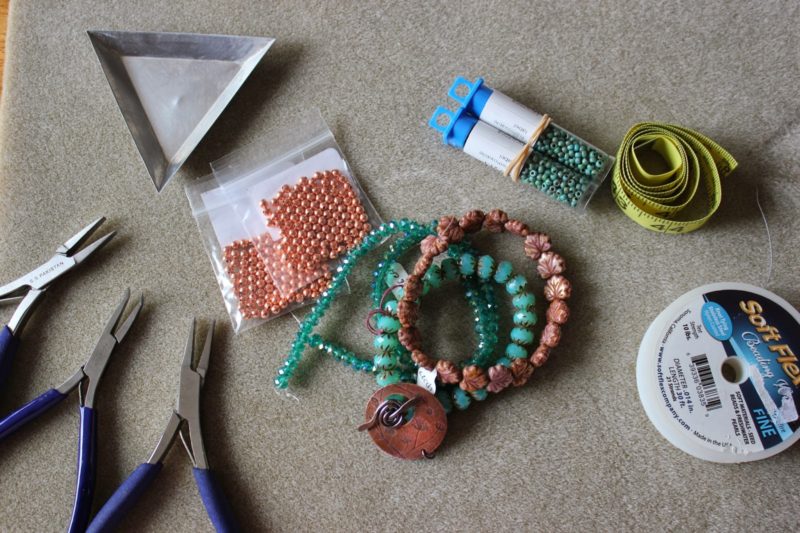
So let’s get started by gathering your supplies.
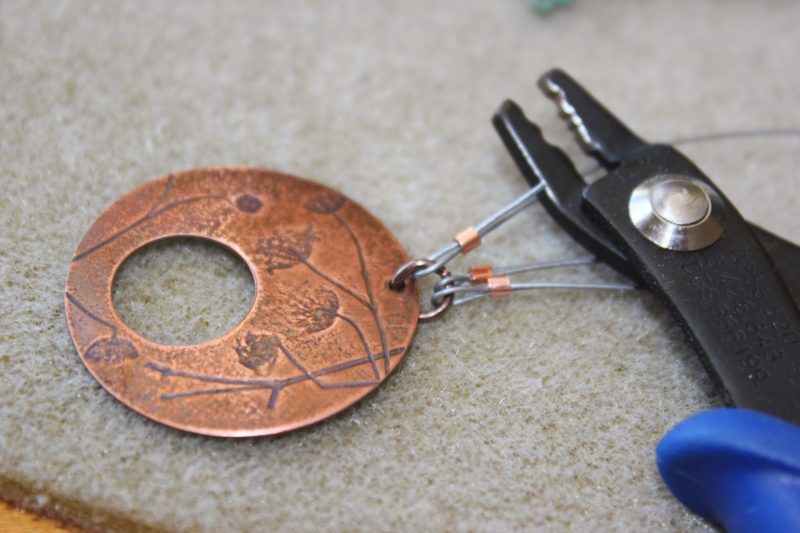
Cut three lengths of your stringing wire, 9.5 to 10 inches. Add one strand of the stringing wire to the focal portion (I’m using a 1.5 inch round focal clasp for this tutorial) of the clasp, use a crimp tube and crimping pliers to secure the wire to the jumpring. Repeat for the other two stringing wires.
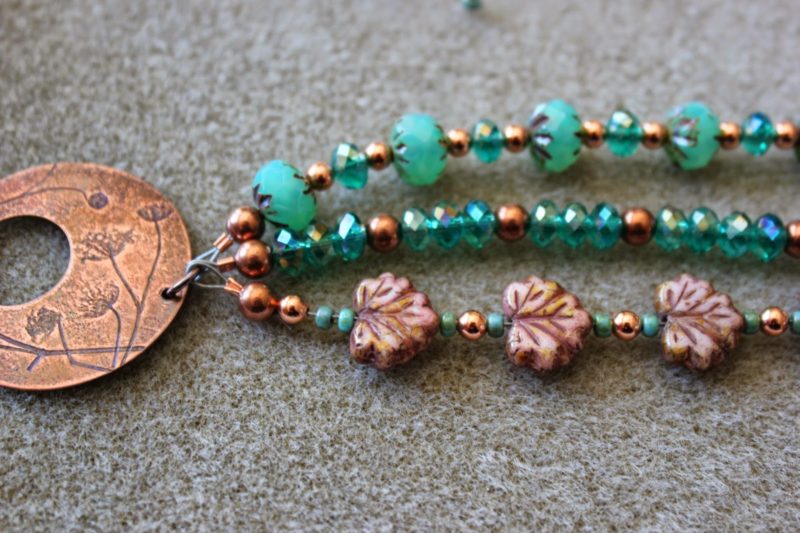
On the first wire, string one 5mm copper round, 12 mm glass rondelle, 4 mm copper round, 8 mm glass rondelle, 4 mm copper round. Continue the pattern from the 12 mm rondelle.
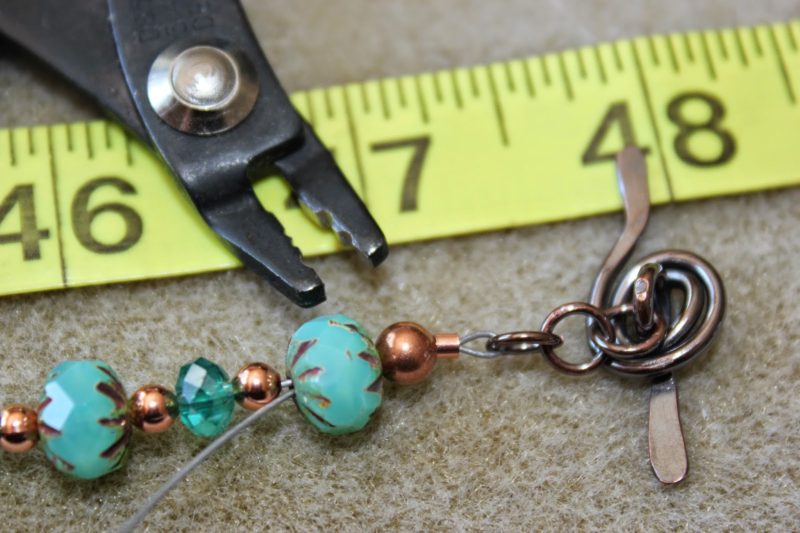
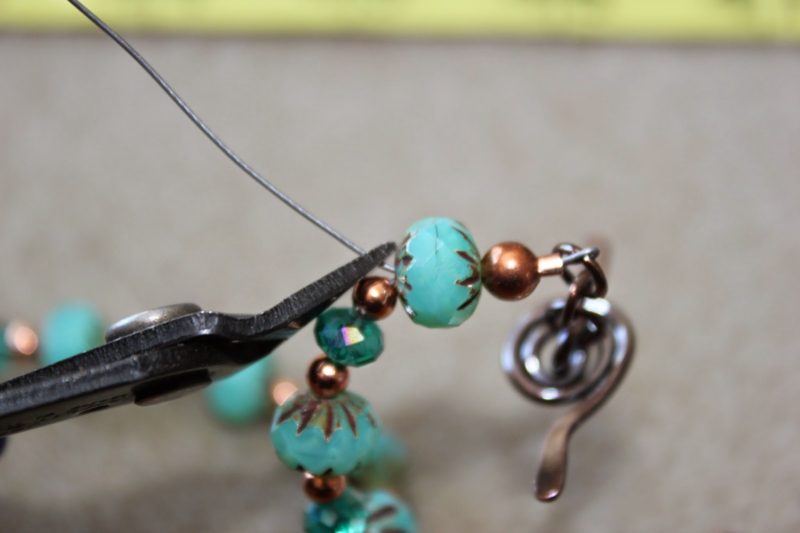
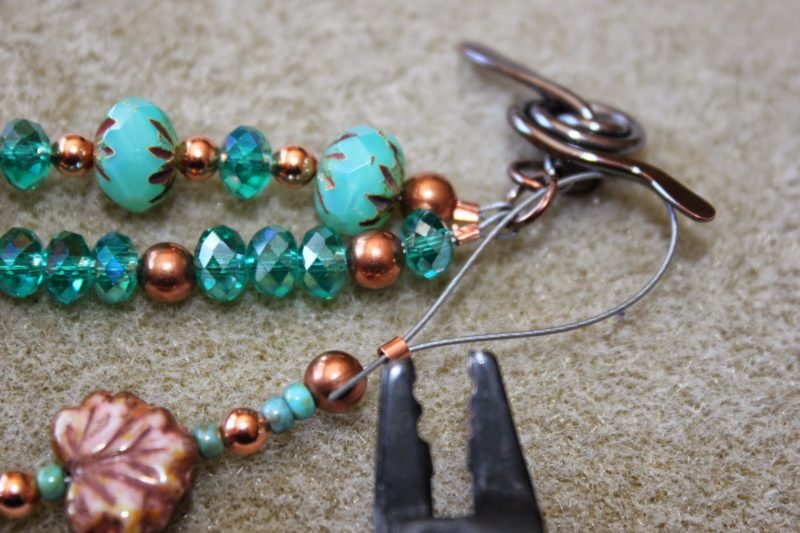
Continue stringing until your desired length is reached. Finish with a 5 mm copper round. Add a crimp tube. String on the toggle portion of the clasp and bring the stringing wire back through the crimp tube (and a couple of the other beads if you can).
*(Don’t be confused by the measurements on the tape…I use a scrap piece of measuring tape that has been cut up. I’m not making a 48 inch bracelet.)*
Crimp the tube to finish this strand.
Trim the excess stringing wire as close as you can to the beads.
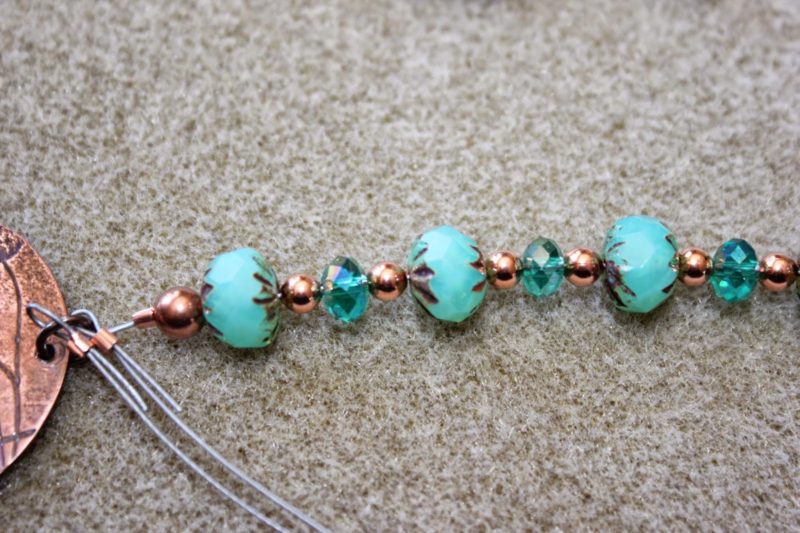
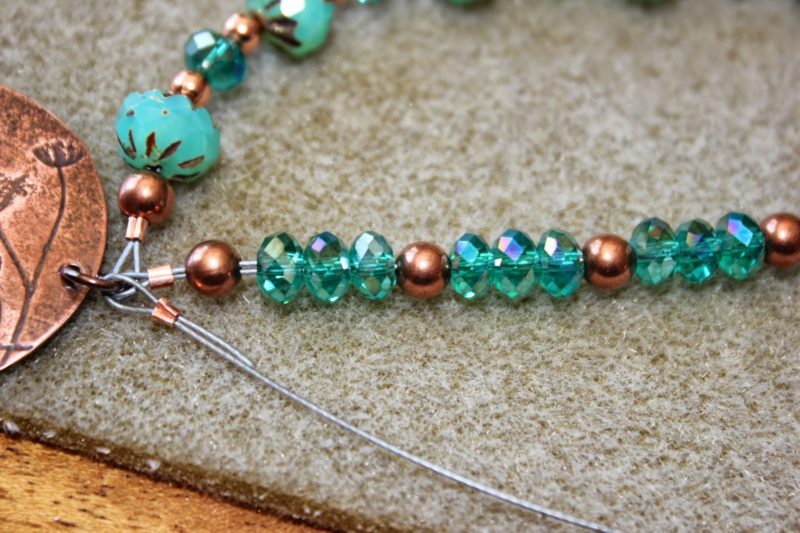
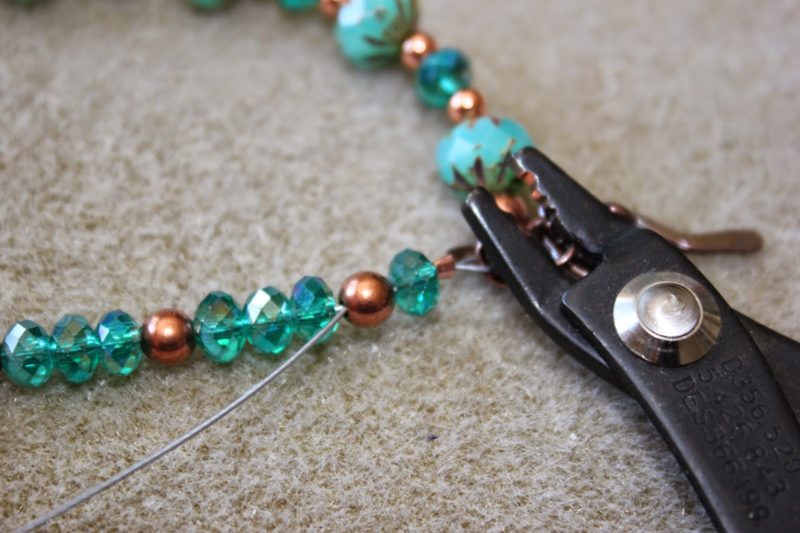
Begin your second strand with a 5 mm copper round. Add 3 – 8 mm glass rondelles, 5 mm copper round, 3 – 8 mm glass rondelles, 5 mm copper round, 3 – 8 mm glass rondelles. Continue the pattern for the desired length of the wire.
Add a crimp tube, string wire through the toggle portion of the clasp. Using the same jumpring the first strand is going through. String around the jumpring, back into crimp tube and through a couple of beads if you can. Use crimping pliers to crimp the tube. Trim the excess wire.
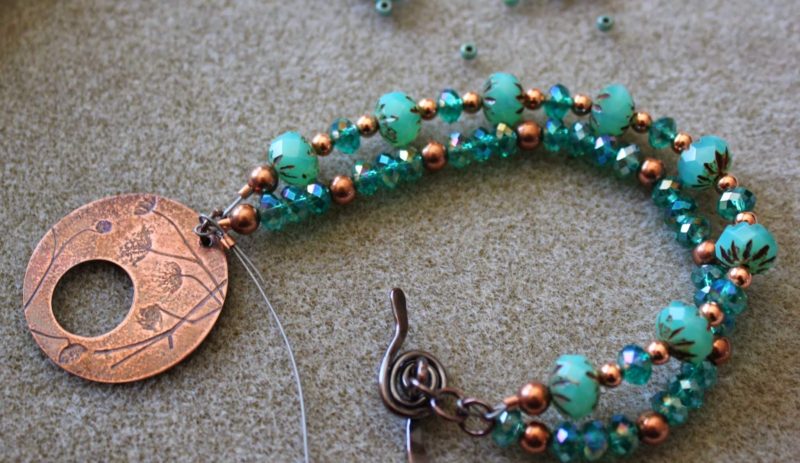
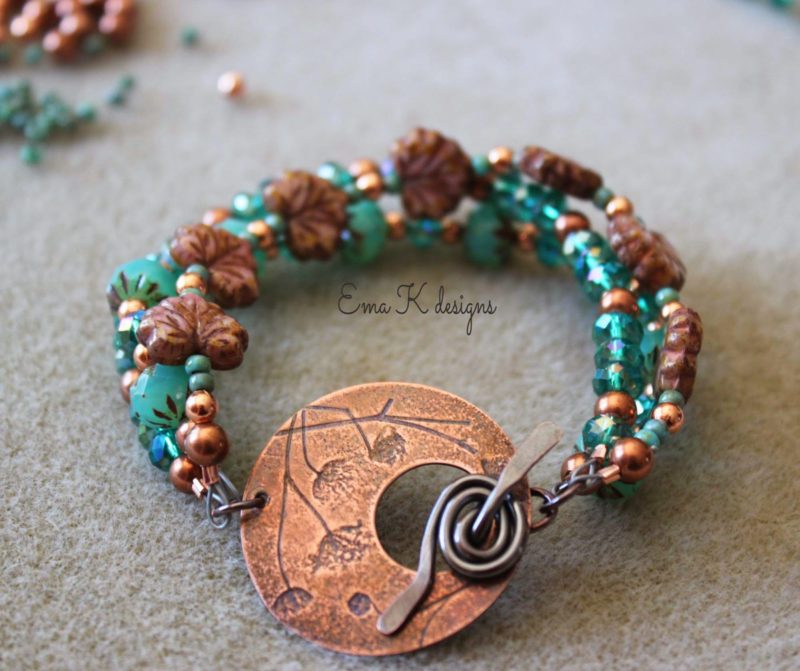
Here’s what your piece should look like so far. Two strands done. One to go.
For the third and final strand we’re going to string on a 5 mm copper round. Followed by a 4 mm copper round, 2 – 8/0 seed beads, a czech glass leaf (aren’t these just precious?), 1 seed bead, 1 – 4 mm copper round, 1 seed bead, continuing the pattern with the czech glass leaf bead for the length.
Finish the end of the third strand in the same manner as the other two strands. I tried to begin and end each strand with a 5 mm copper round if I could manage it.
And drum roll please….
Your piece is finished. That is if you want to be finished.
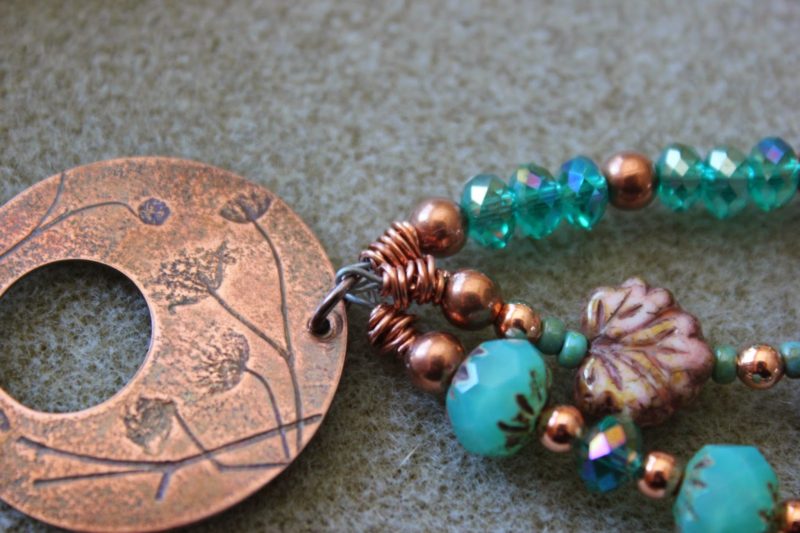
You can add crimp covers to cover the crimp beads if you wish or you could continue on with the optional portion of this tutorial. I have taken to adding wrapped wire to the ends of my pieces. I like the look it gives to the piece.
I find that adding wrapped wire to the crimp covers tend to tighten the stringing wire, making the strands a bit stiff. Almost as if I had used actual wire to string the beads. Just something you should keep in mind if you are going to try this. It may also shorten your bracelet up a tad. So if you’re bracelet is fitting you perfectly you may want to skip this step.
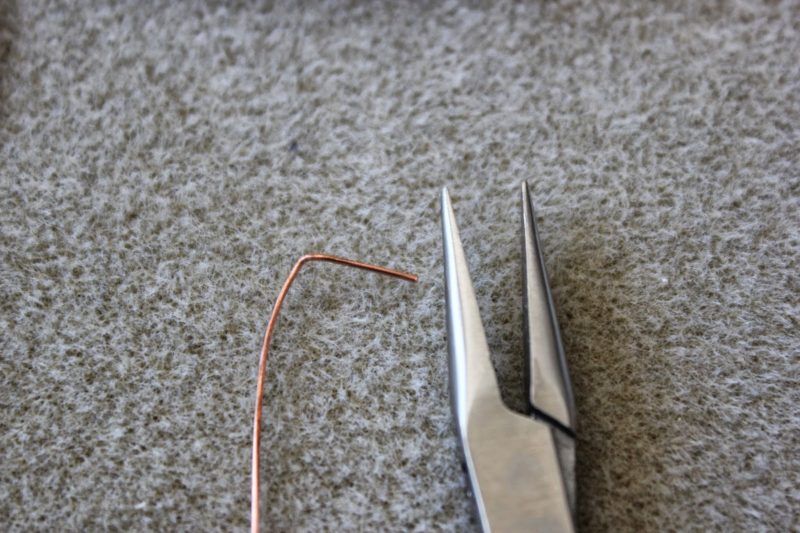
Bend the end of the 3.5 inch copper wire up about a half inch.
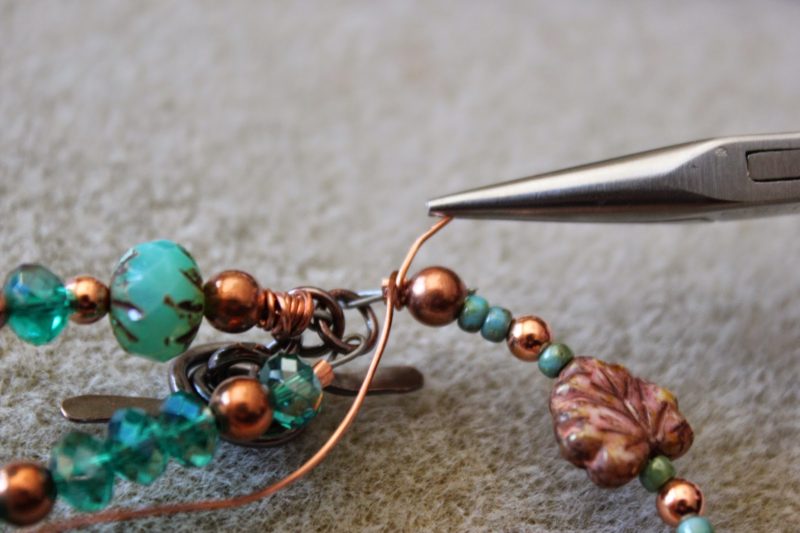
Put the crimped tube into the crook of the bent wire. Starting at the end of the copper round bead. Hold the wire tail with a pair of pliers and begin wrapping the wire around the crimp. I tend to wrap around the crimp in a neat fashion and then wrap back to where I started the wrap.
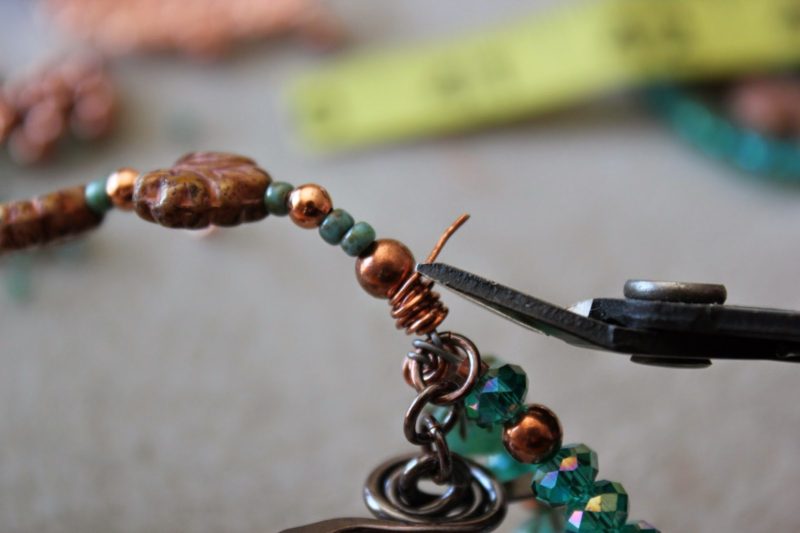
Trim the excess wires.
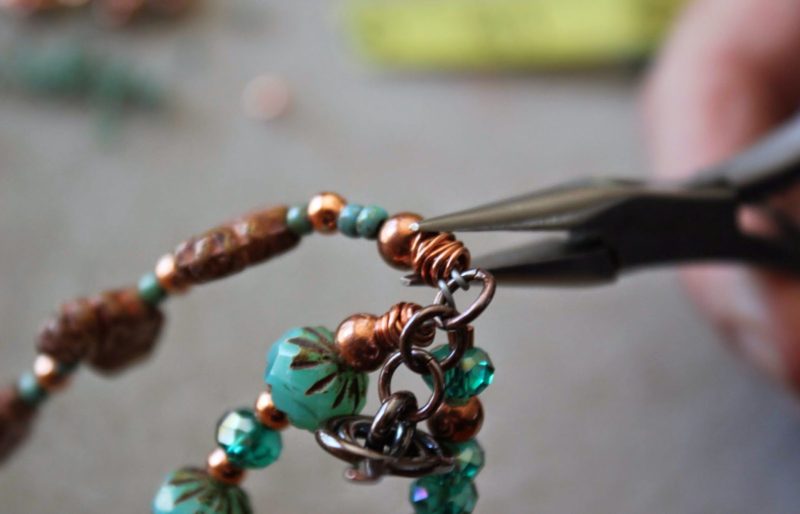
Tuck the cut ends neatly so they bury under the wrap. I start and end at the copper round to give the cut ends a place to hide.
You’ll have to complete this process six times. One time for each crimp tube.
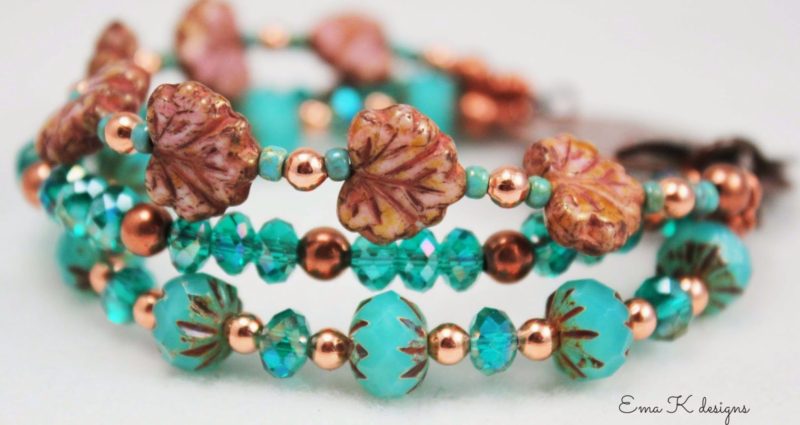
The finished layers and those delicious czech glass beads.
A final look at the finished piece.
Additional options:
I used a large, 1.5 inch clasp from
my Etsy shop. You can easily use a smaller clasp and/or make less strands to suite your own personal taste.
I purchased my Czech glass beads from my local bead shop. If you can’t find the exact beads in the materials list you can peruse, our own, Rebecca Anderson’s Etsy shop, The Curious Bead shop. Rebecca has a lovely assortment of Czech glass beads.
Thanks for visiting with me today. I hope you’ve enjoyed the tutorial and I look forward to seeing your creations.