
Inside the Studio with Mary Harding
Each week one of our contributors gives you a sneak peek into their studio, creative process or inspirations. We ask a related question of our readers and hope you’ll leave comments! As an incentive we offer a free prize each week to bribe you to use that keyboard. The following week we choose a random winner.
Congratulations haezz!
You have won a set of ceramic beads from Claire at Something to do with your Hands.
You have won a set of ceramic beads from Claire at Something to do with your Hands.
Please send Claire a message with your information.
….
August has been a busy month for family and friends visiting. It has been lots of fun and has kept me out of my studio more than usual. But not entirely, as I was also participating in an online class called Getting Attached: Rivets Revealed taught by Keith Lo Bue at Artful Gathering.

That’s the beauty of online classes, you can do them anytime of the day and that is what I did. I watched his videos early in the morning or at night after everyone was sleeping on my ipad with ear buds. I went to my studio before anyone was up to try out each new teaching. And because online classes extend over a long period of time, I was able to keep up before and after the company came and even during the time when I was busy preparing the house for visitors ( you know what I mean, packing away the beading sprawl and removing the dust bunnies.)
This was not my first online class but my first time taking one from Artful Gathering. I have been very happy with how well it is organized and by the high quality of the video lessons. And of course, I just love Keith Lo Bue’s off beat teaching style. What’s best of all about this class is his precise and extensive knowledge of rivets that he has shared with us in minute detail.
My Inside the Studio post today will be a look at some of the rivets we made. Since Keith teaches technique, not project, I devised projects for myself to practice the various rivets we were taught. What follows is a picture tour of the rivets that I learned.
This pendant, made from copper scraps in my studio, was a way of practicing the first kind of rivet that we were taught to make. A simple rivet with a slightly rounded head. We used rebar steel wire from the hardware store. Last year at Artful Gathering, Keith taught a class called Steeling Beauty. It was all about making jewelry from steel wire. You can see a video preview of the class and learn more about this kind of wire HERE.( this is a 13 minute video and it is well worth watching.) Unfortunately, I did not know who Keith Lo Bue was last summer nor had I ever checked out Artful Gathering. I heard about the class by chance after it was over, and looked up Keith Lo Bue and that is how I found out about the Getting Attached Class. If you are interested in what he may be teaching next summer at Artful Gathering you can follow him on Facebook or on his website.

This brass bar pendant is made with mechanical rivets. These riveted bars move and the necklace changes shape along with body movements of the wearer.
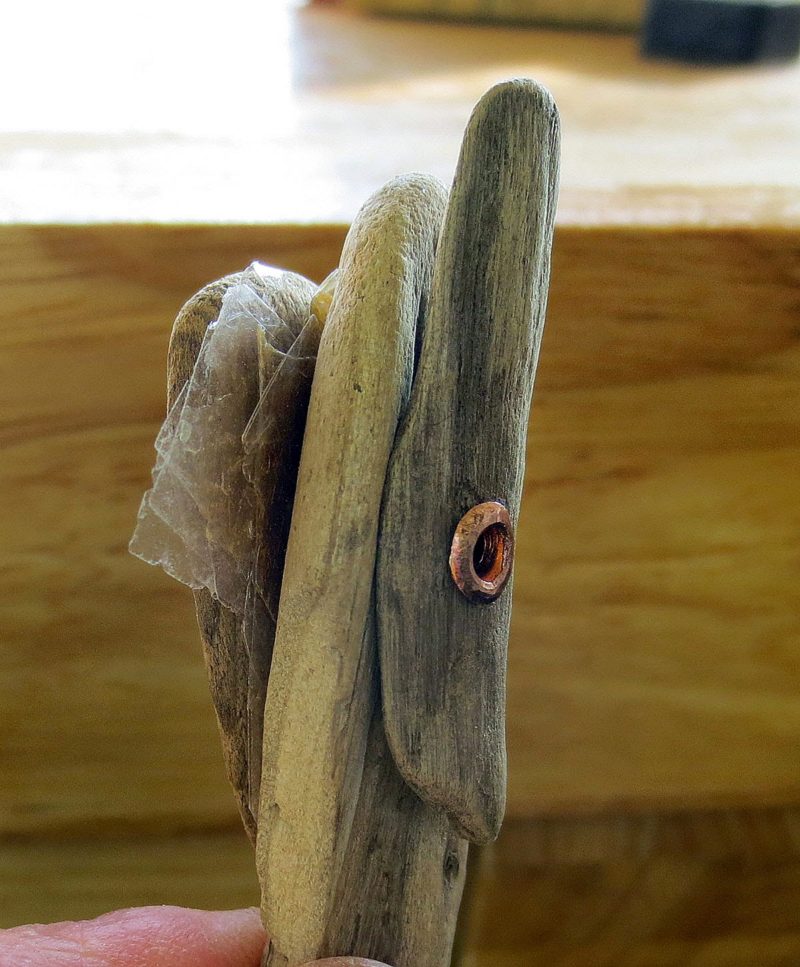
This is a tube rivet that has been used to attach driftwood and mica together.
Another tube rivet. This time attaching beach glass, mica and driftwood together. It was to learn how to attach such fragile materials together with rivets that was the draw for me to take this class. And I have not been disappointed!!
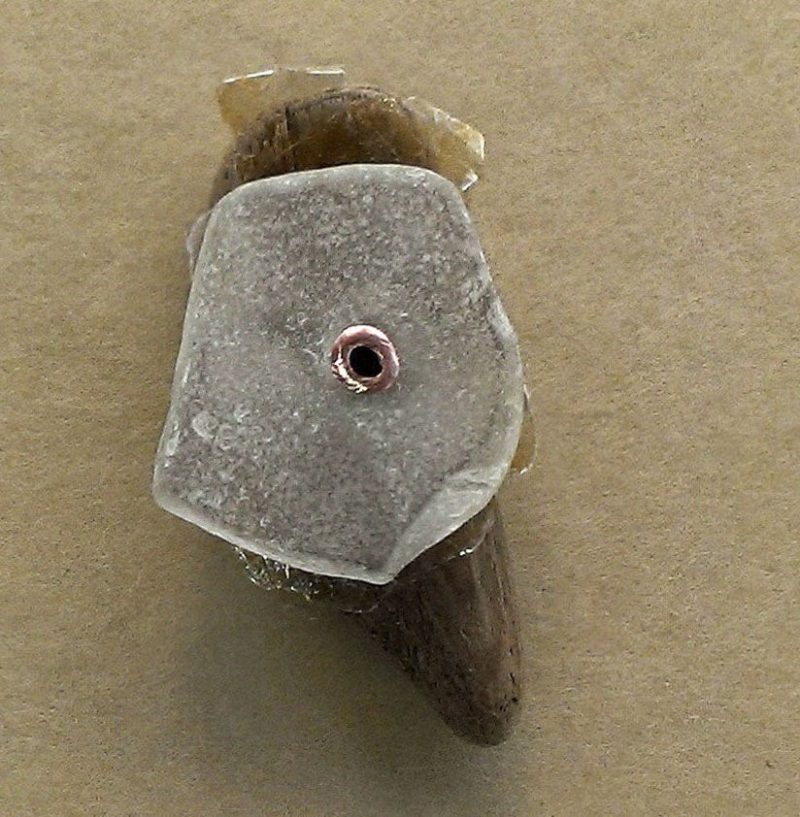
This pendant was made to practice making a rivet through a hollow concave shape.
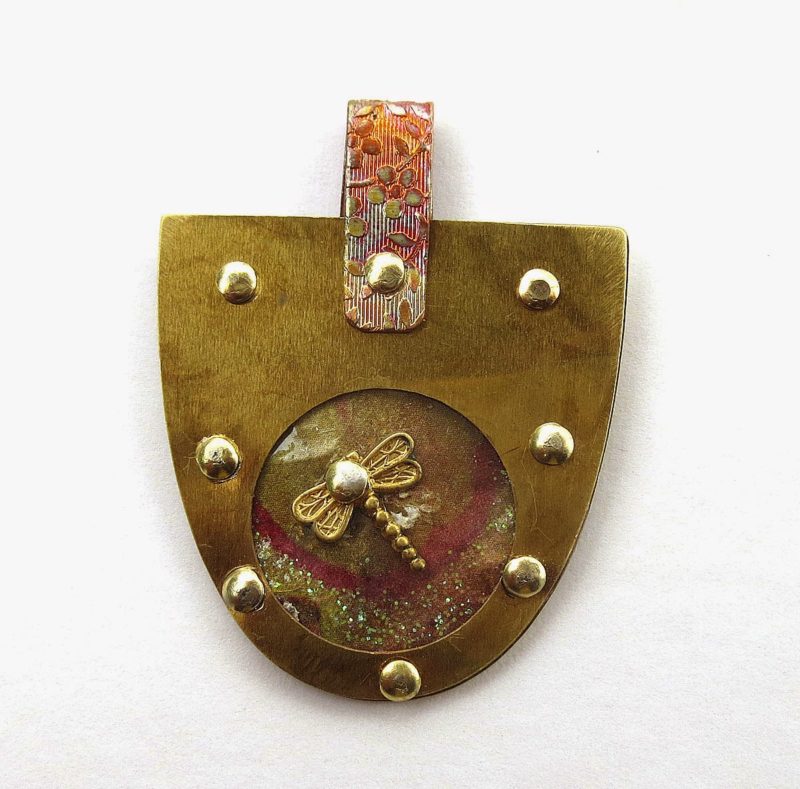
This dragonfly pendant combines capturing a piece of resin paper between two brass pieces of metal and adding a three dimensional object in the window opening between the two sheets of metal. The rivets used are escutcheon pins which are like half rivets as they come with the rounded head already made. I got mine from Ace Hardware.

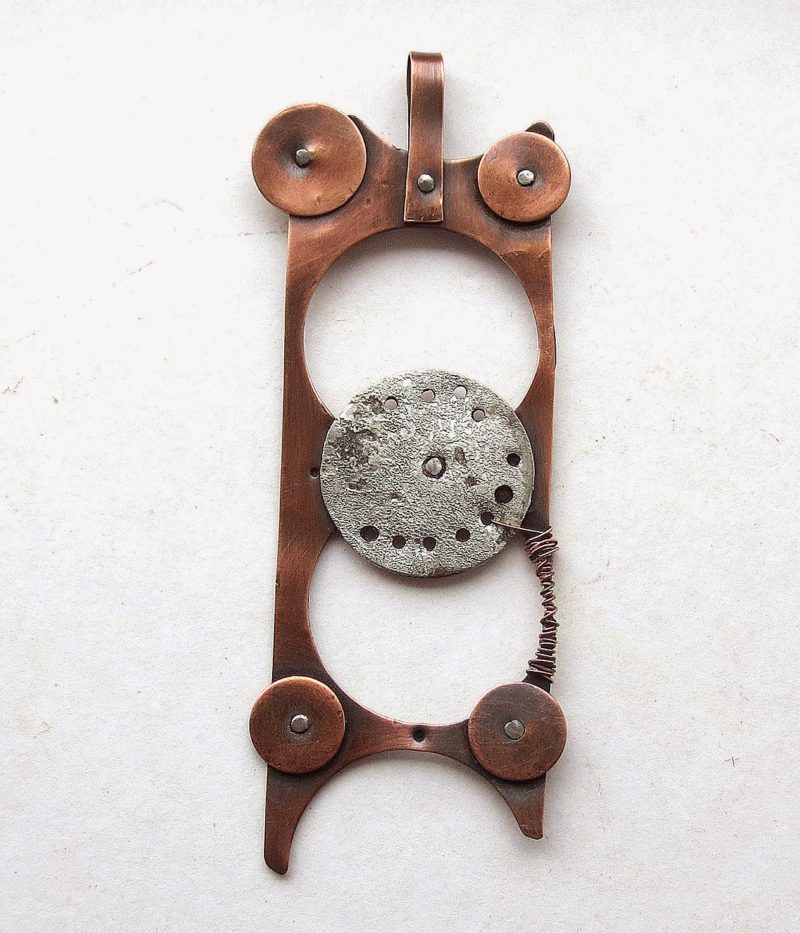
This round pendant illustrates attaching an object with a balled head rivet.
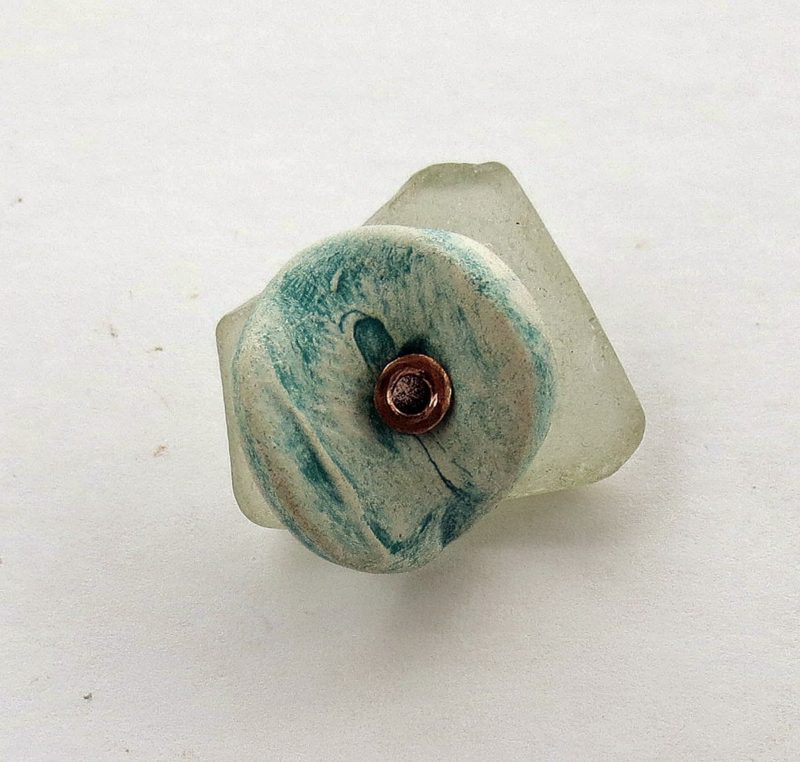
Now we are looking at the most fragile rivet that I was able to make so far: ceramic and glass attached with a tube rivet. This was my first try and I purposely made the rivet too long so I would not hit the ceramic piece and break it.
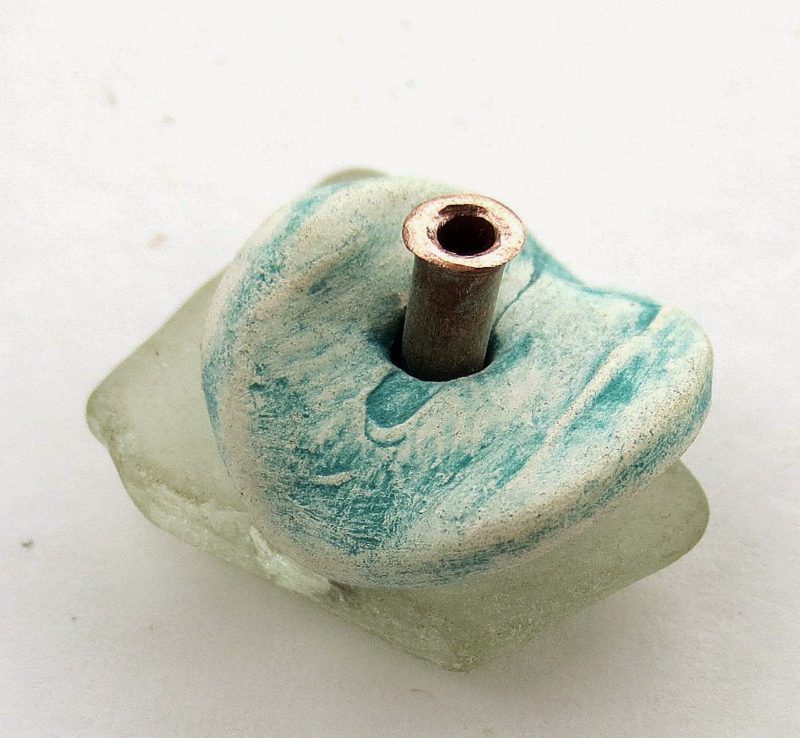
Here you can see how the tube rivet is quite long. It can be useful if strung as a pendant or if one were to use it for part of an earring, I think. My next try at a tube rivet with a ceramic piece ended up in me breaking the ceramic disk I was trying to rivet to a piece of copper. After that I decided I needed more practice.
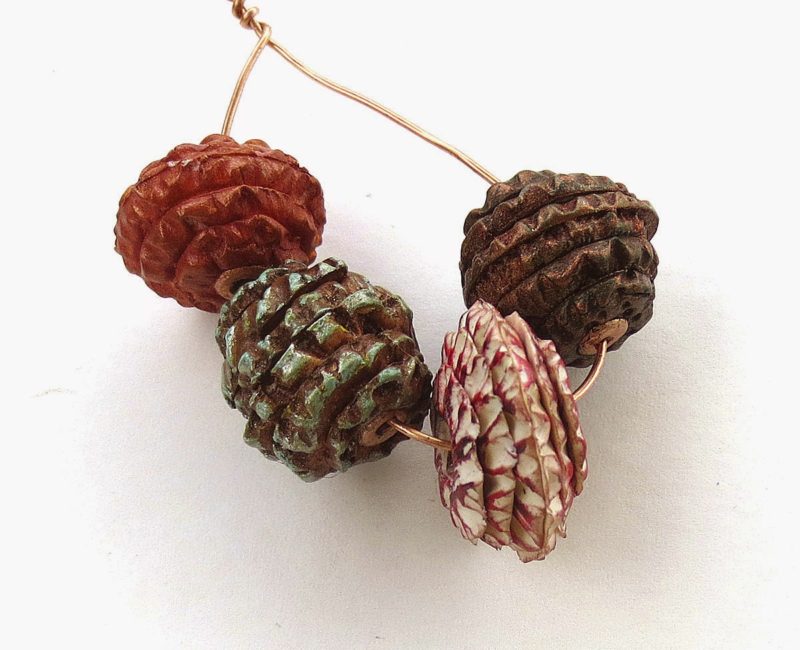
Polymer Clay beads attached with a tube rivet
So I began practicing on polymer clay. Each of these beads is made up of 6 pieces and the tube rivet holds them all together. No glue or curing binds. I found making these difficult because all the pieces are hard to hold on to while hammering on the tube rivet. But the good part is when I missed my mark, the bead did not shatter.
I am still challenging myself to make a clay bead pendant or stack that is held together by a tube rivet. Since this class is still going on for a few more days, I may get them done in time. If not, there is always the CDs of the class that each instructor makes available for purchase to current students. And much later Keith will publish a CD for the public.
Now for my question to you: if you have taken an online class what did you like best about that kind of venue for learning and if you have never taken one, what concerns do you have about learning in a virtual setting?
Please leave a comment below and you will be entered to win a pair of my tube riveted polymer clay beads or if I master the task, one made from ceramic clay.
Thanks so much for stopping by today.
Mary