
Hello. My name is Ema Kilroy. I am a glass bead maker, metalsmith and jewelry designer. I’ve been a follower of all the marvelous contributors and their inspiring posts here at Art Bead Scene for a few years now. I’m thrilled to be asked to be a guest contributor today. I’m going to share with you one of my favorite jewelry designing techniques; kumihimo braiding.
What is Kumihimo braiding?
A
Brief History: Kumihimo braiding is an ancient Japanese art which roughly
translates into English as braided cord. Often used as a belt over traditional Japanese
clothing. The braided cords are also used as ornamentation on festival carts,
tea containers, as ribbons for fans and as closures for clothing in place of
buttons. The braids were traditionally created using wooden braiding tools,
called marudai, although there are a variety of loom like structures also used
to create the braids. The history and development of Kumihimo braiding is
undocumented until around 645 – 784 A.D, as it was considered a small part of
textile tradition.
A wooden loom used for braiding.

A traditional Japanese sash tied on with a kumihimo belt

Here we are in 2014 and kumihimo braiding is now a hot trend in jewelry designs.
I’ve been adding seed beads, fibers, lampwork beads and sterling silver beads to kumihimo braids to create unique pieces of art jewelry. I’ll share with you a few of my own pieces for inspiration and then give you a tutuorial so you can create your own beaded kumihimo jewelry.
This is my very first kumihimo braided bracelet. I created this bracelet using rattail cord. Rattail is a good beginners choice to learn the rythym of kumihimo.

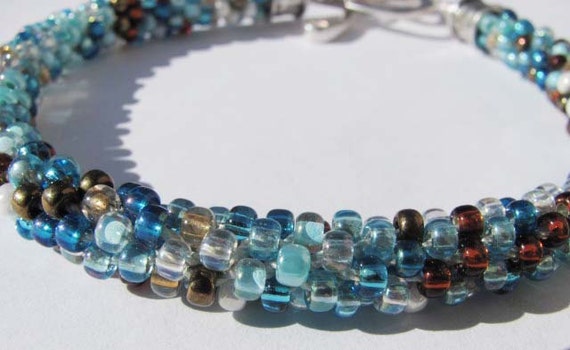
I quickly progressed to using seed beads in my braided designs. I just love the sparkle of seed beads!
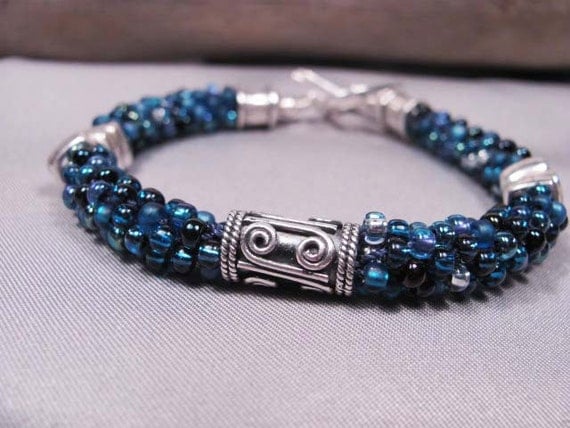
I added sterling silver beads into the weaving process. Adding beads directly into the kumihimo braid is a bit more complicated. I thought I’d share these pieces with you to show you where you can evenutally head with your braiding if you choose.
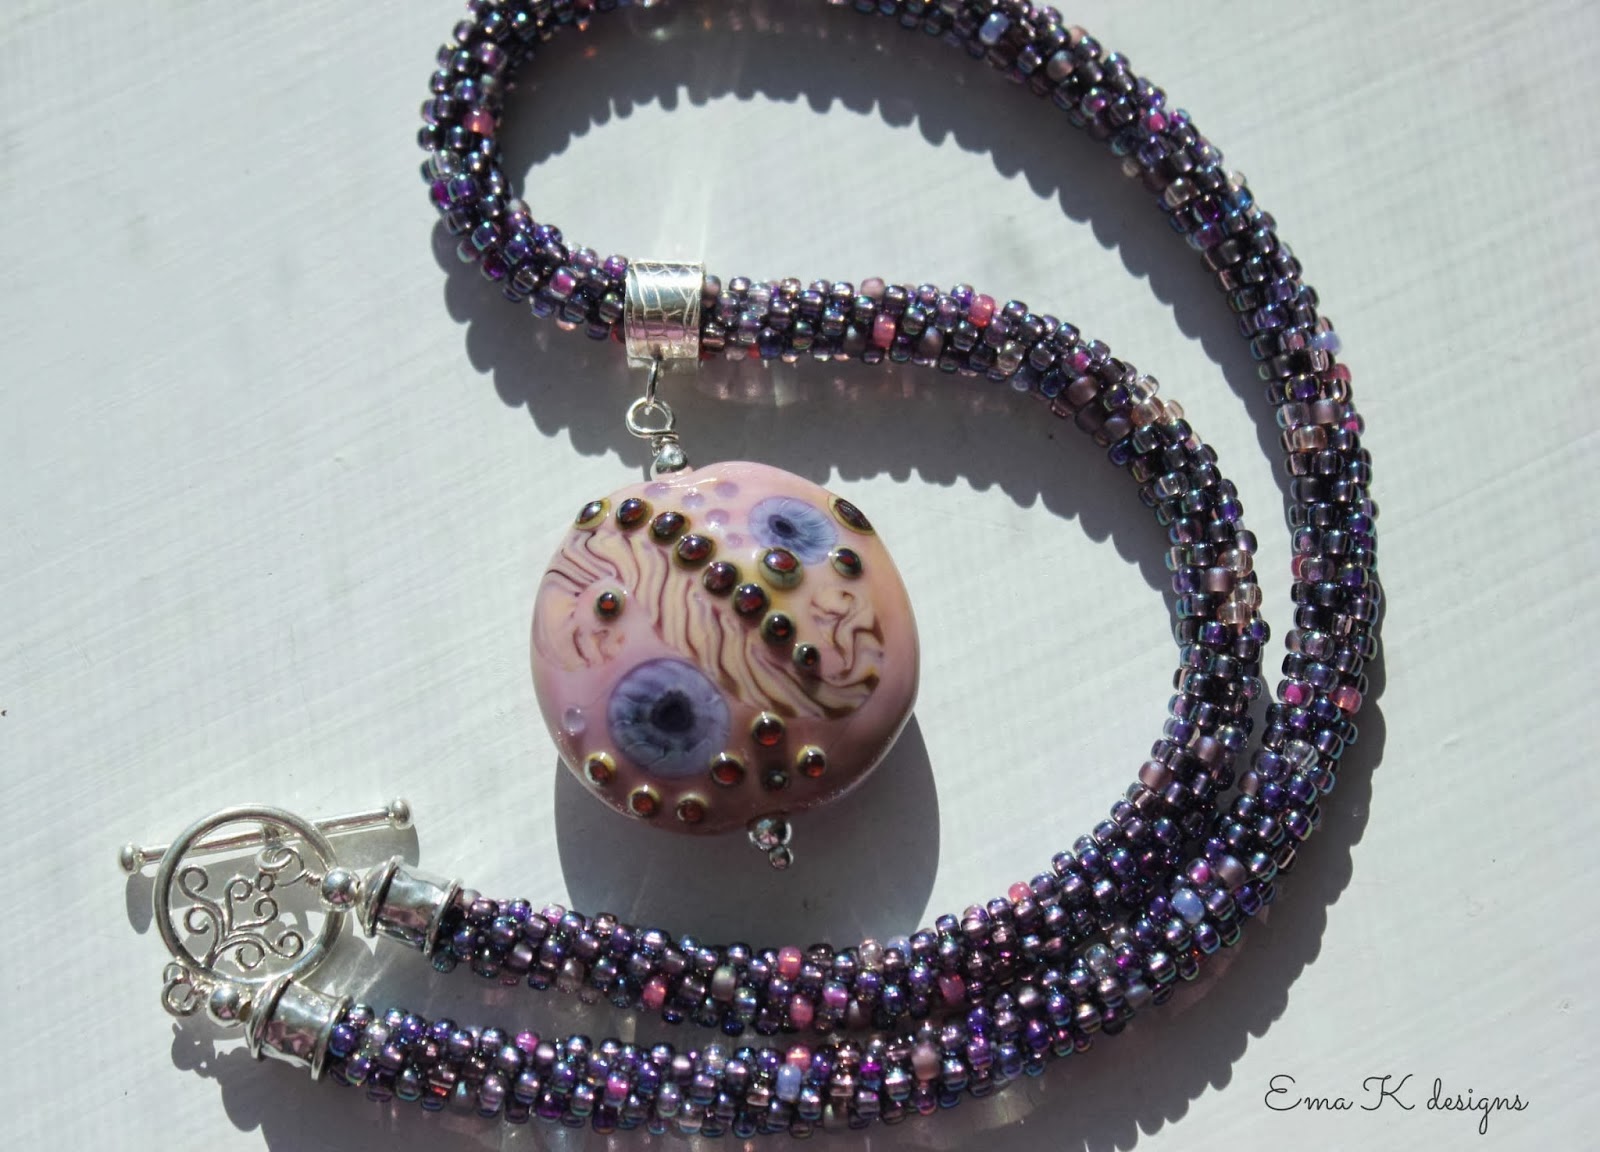
Lampwork beads were added to the kumihimo braid using various techniques. Again these focal beads have been woven directly onto the kumihimo braid.
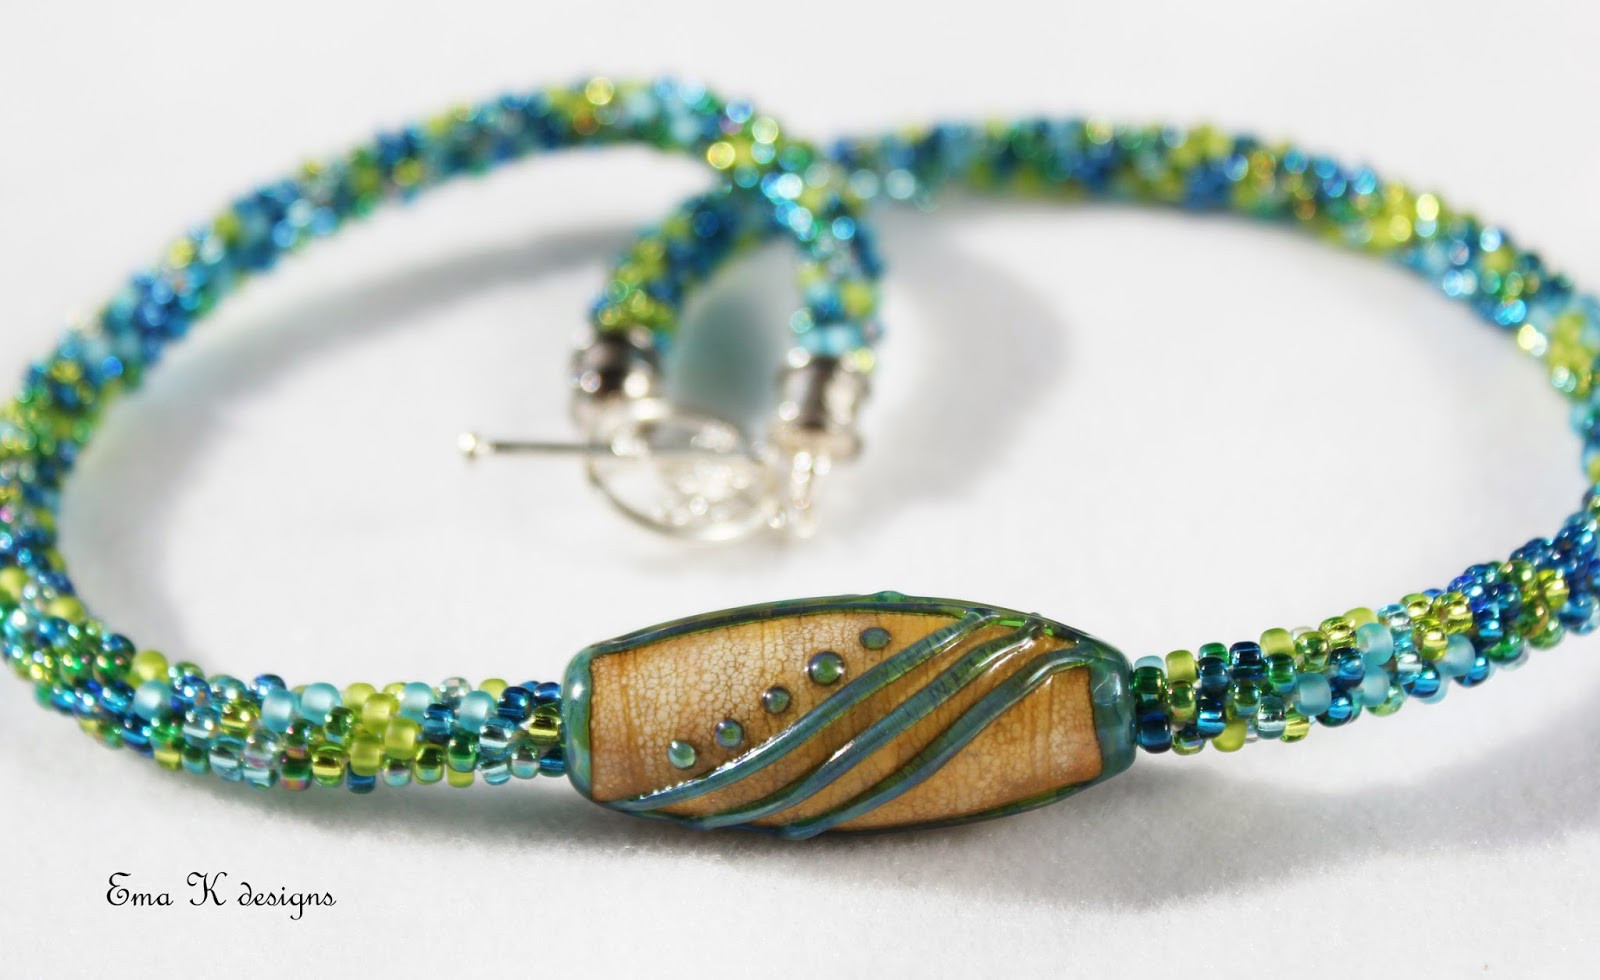
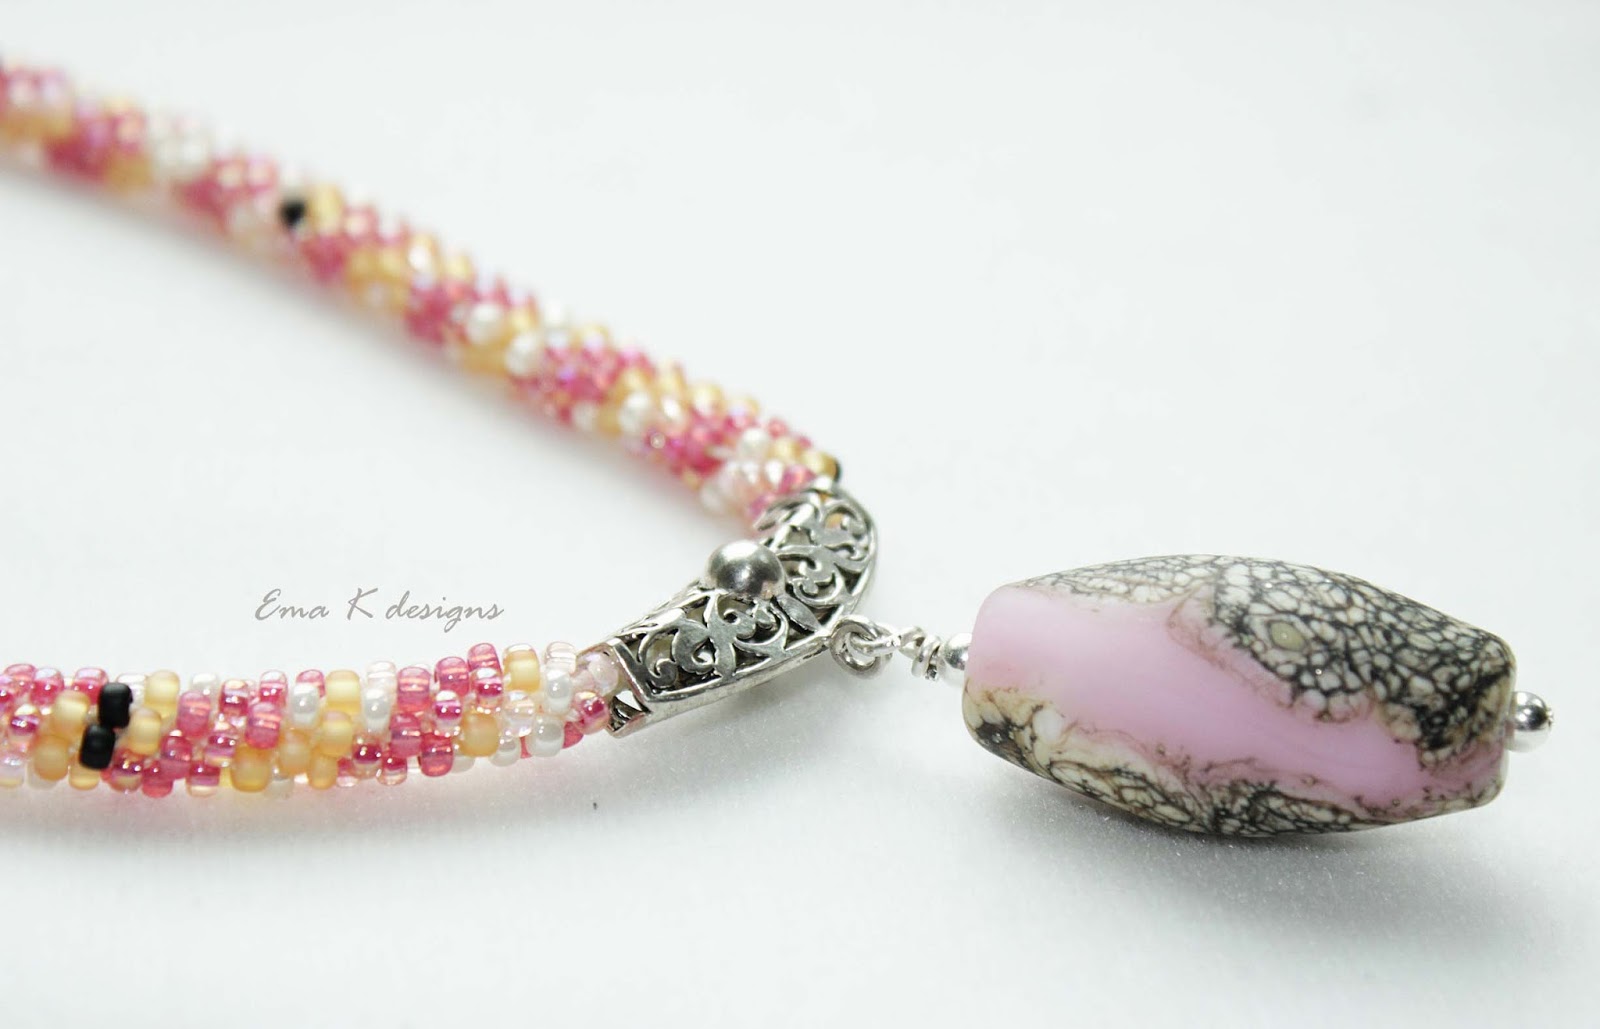
In this case a lampwork bead was added after the braid was complete. A much more straightforward method, using basic jewelry making skills, to add a bead to the kumihimo.

Here is a design combining fibers and beads.
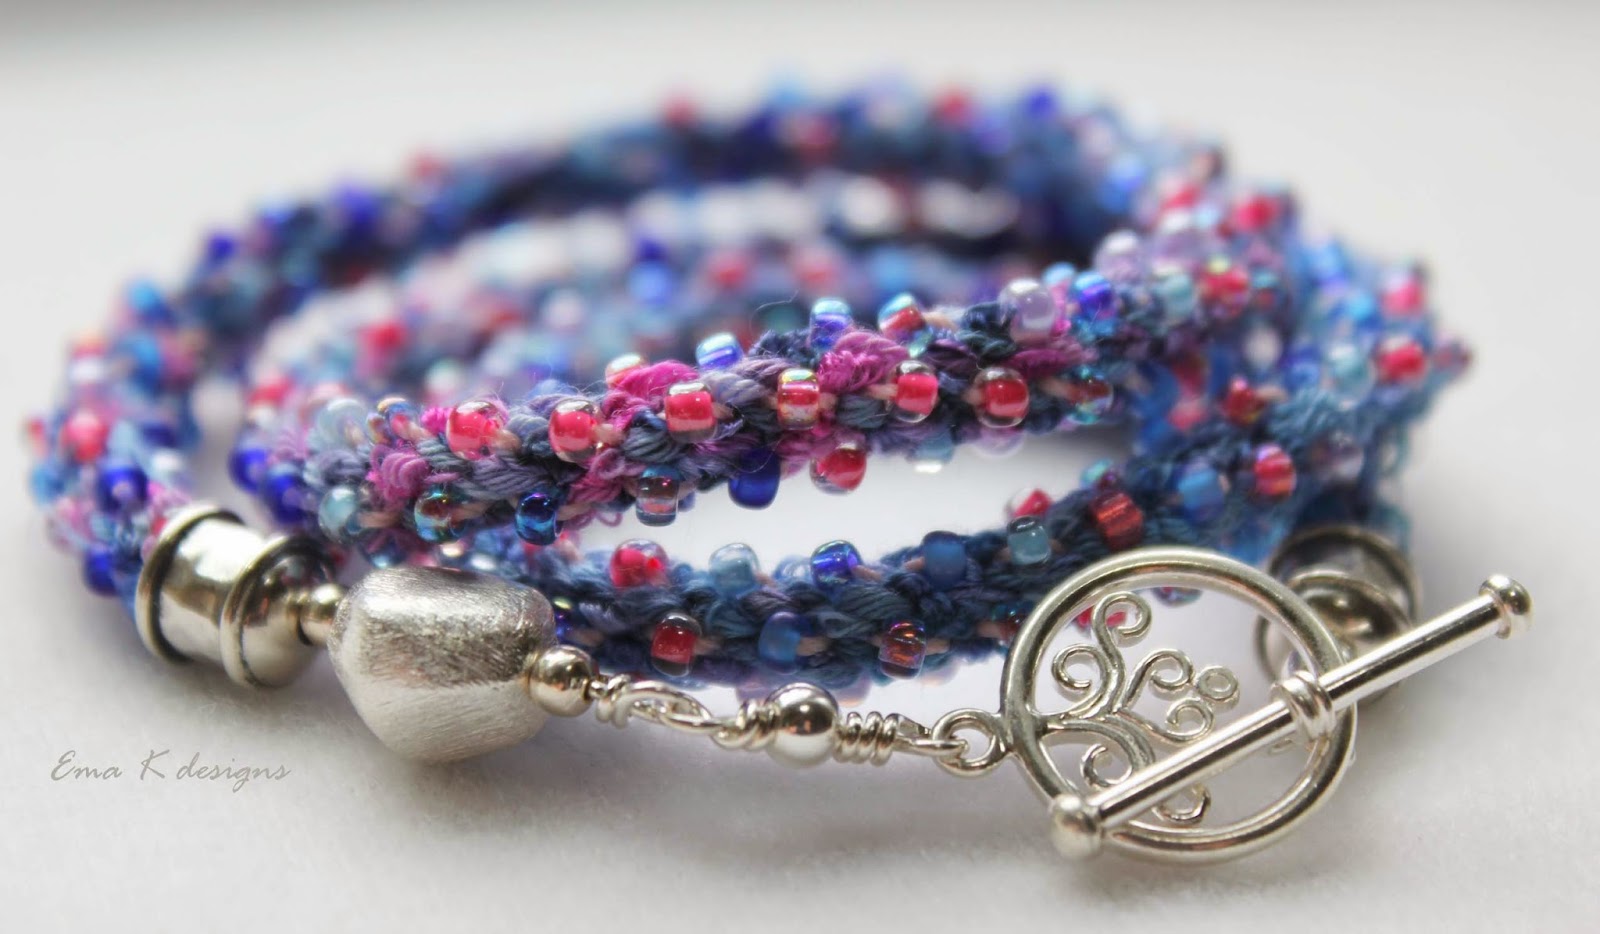
As you can see the possibilities are endless!
So let’s get to the tutorial. I’m going to show you how to create a beautiful kumihimo braid using seed beads. You may want to create a practice piece or two using inexpensive rattail before you begin using seed beads. The basics of the braiding techniques will be the same.
Your first task is to decide on the focal and the seed beads you’ll be using in your design. So many wonderful options! Forgive the not so great picture. I tend to spread out on my floor when I’m pulling out various materials to consider my options.

Materials:
A kumihimo disc and 8 spools
30 – 35 grams size 8/0 Miyuki Delica seed beads
C-Lon thread in color to match your seed beads
2 sterling silver end caps (8mm outer diameter – 6 mm inner diameter)
2 – 4 or 5 mm sterling silver rounds
1 sterling silver toggle clasp
2 – 4-6 inch lengths 22 ga sterling silver wire
Jewelers glue – I prefer G-S Hypo Cement
A measuring tape
A weighted clip
scissors
basic jewelry making tools (pliers, cutters)
Focal:
1 bail – 10 mm inner diameter
lampwork focal
2 – 5 mm sterling silver rounds
1 balled headpin
Kumihimo Braiding Supplies


Supplies for the lampwork focal piece

Decide on the length of your finished piece. In this case we will be making an 18 inch necklace. I will subtract 1.75 inches from the finished length to accomodate for the end caps and clasp to determine the actual length of woven beads we will need. 18 – 1.75 = 16.25 inches woven seed beads.
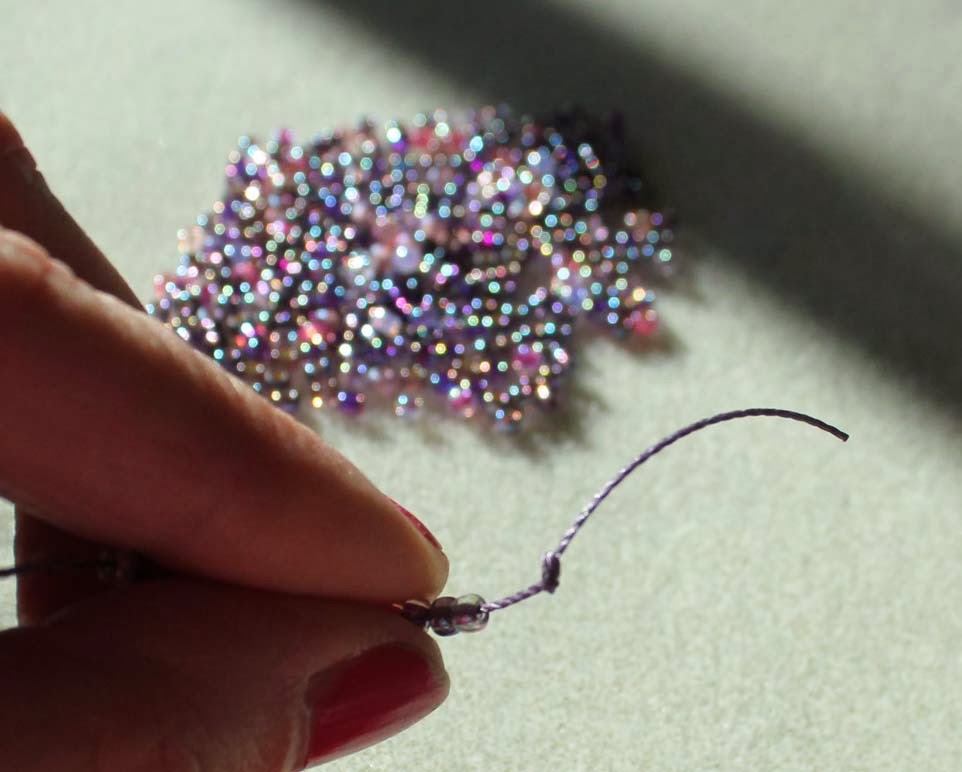
The length of your cut thread will be 3x the finished length (this is a basic kumihimo guideline but I always find I have a substainal amount of extra thread left on my spool – just an fyi). In this case our finished length of an 18 inch necklace, 18 x 3 = 54 inches + ‘just in case’ inches = 57 inches. Cut (8) pieces of C-Lon thread, 57 inches each. Gather one end of all eight cords and tie together into one big knot.
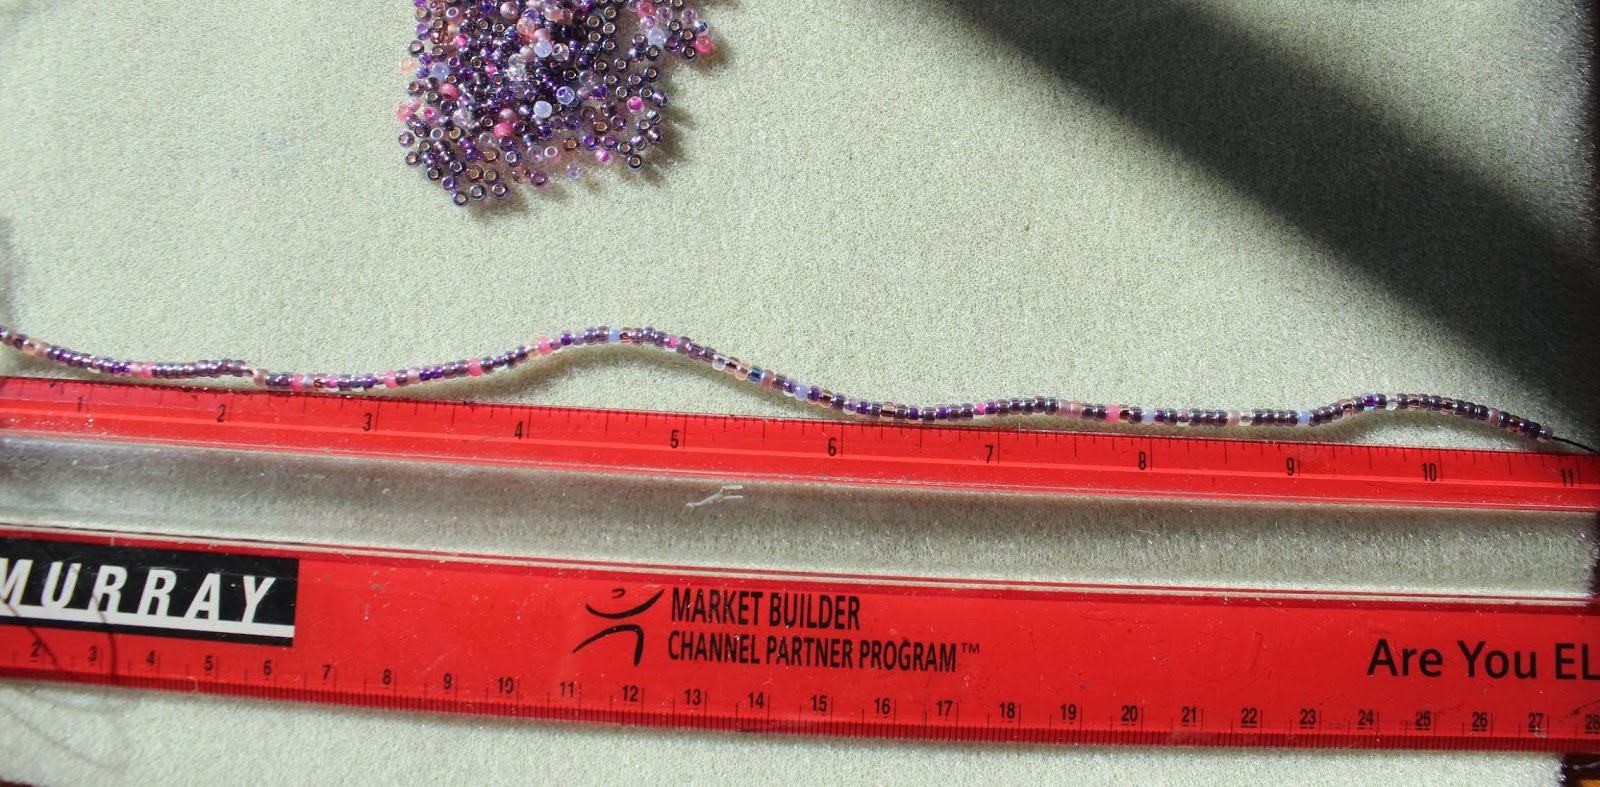
On the opposite ends of your threads string 11 – 12 inches of seed beads onto each of the 8 cords. Tie a knot on the end of each thread after you have added the seed beads and immediately roll onto a spool. Spooling before you begin to add beads to the next thread keeps your work nice and neat so your threads don’t tangle up on each other. A needle is not necessary as the C-Lon thread is sturdy enough to pick up the seed beads. This is the tedious, time consuming bit. Find a sunny spot, put on some good tunes and get each thread loaded with beads and wound onto their spools.

Tie a knot on the end of each thread. You definitely don’t want those seed beads sliding off unexpectedly.
Wind each cord onto a spool.


Snap the spool closed.

Finish adding seed beads to the remaining 7 threads.
You’re work will look something like this. You’re now ready to to add the work to your disc.

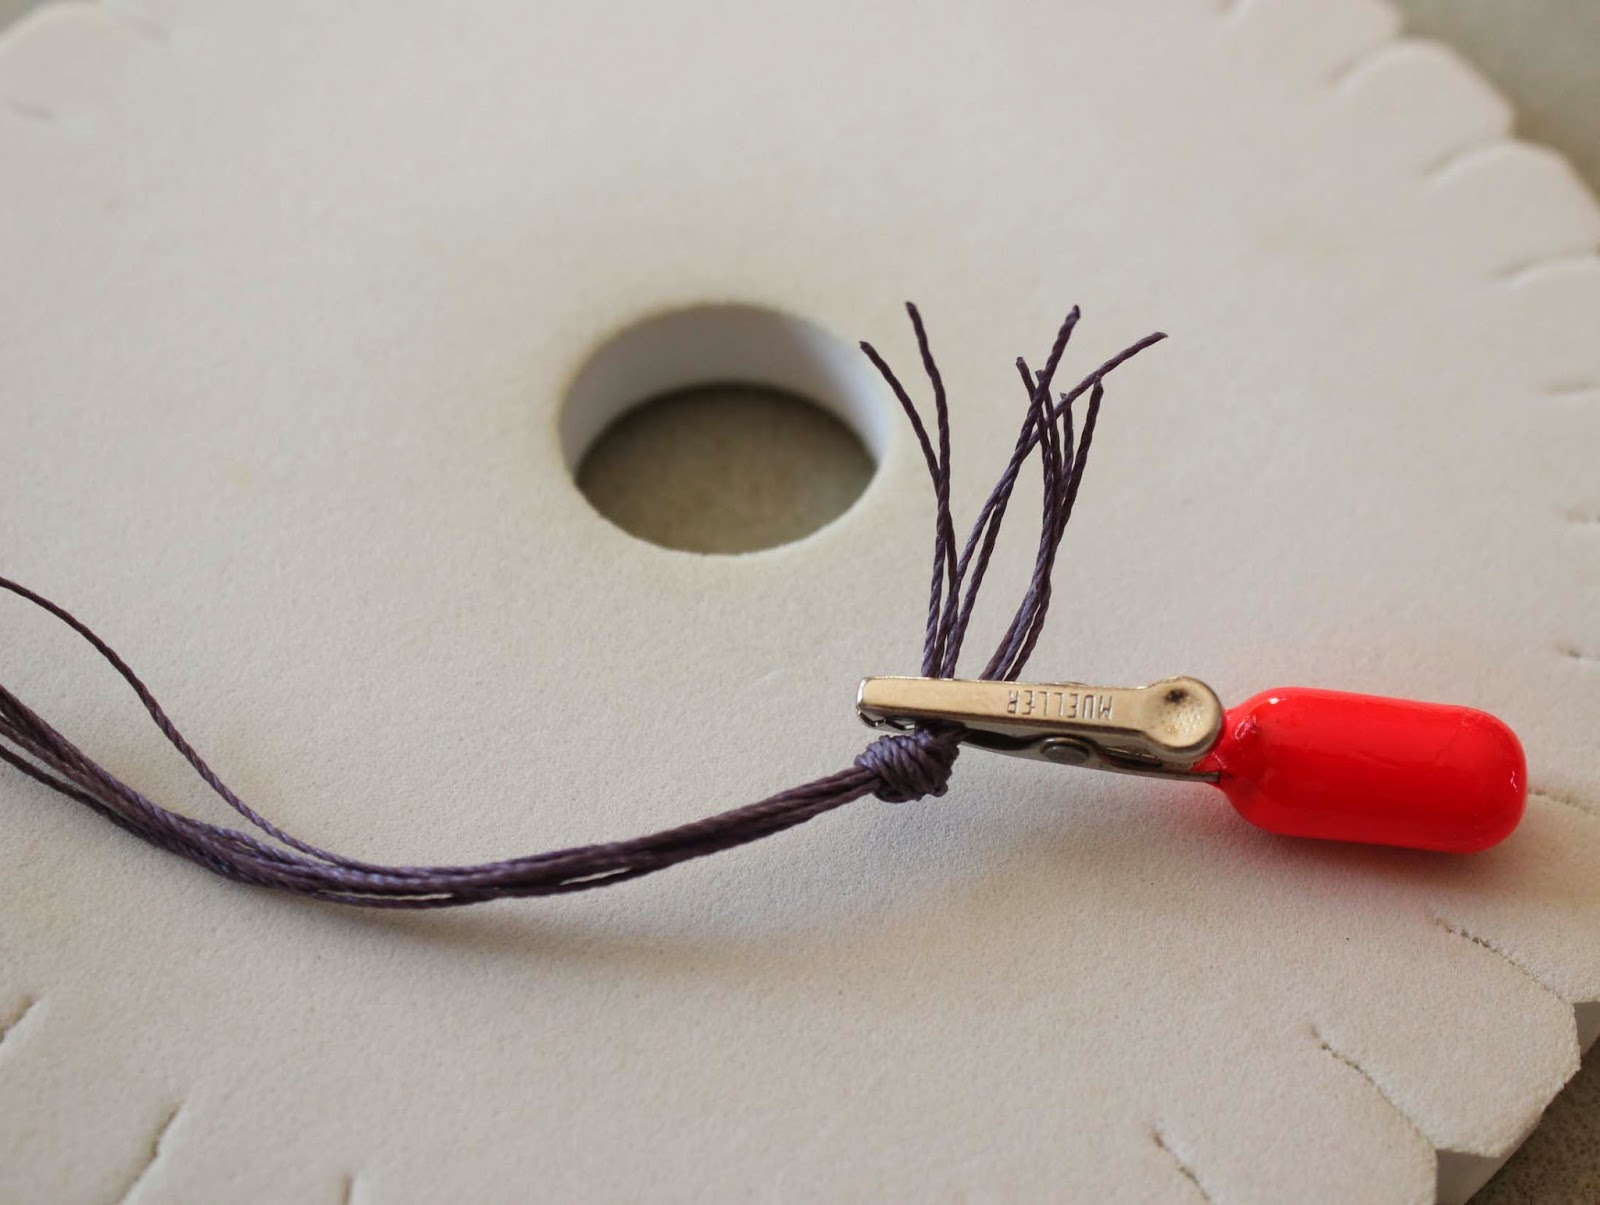
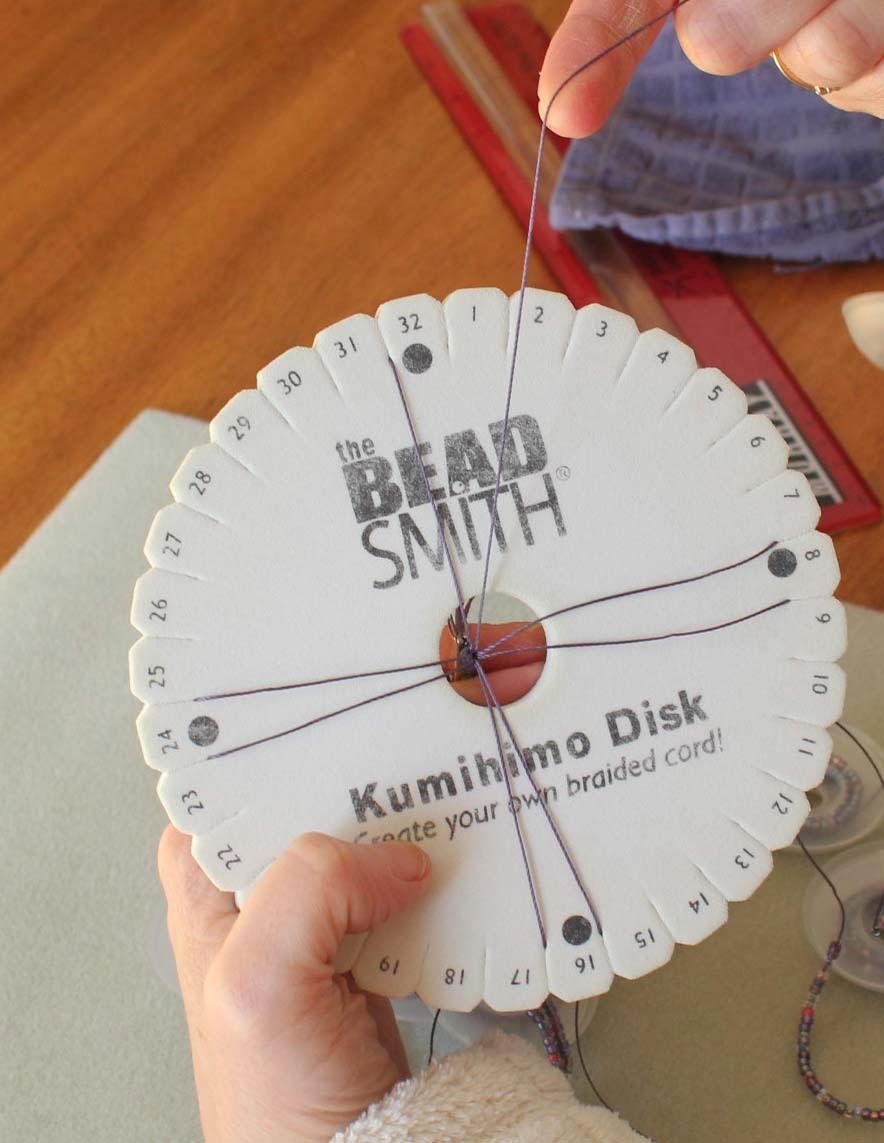
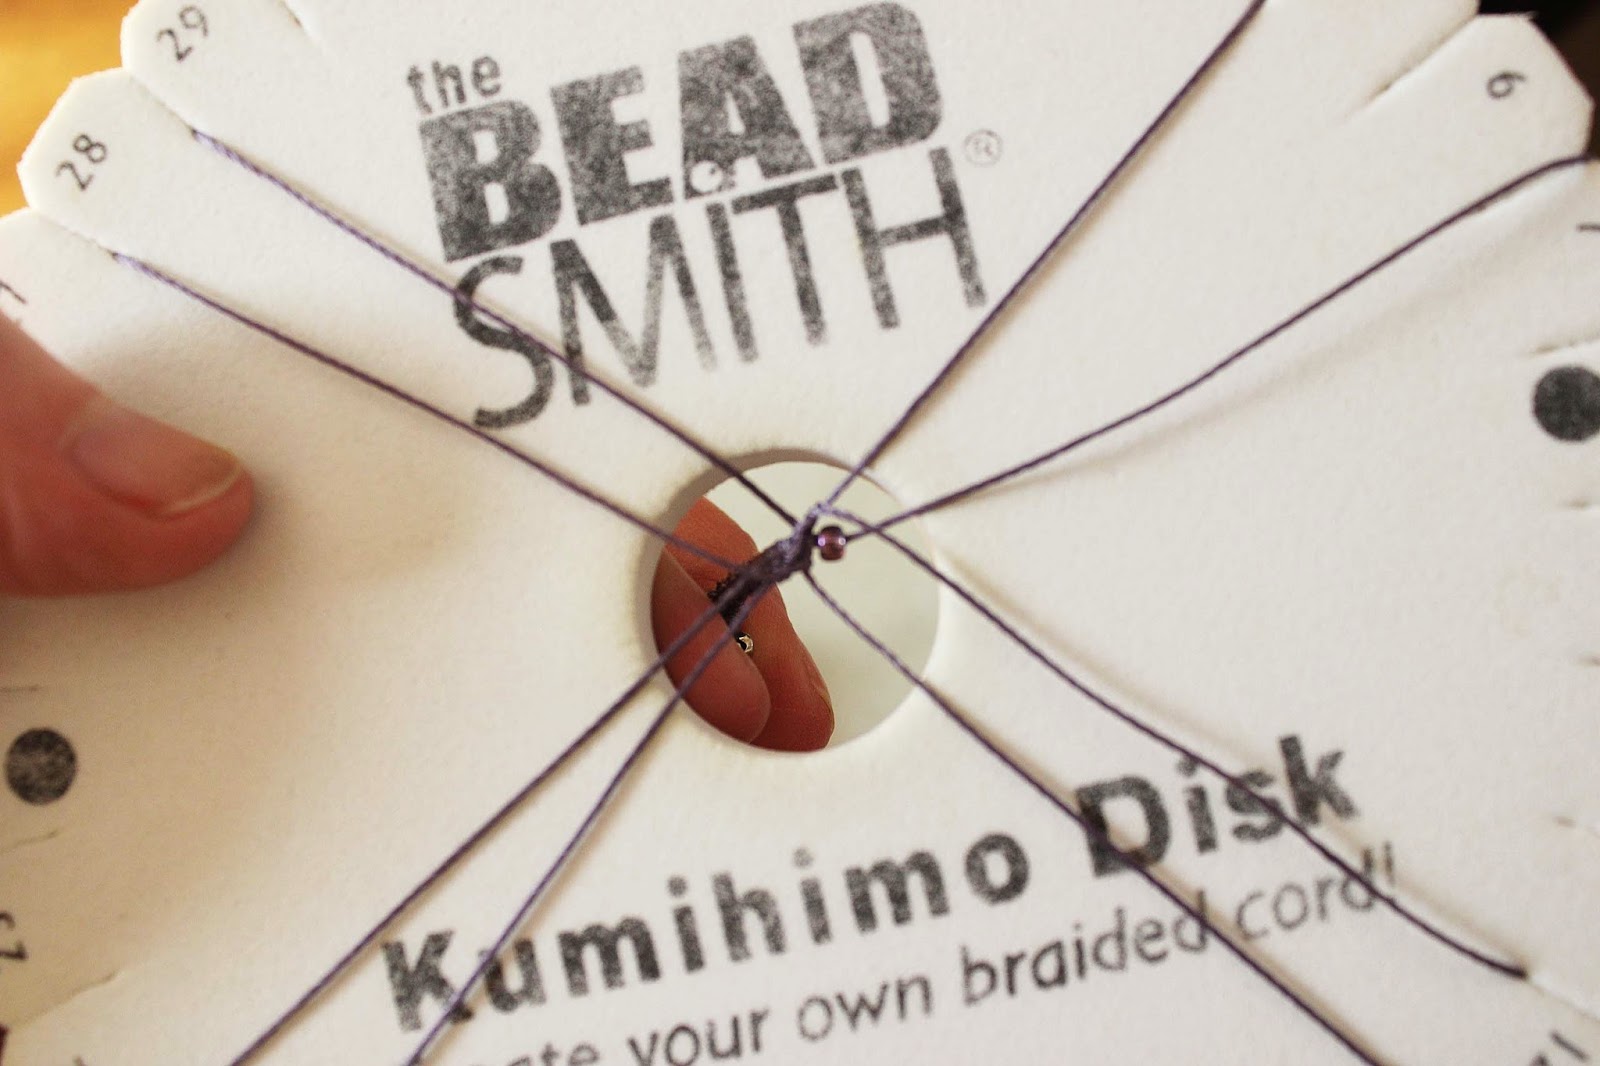
Insert the knotted end into the center of the disc. The weight is optional but I find it extremely helpful in the early stage of the braiding process. Not only does it give you something to hold onto but it also adds weight to help your work pull down through the center.
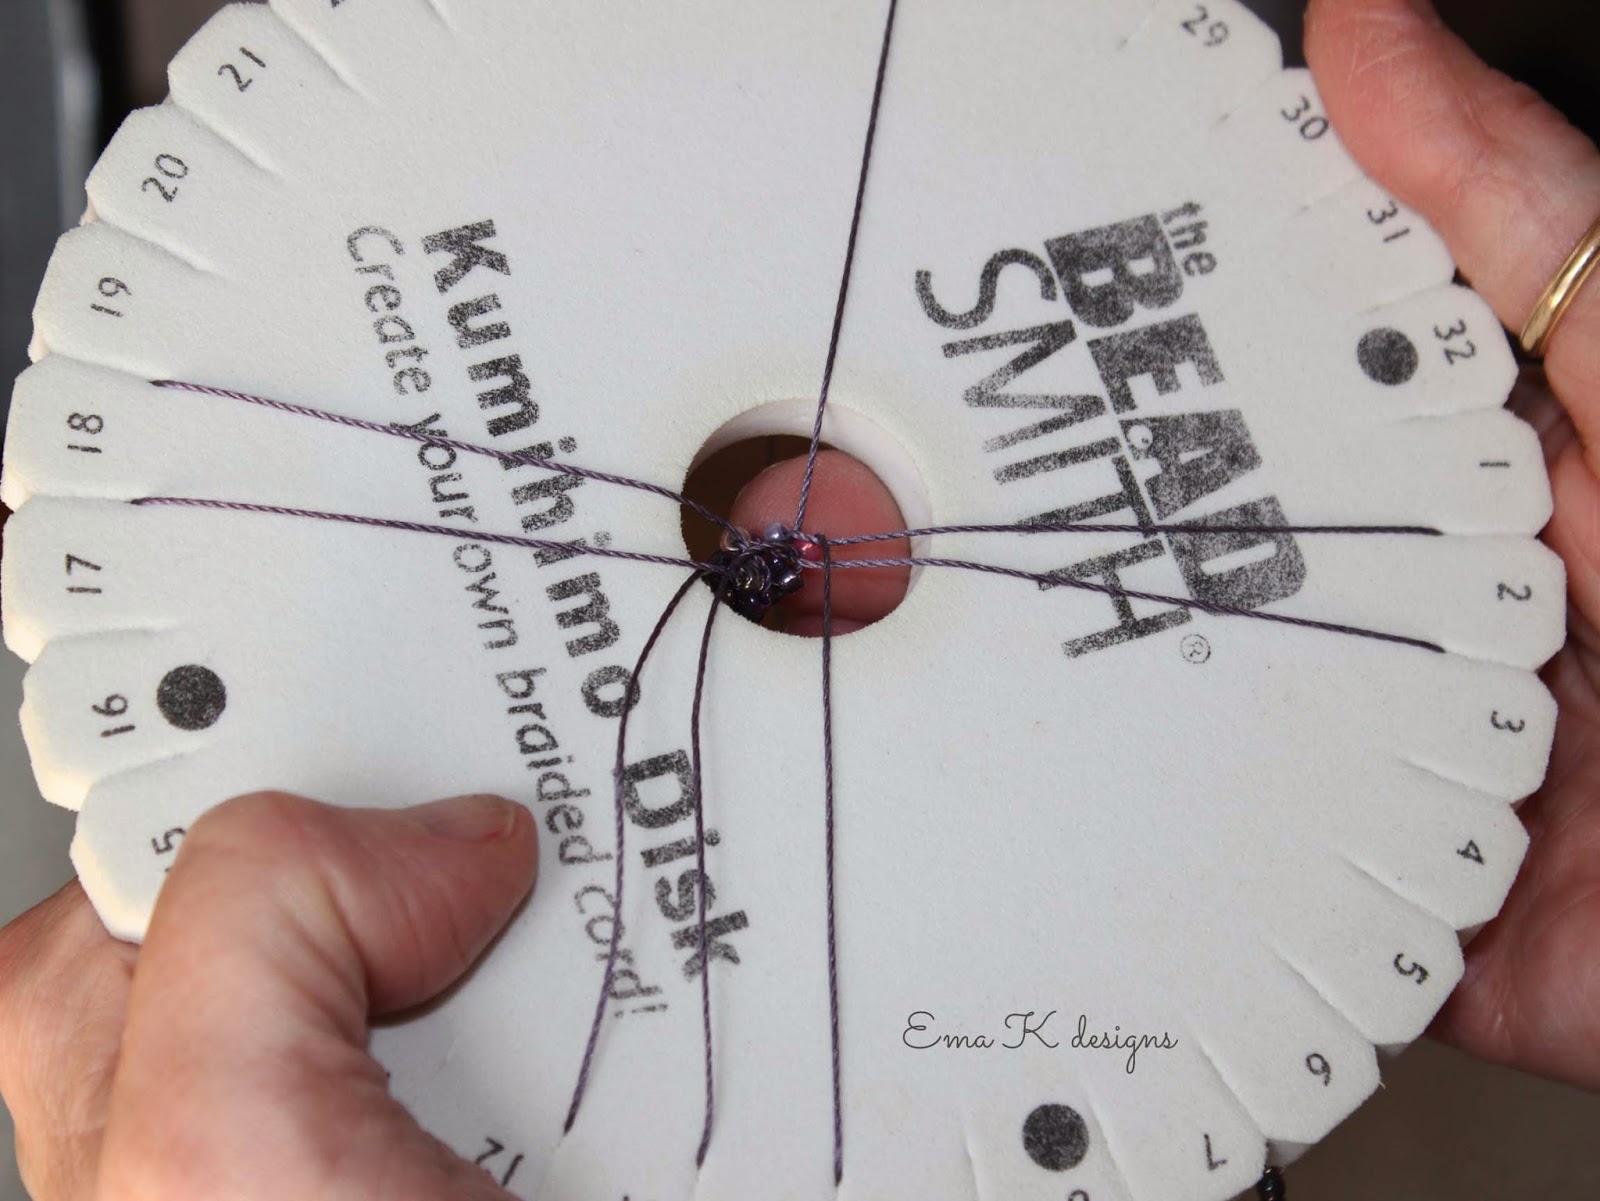
Place two threads, into adjacent slots of the disc in each of the north, south, west and east positions of the disc. Set up as you see in the photo below.

You are now ready to begin braiding! Begin by braiding the threads only. We’re not adding beads at this point. Pick up the thread in the top right position (slot #1), bring it down to the south position (slip into slot# 15). Pick up the thread furthest to the left in the south position (slot #17). Bring up to the north and slip into the slot furthest to the left of existing thread (slot# 31). Turn the disc counterclockwise 1/4 turn and repeat…down to the right, up to the left, 1/4 turn.


Your mantra as you braid:
Down to the right
Up to the left
1/4 turn counterclockwise

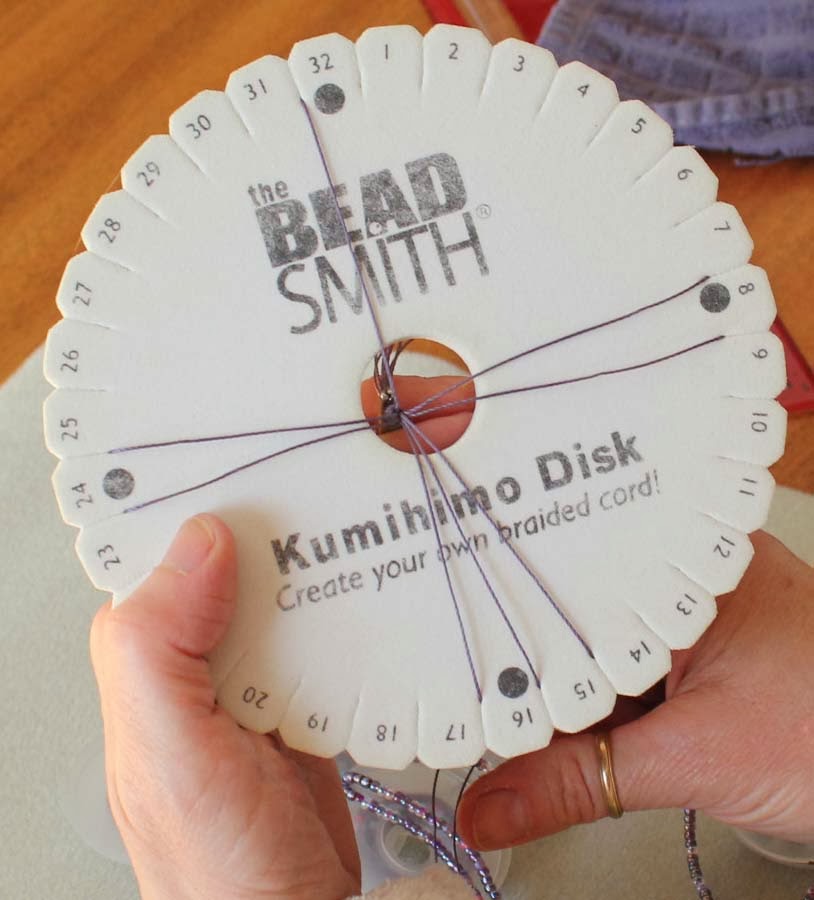
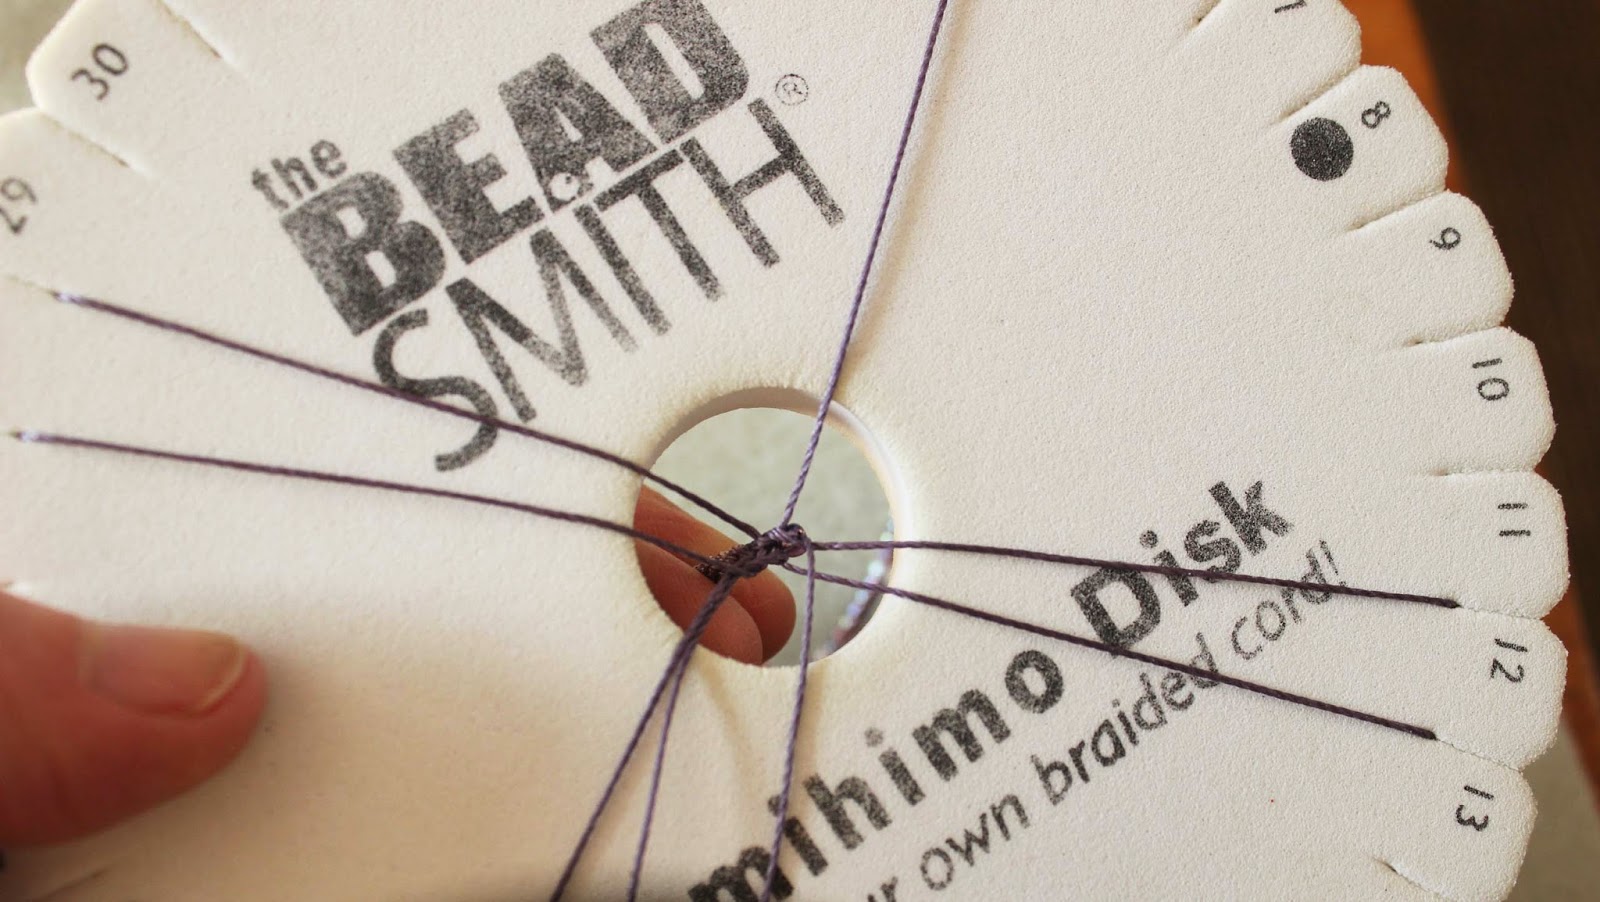
Braid the thread only for a couple of rows. I got a little over zealous in the photo below and braided too much thread. I had to go back and adjust this. We’ll talk more about this later on.

As you’re braiding you want to maintain an even tension on the threads. Every once in a while, one, two or three times around the disc, you’ll want to tighten the threads by holding threads opposite each other and pull them snuggly. As you see in the photo below. NOTE: When you do this make sure you take note of your thread/disc positioning. You will want to know what thread you will be picking up next. You may want to note the number you would be using next.

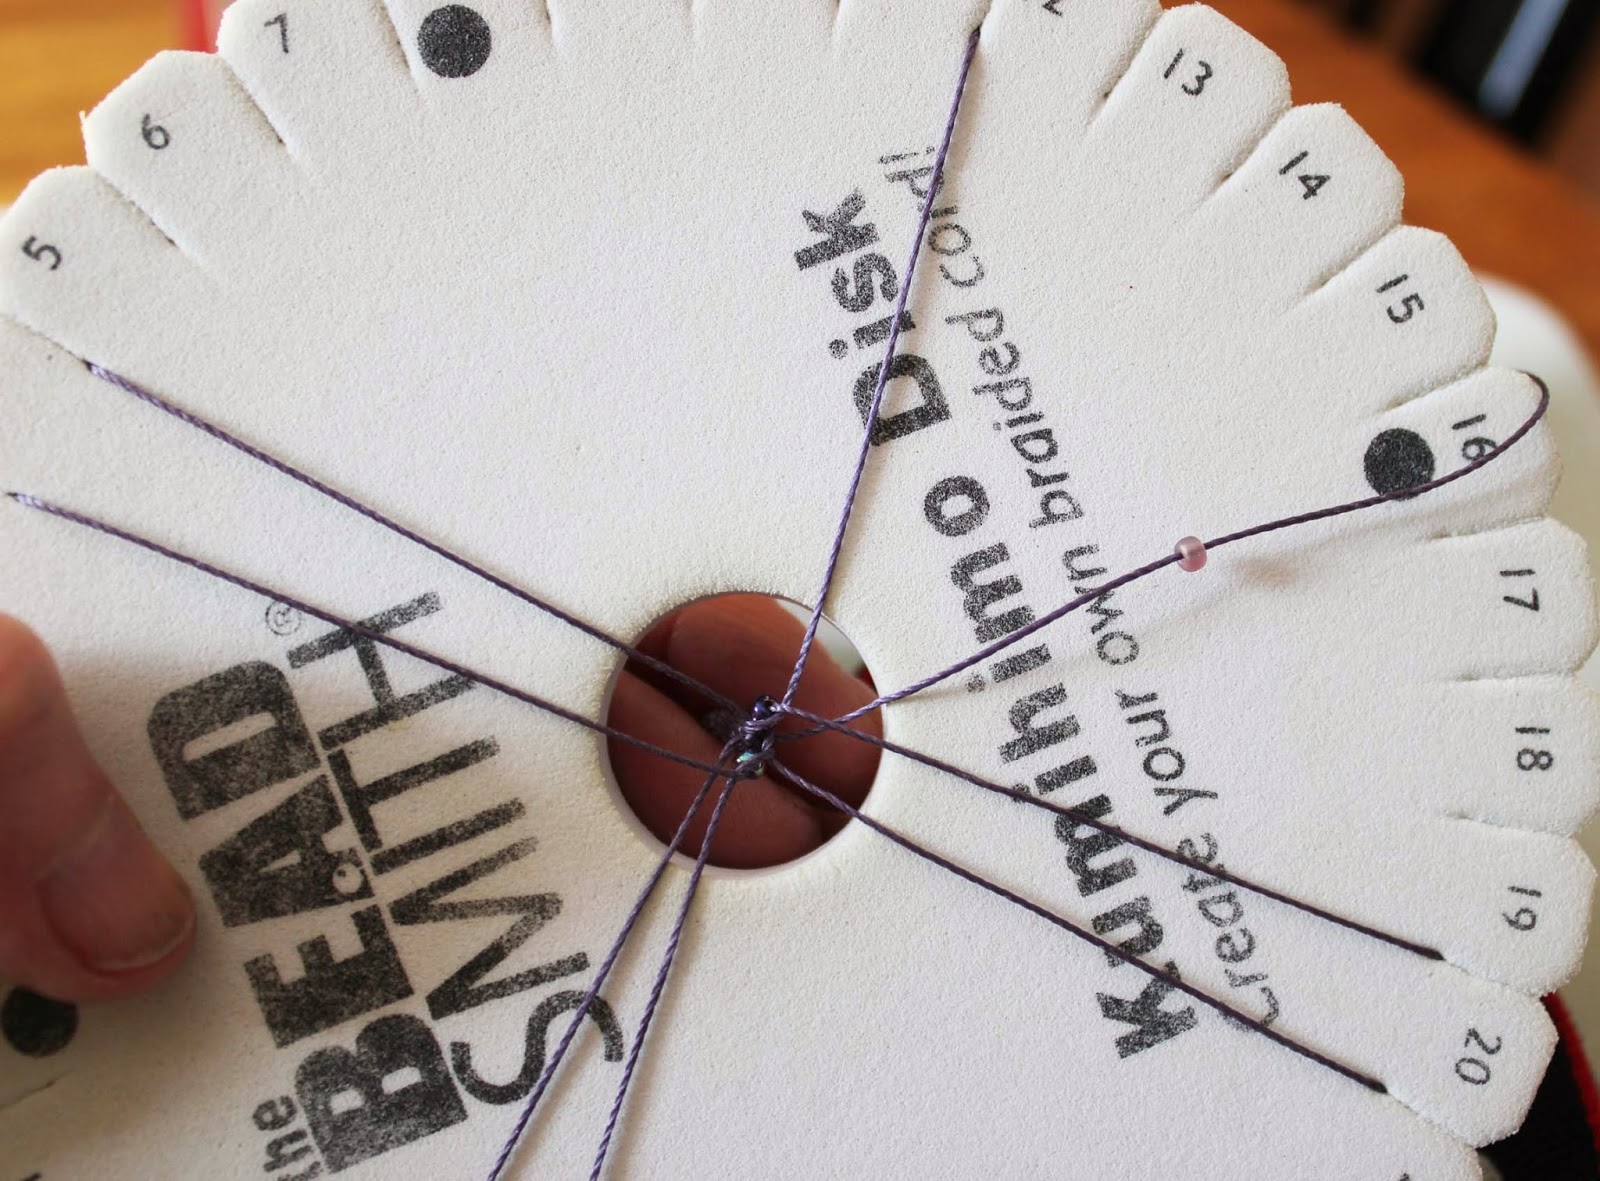
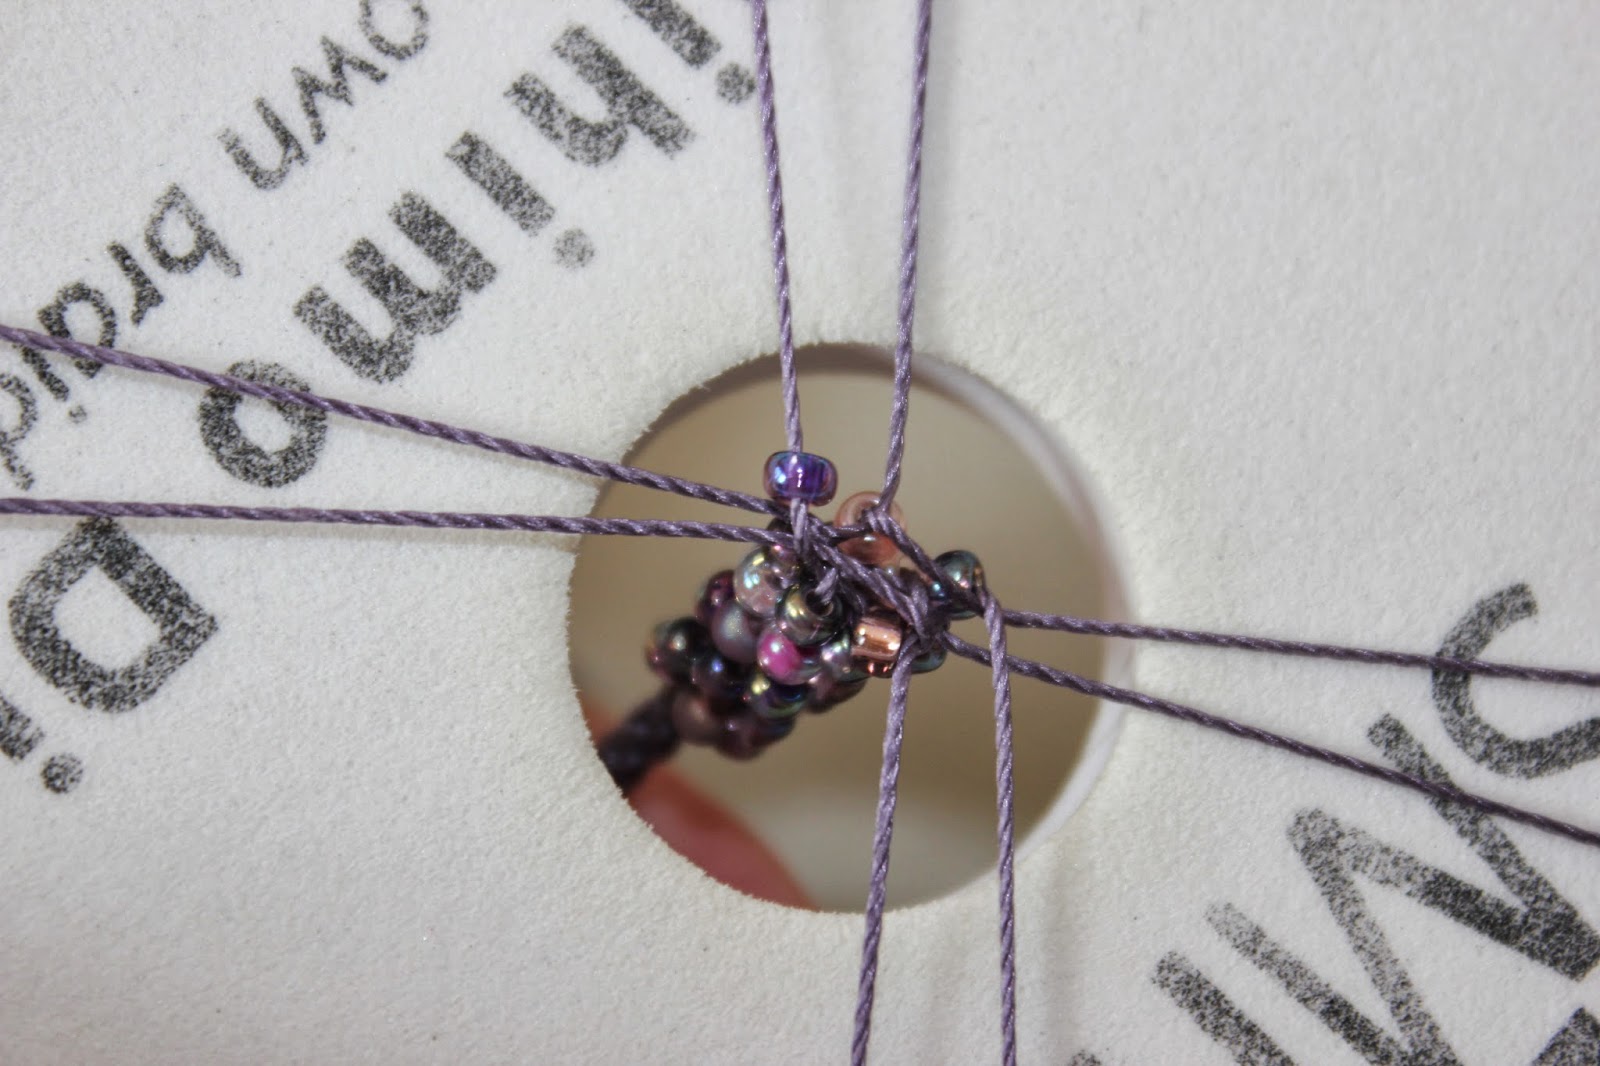
After two or three rows of braiding thread we can begin to add the seed beads. Pick up your most northern, right thread. Slide a bead down the thread.
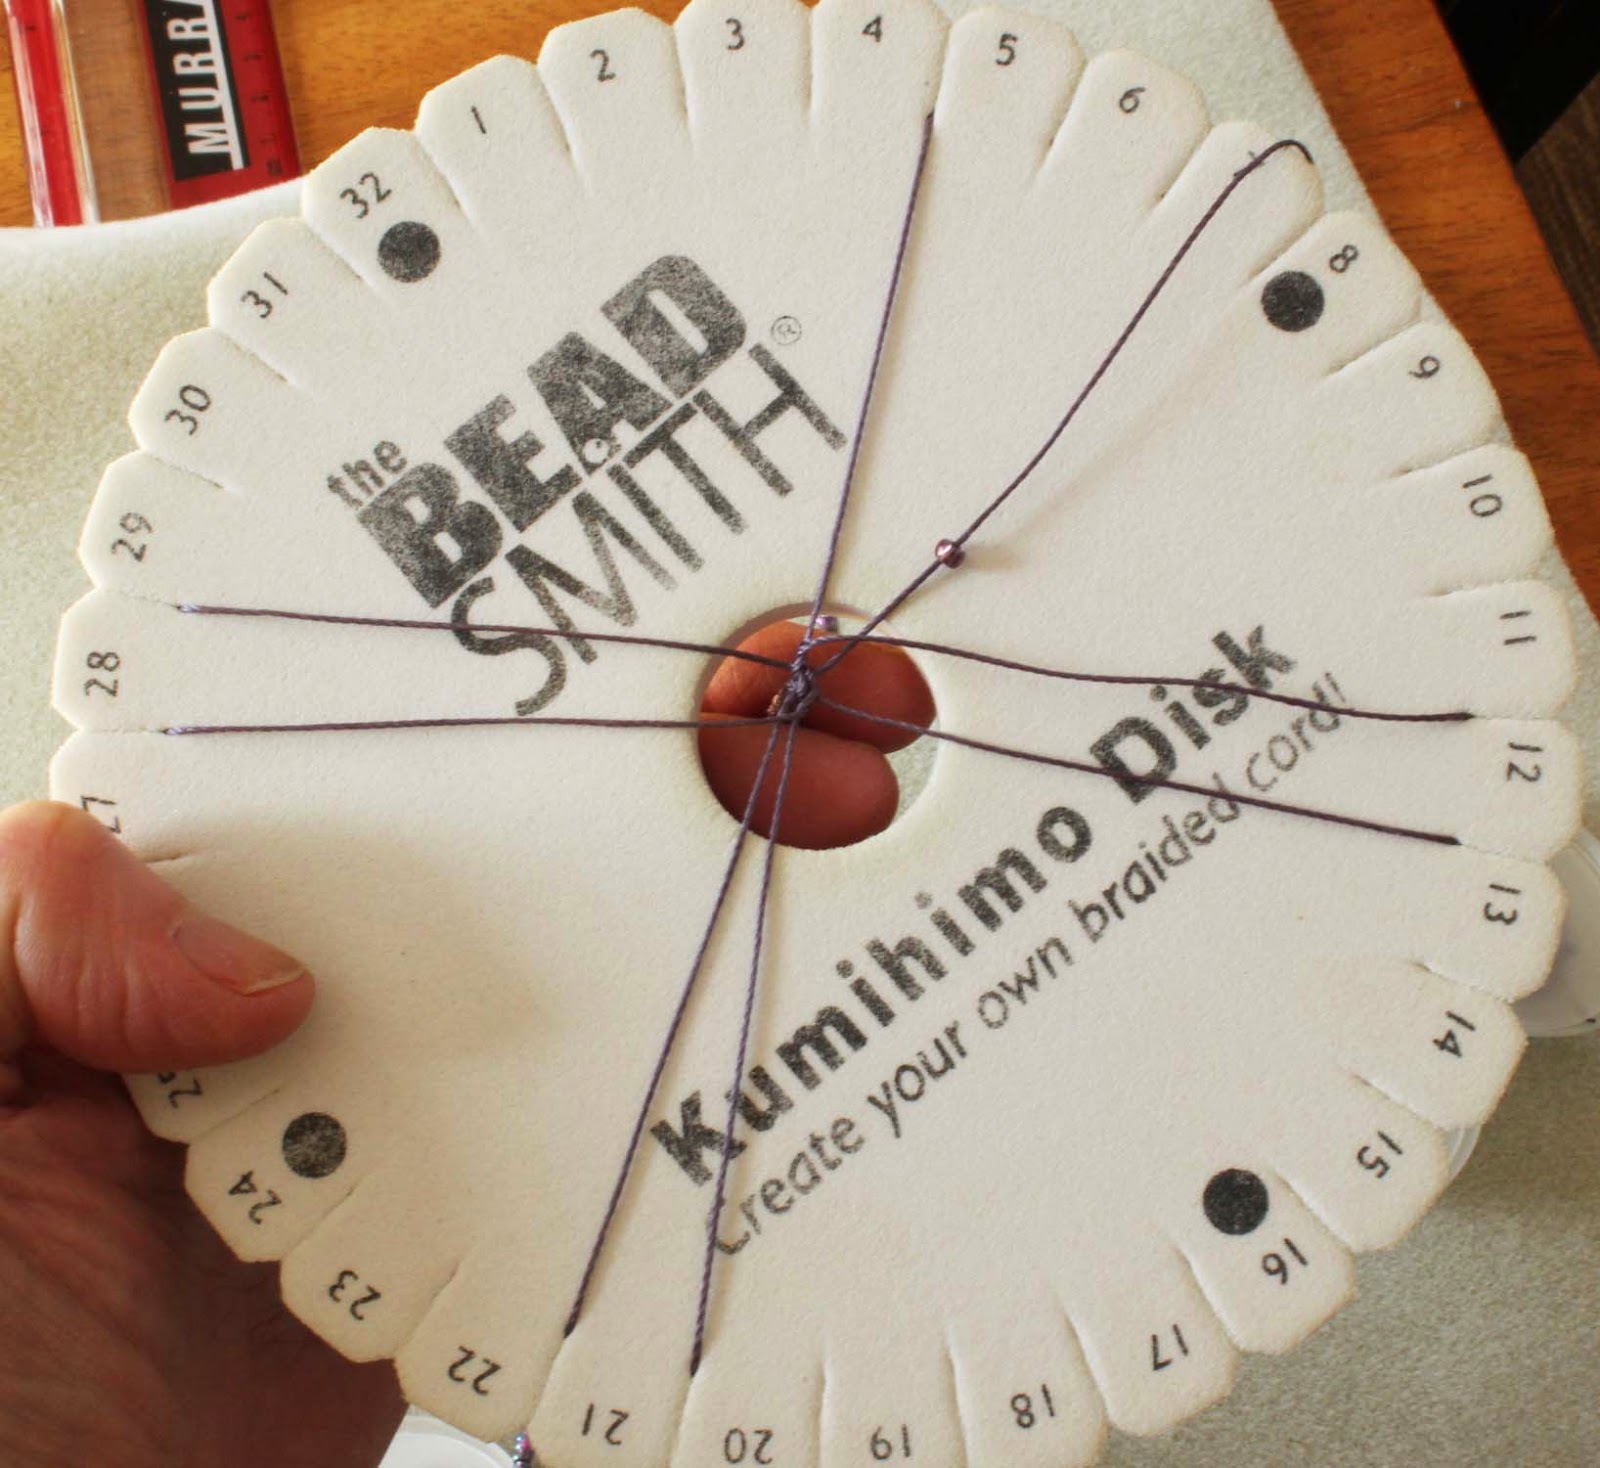
Make sure the bead slides all the way down so it is resting under the thread in the east position. This east parallel thread will be holding the bead to the outside of the braid.
Bring the north thread down to the south , slip it into the next available slot in the south, to the right of the existing threads.
(down to the right)
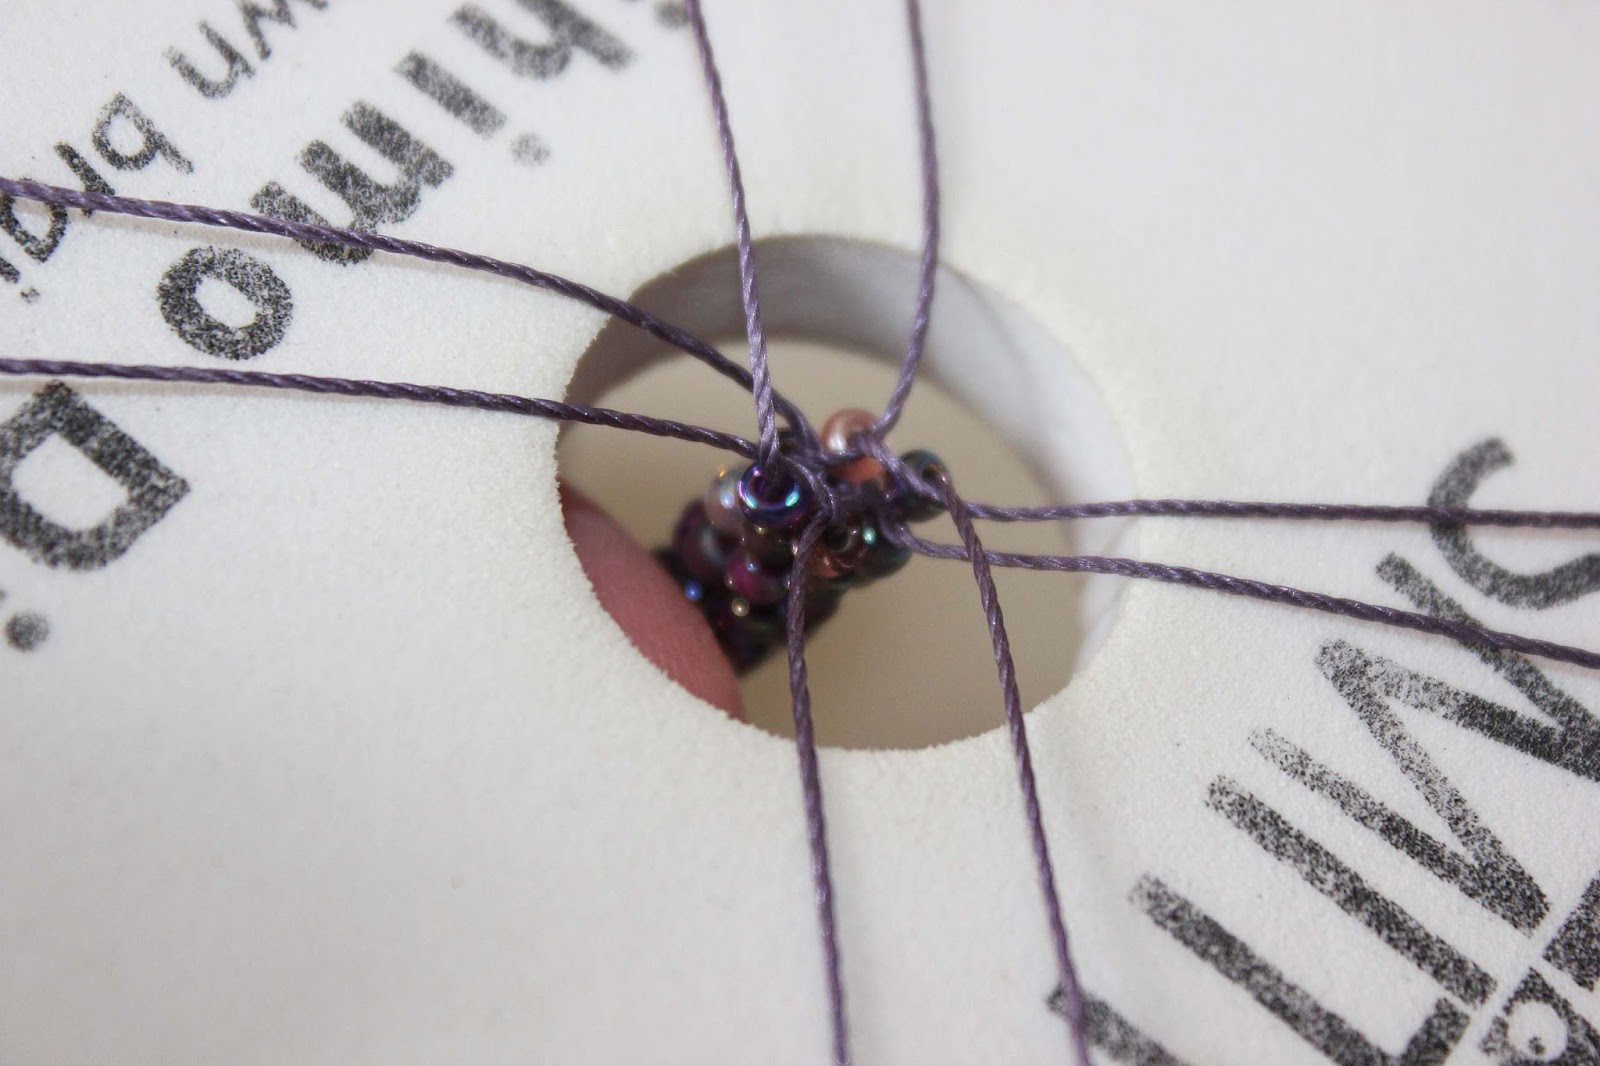
Contiune…Up to the left…Pick up the thread furthest to the left of the south position. Slide a bead down the thread and move the thread up to the left into the slot to the left of existing north thread.
Again, Make sure the bead is under the parallel thread.

This what your threads and disc will look like after completing down to the right, up to the left.

Rotate 1/4 turn counterclockwise.
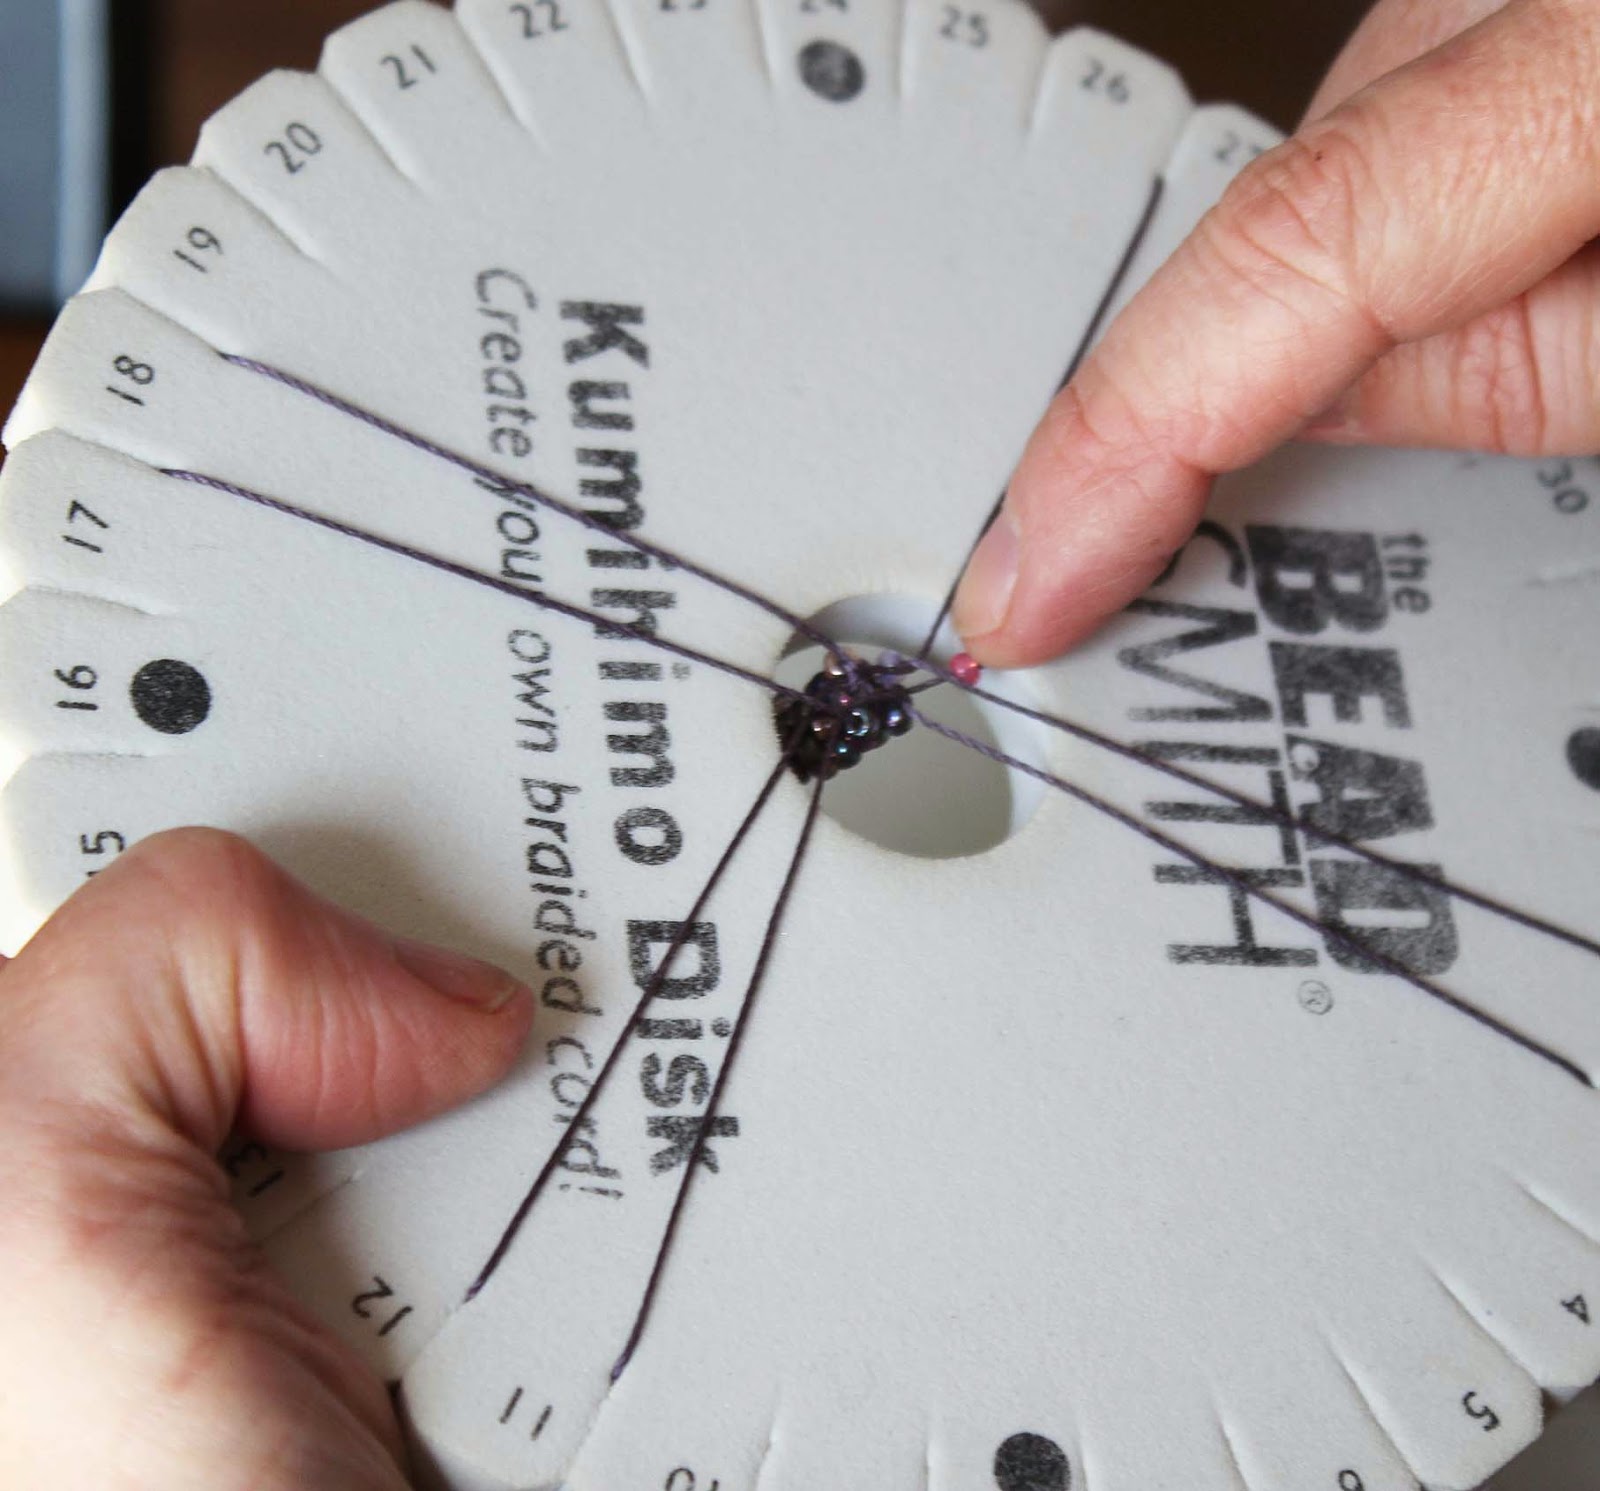
Slide a bead down, pull thread down to the right, insert into slot.


Your next thread to pick up will be the thread furthest to the left, south position.
Slide a bead down, pull thread up to the left.
1/4 turn counterclockwise.
Repeat.
Down to the right
Up to the left
1/4 turn disc, counterclockwise
Keep an even tension on your threads as you braid.
Before you know it you’ll be getting a good idea of what your braid will look like when it’s woven together.
A bead may not want to slip under the east/west parallel threads. As you can see in the photo below. I moved the thread up to the left and the bead popped up.
You want to make sure the bead is anchored under the parallel thread before continuing.
As you build the braid you may find beads are not slipping under the parellel threads.

Give it a little nudge with your finger.

Bring your thread down to the right.

Before you know it you’ll have a nice beaded braid.

Here is an important tip:
If you are putting your disc down for any reason (phone rings, tea time, taking a break) ALWAYS finish by leaving off with a thread down to the right. You will have three threads in the south and only one in the north.
When you return to your work you will always know where you left off and exactly what your next move is When I look at this disc I know my next move is going to be…Up to the left.
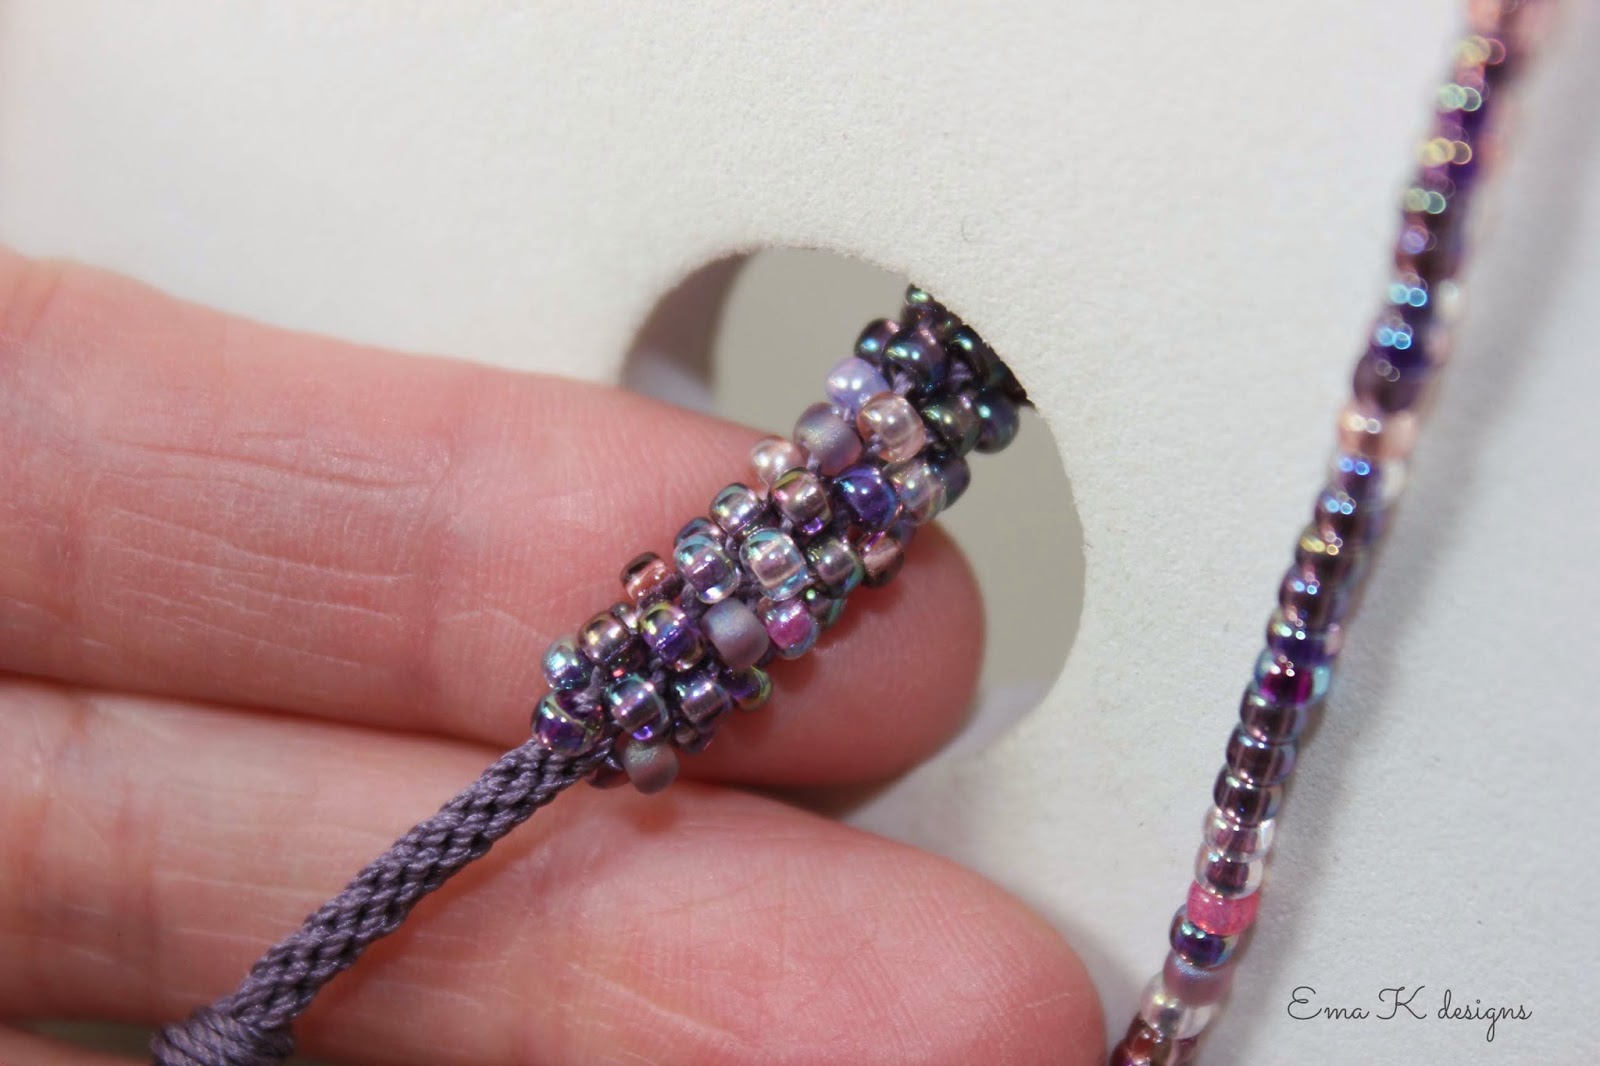
When the braid reaches your desired finished length, stop adding beads and braid three or four rows of thread only. We will finish exactly the way we began by weaving the thread only.
Remove the threads from the slots in the disc. Pull the braid up through the center hole of the disc. We are now done with the disc. Loop a knot on the end. Keeping the knot as close as possible to the beaded braid.
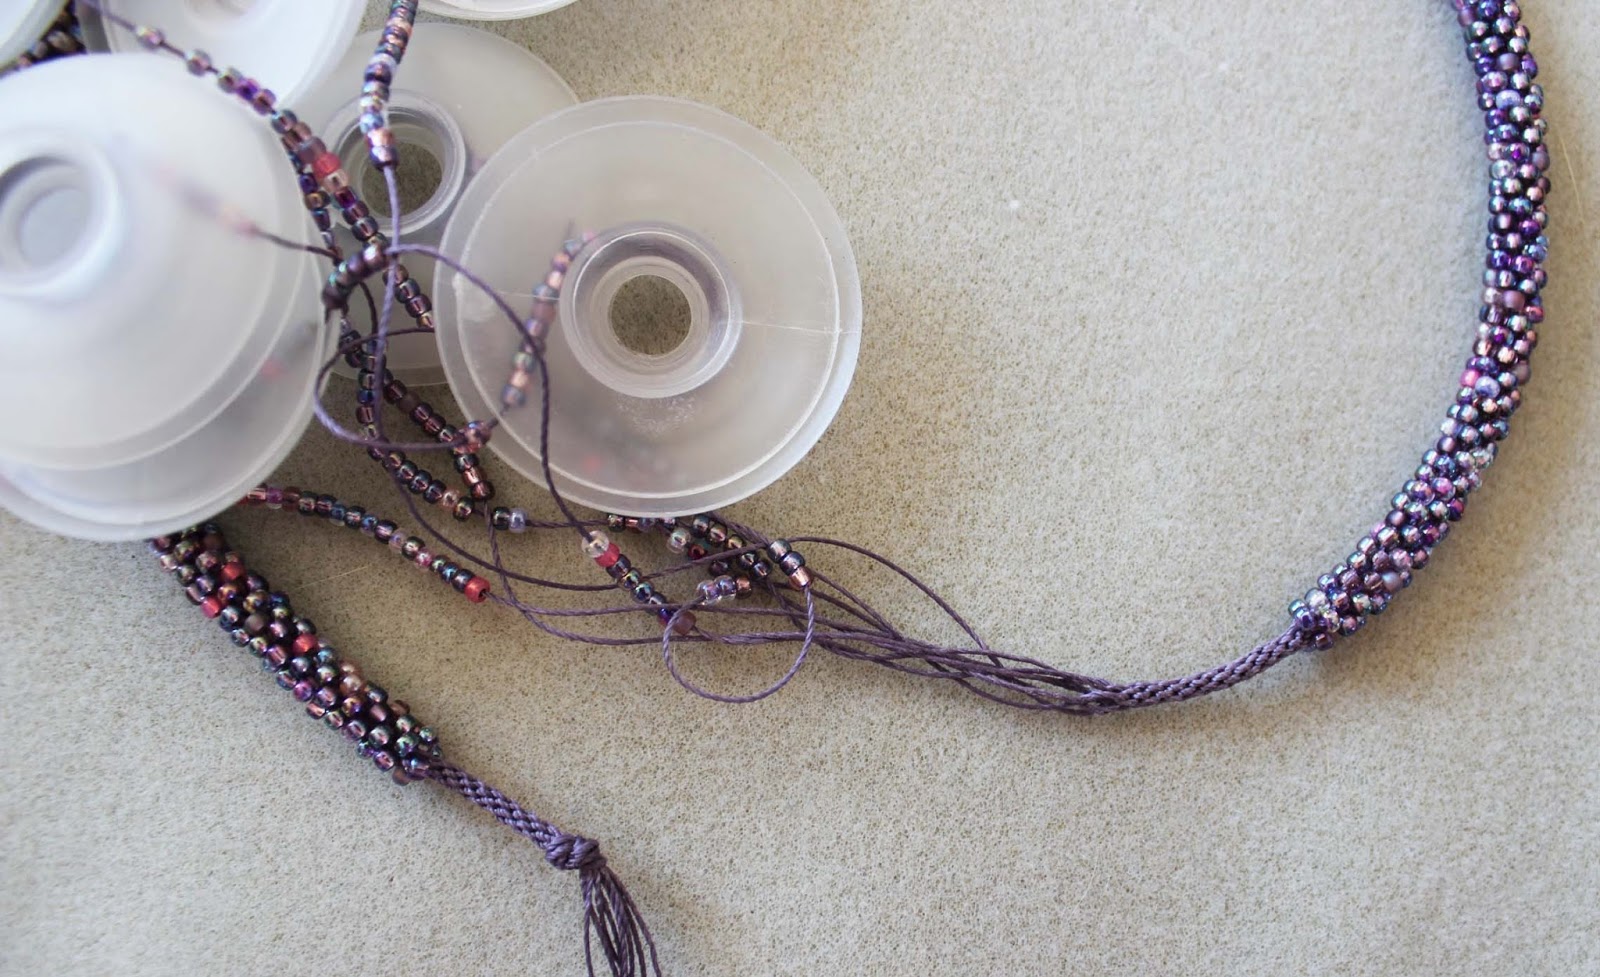
I braided too much and had to undo some of the braid in order for my end cap to fit.

Working the knot closer to the beads.

Do this on both ends of the braid. Once you have the knot in place you can cut any remaining threads with beads/spools free from the braid. Leave a good three or four inches of thread above your knot, giving yourself extra thread to work with as we finish up this project.
I have developed a technique that I prefer to use in order to add bead caps. I’m not happy with just glue. I want to feel that my piece is incredibly secure (perhaps overly so) and will last a lifetime. I do this by adding a length of wire into the center of the knot before tightening it. Tighten the knot; sliding it close to the beads and pull on each thread to ensure a tight knot. Use chain nose pliers to hold onto the wire just below the knot, pull on each thread with another pair of pliers.
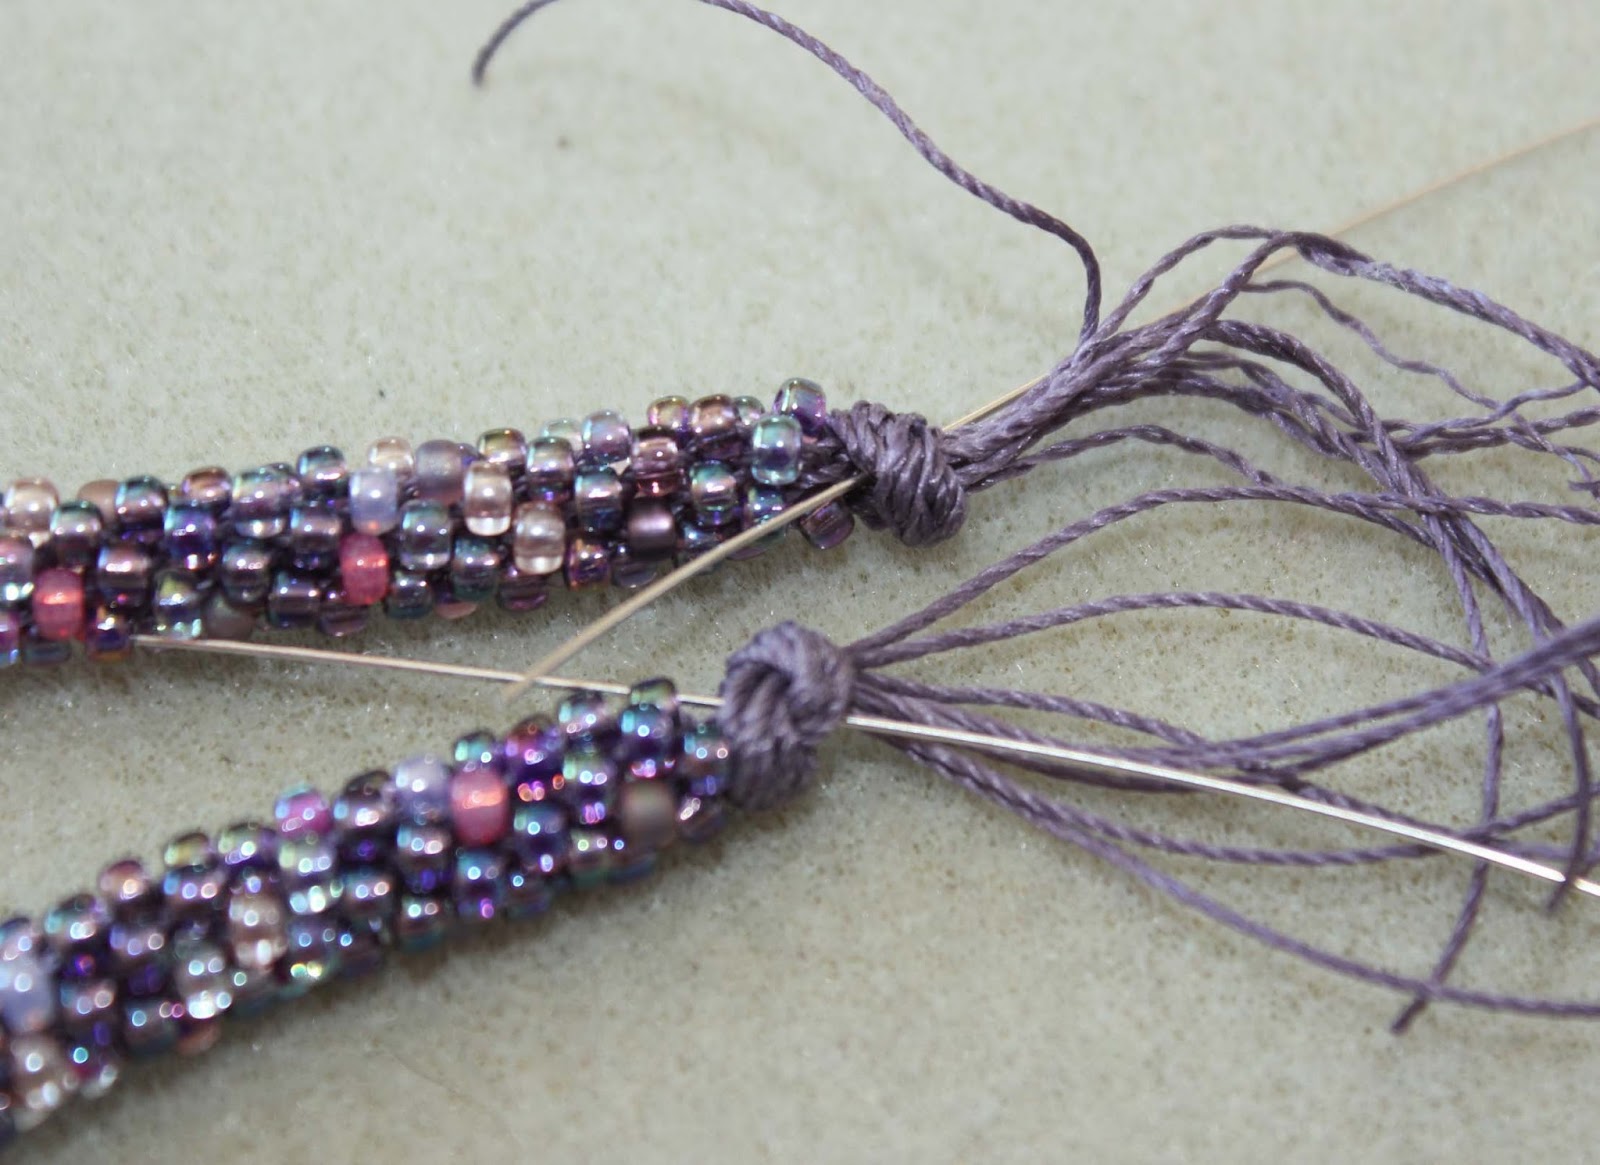


I’ve completed tightening the knot on one end of the braid (top). You can see the difference it makes in the size of the knot. The knot in the bottom of the picture has not been tightened yet.

Using chain nose pliers hold onto the silver wire and the threads above the knot and wrap the other end of the wire around the woven threads, in between the beads and the knot.

You can see the neat wrap, the wire going through the center of the knot and extending out the top with the threads.
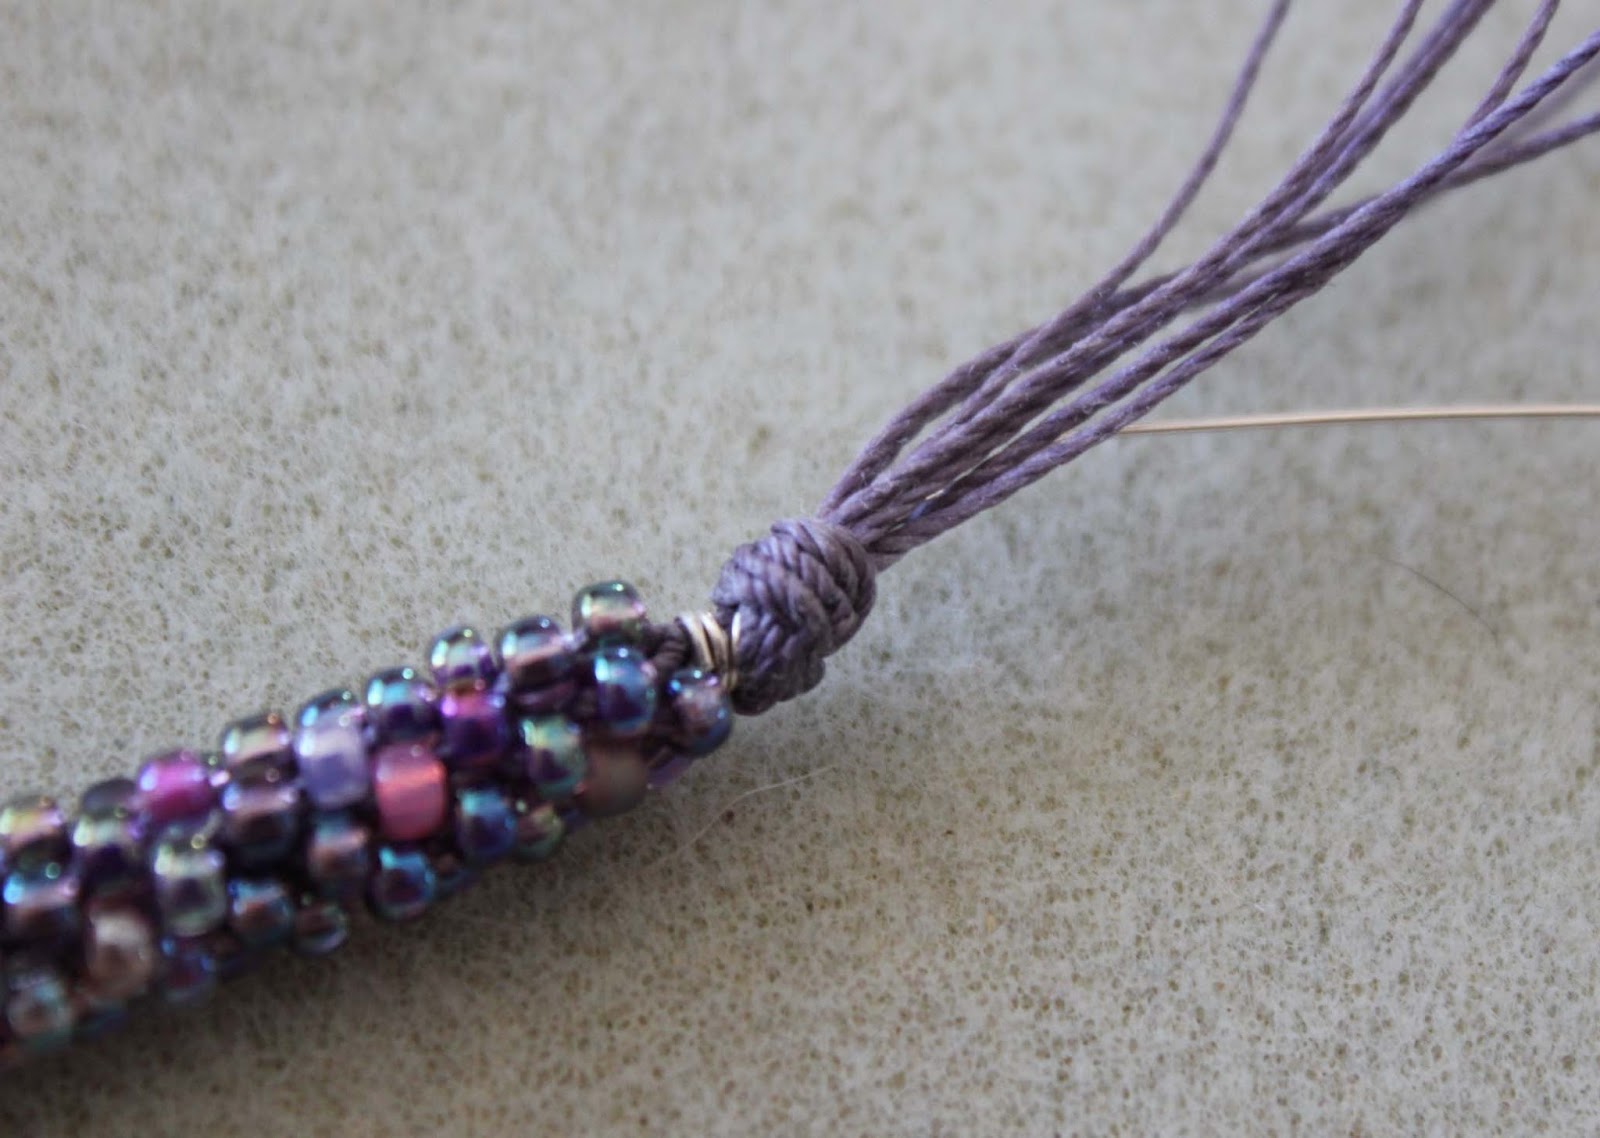
Test that your bead caps will fit over your knot. If it doesn’t you will have to make your knot smaller or buy larger bead caps. (This is why you only need to weave a couple rows of thread at the beginning and end of the braid. And why I needed to make adjustments on the piece I made. When making the knot with the woven thread, the knot is too large to accomodate the bead cap.)
You want to bead cap to cover all the messy bits and meet your beads.

Trim the threads just before glueing. CAREFUL….DO NOT CUT YOUR WIRE.

I’ve trimmed close. Leaving just a tuft above the knot. Glue immediately.
Glue the wrapped wire, the entire knot and the tuft. Careful not to get glue on the seed beads.

While the glue is drying put your focal piece together using basic jewelry techniques.
Slide the completed bail and focal onto the braid before adding the bead caps and finishing the ends.
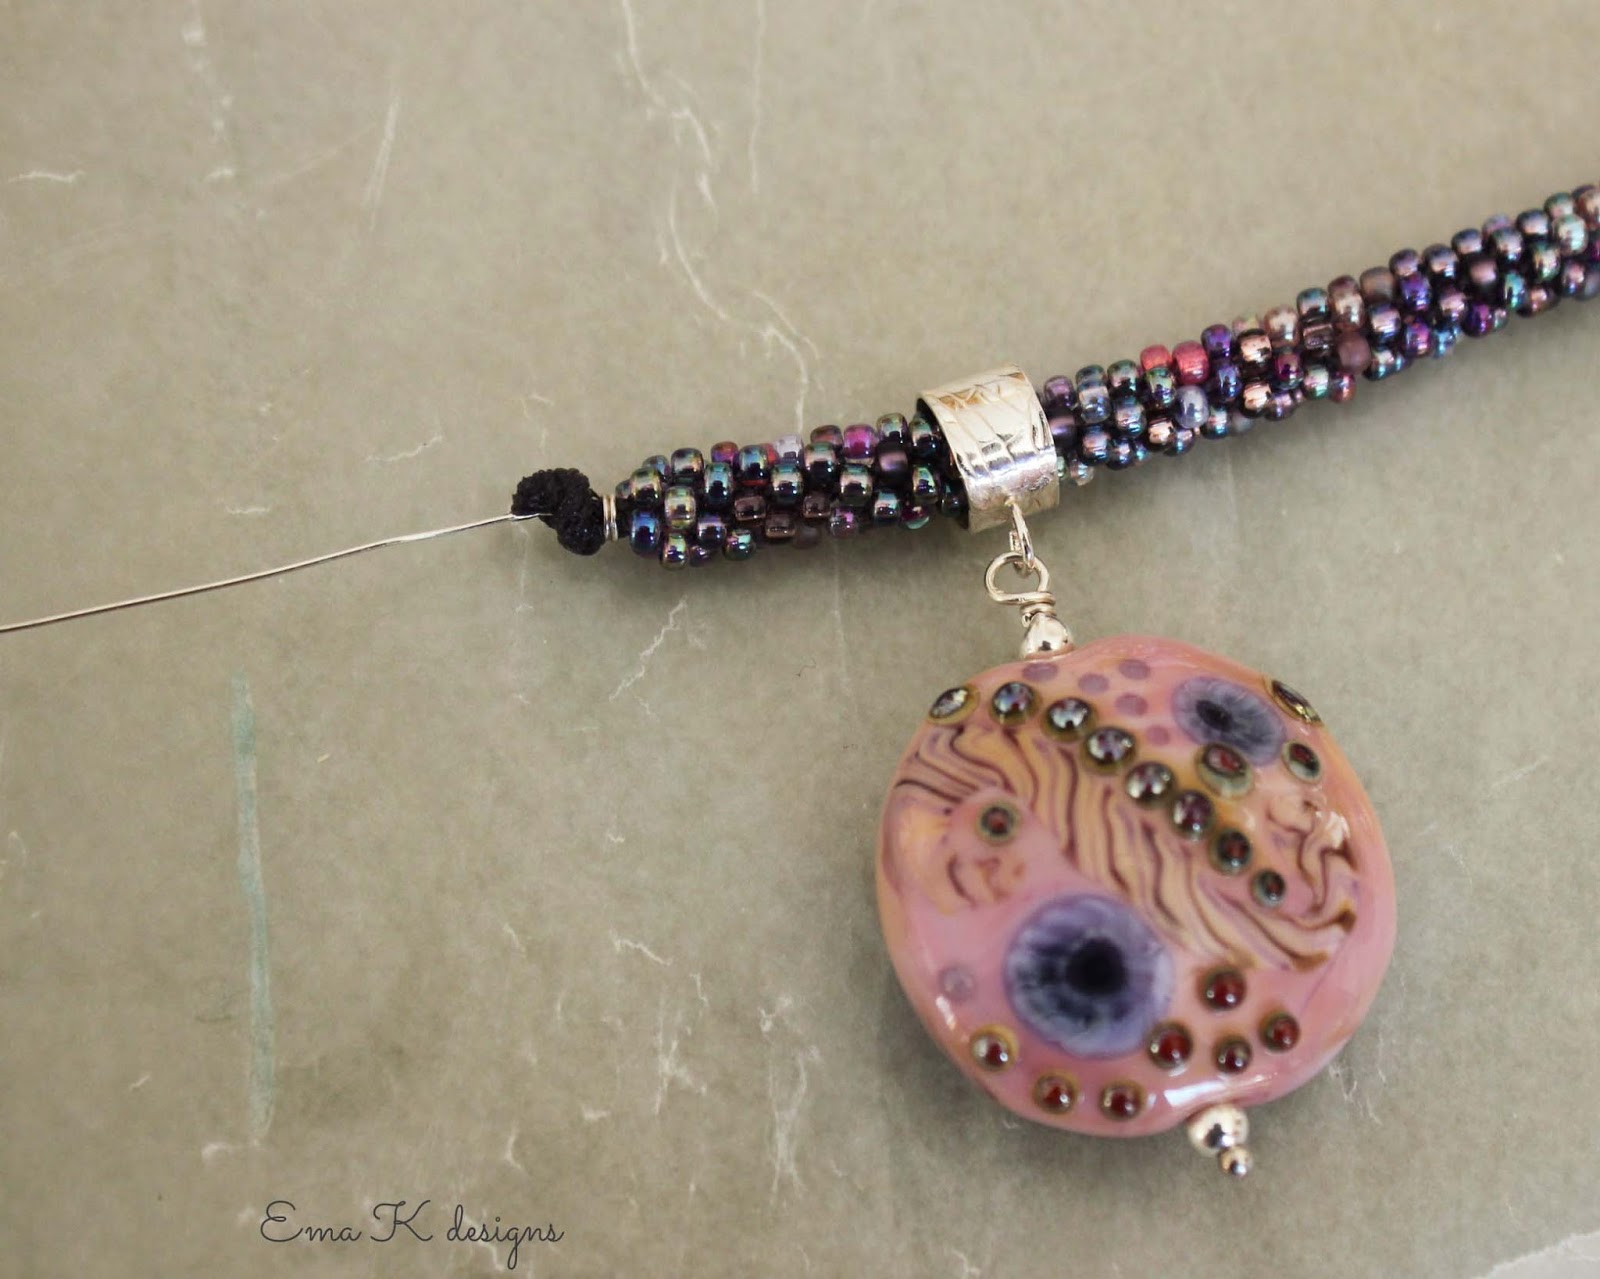
String the bead cap, a sterling silver round onto the wire and create a wrapped loop to add the toggle clasp.


Congratulations! You have just created a beautiful kumihimo beaded piece of jewelry!

I am offering 20% off jewelry components (jewelry is not included) in my Etsy shop. If your looking for lampwork beads for your designs, stop by my shop and use coupon code ABS20 to receive your discount.
Many thanks to the contributors of the Art Bead Scene community. I appreciate the opportunity to visit with you today. I hope you enjoy this tutorial. I’ve been inspired to create an in depth tutorial offering additional kumihimo techniques. This will be available in my Etsy shop on March 1, 2014. If you have any questions regarding the techniques presented please feel free to contact me.

Find me on Facebook
Shirley Moore
February 18, 2014 at 5:37 pmSo thrilled to see kumihimo as a hot trend! Love your beautiful examples, and I really NEED one of those focals, did you make them all?
Anyone wanting to can come join any of several great kumihimo facebook groups, where lots of info and techniques are shared.
Jean
February 18, 2014 at 7:49 pmEma! what a fantastic post with fab photos AND the extra addition of your superlative way with words, color, and of course, art glass beads! I don't know which of your offerings I love the most! I fell for all of them, one after the other! WOW! I have been so out of the loop I didn't know that you were a jewelry artist and designer now as well as a wonderful art bead maker. It is not surprising to me, as you have so much talent… however this is an exceptional contribution to this truly great site, Art Bead Scene! CONGRATULATIONS! And thanks for the information and the beauty. I hope we all get to see you here again and again! xox jean
Erin Siegel
February 18, 2014 at 8:23 pmWow! Really great tutorial, Ema! So detailed. Everyone is sure to appreciate this. I especially enjoyed your finishing technique. Wonderful execution. So professional. I suggest you become a regular Art Bead Scene contributor!
Shaiha
February 18, 2014 at 9:31 pmWhat a great tutorial! Thank you for sharing it.
sandi m
February 19, 2014 at 1:10 amThank you Ema for sharing. Your instructions and photos are excellent. I bought a disk and spools last summer and still haven't tried. I think your tut may be just the thing to get me started.
And, yes, I vote for you to be a regular!
CreekHiker / HollysFolly
February 19, 2014 at 3:57 amI would love to know more about putting ONE bead in the middle of kumihimo as you talked about in the piece… Maybe another tut???
Kathy Lindemer
February 19, 2014 at 11:41 amGreat detailed and well illustrated tutorial. Thank you!
KayzKreationz
February 19, 2014 at 4:44 pmGreat tutorial. I've been wanting to try this for a while, but wasn't sure how to go about it. Thanks for all the detail.
Lyn Foley
February 20, 2014 at 1:26 pmYour tutorial is GREAT! I am inspired to buy the wheel and supplies and get started learning. Such good explanations and photos. Big kudos. I also would like to know how to add one lampwork bead to the center. Another tut?
Thank you very much.
Ema Kilroy
February 21, 2014 at 1:21 amThank you Everyone! Shirley I did make the focals. I have many lampwork beads in my Etsy shop. I wasn't aware of any FB kumihimo groups. Sounds like fun, I'll be looking into joining!
Eileen The Artful Crafter
February 23, 2014 at 12:18 pmFantastic illustrated tutorial! Thank you so much.
Rebecca
February 23, 2014 at 9:57 pmThis is such a great and detailed post – thank you! I've not had a go at Kumihimo yet but you are tempting me…
Liebreiz
August 3, 2015 at 5:58 pmGreat! Beautiful work!
http://www.ula-liebreiz.blogspot.com
SEO
August 14, 2015 at 9:14 amHi,
Thanks for the great details, i have bookmarked your blog for the future upcoming post.
We are leading manufacturers & suppliers of Braiding Wire, MIG Wire, Nail Wire, Weaving wire