
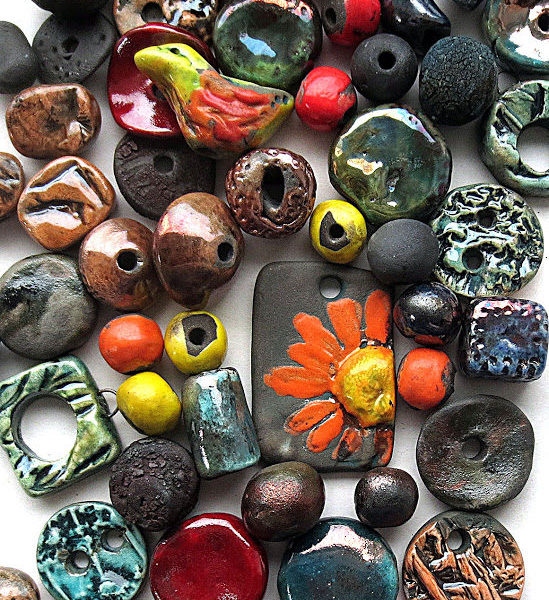
Today Rosanne of FabFibers and Melanie from Earthenwood Studio and I are gathering together for a creative session exploring resin. We have bezels and objects to fill, images and text to cut, mementos and treasures to add to the mix.
First here is a link for tips, instructions and a project working with ICE Resin from Objects and Elements.
I thought I’d share a fast and easy way to create your own bezels.


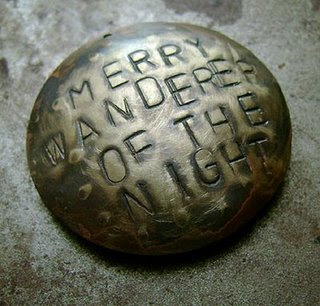
1. Stamp a phrase or word onto the brass blank.
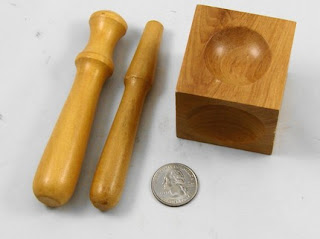
2. Set the blank in the dapping block and use the wooden punch with the wider bottom. Hammer the end of the wood punch, forcing the brass blank to conform to the bowl of the dapping block. Start in the center and work your way out to the edges.
3. You can use a little bit of steel wool, fine grit sandpaper or a brass brush to bring out some of the highlights on the metal.
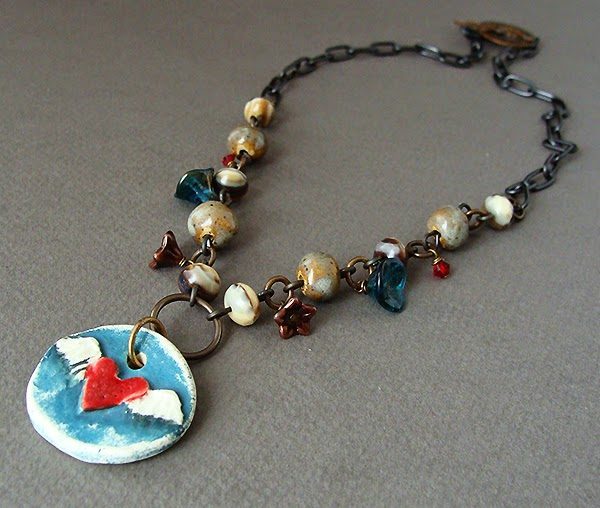
4. Turn over and fill with resin!
Lorelei
July 17, 2009 at 2:03 pmHey I've got a question. (this is a really cool project by the way!!)
I've seen the dapping blocks in wood like you show here, and also in metal. Is one better than the other?
mairedodd
July 17, 2009 at 2:14 pmahh… this is fabulous! i have the blanks and some stamps… half way there! thanks so much for these wonderful posts…
TesoriTrovati
July 17, 2009 at 2:54 pmYippee! I recognize that little guy! I still need to fill mine with resin….thanks for reminding me! ICE Resin is so much fun. I am also experimenting with Gel du Soleil and a UV lamp. Good stuff…very unique and mixed media. Thanks for sharing!
Enjoy the day!
Erin
Melissa J. Lee
July 17, 2009 at 3:25 pmLove the Puck-ish quote you chose for your sample!!!
lunedreams
July 17, 2009 at 3:38 pmThanks for sharing the know-how, and the great links. I'm always looking for ways to do metalwork that don't involve torches, so this is great!
Amber Leilani
July 17, 2009 at 3:42 pmi've been dying to work with resin. thanks for the links and tips!
lilibulle
July 17, 2009 at 4:04 pmthank you so much!!
Alice
July 17, 2009 at 9:07 pmOh, you make it sound so easy! Now you've got me itching to try it, which means buying more tools and supplies.
Thanks for sharing with us!
Alice
Carol B
July 17, 2009 at 11:19 pmWhat gauge is the thickness? I've had trouble with the dapping making the stamping look funny. Maybe I was using too thin a piece of metal.
thx
Marbella Designs
July 18, 2009 at 1:48 amgreat post, thanks!
Heather Powers
July 18, 2009 at 12:53 pmI'm not sure what gauge it is Carol, it's pretty thin. I just know to work from the center out, and I haven't had any trouble.
sorry Lorelei, that's a mystery to me too.
Melissa, I have this whole Midsummer Night's Dream thing going for me. 🙂
Barbara Lewis
July 19, 2009 at 12:13 pmMy understanding of when to use a wood dapping block over a metal one: use the wood when you have texture on the piece, such as the stamped text, so that you don't distort or mar the finish.
Cyndi L
July 31, 2009 at 2:57 pmI love resin, and usually use bottle caps for my bezels. This is such a great alternative!
The Beadjar
August 3, 2009 at 7:04 pmCyndi, is ICE Resin any safer than resin/epoxy? Do you have to use a respirator? That stuff scares me, but I've wanted to use it for the longest time!
LLYYNN - Lynn Davis
August 5, 2009 at 2:07 pmBeing the tool-fool that I am, I have both a wood and a metal dapping block. I use the metal for heavier gauge (thicker) metal sheet, and the wood for thinner, but that's just me! Others may just use one for both types of metal. I also use the wood block for softer metals like copper that dap easily.