
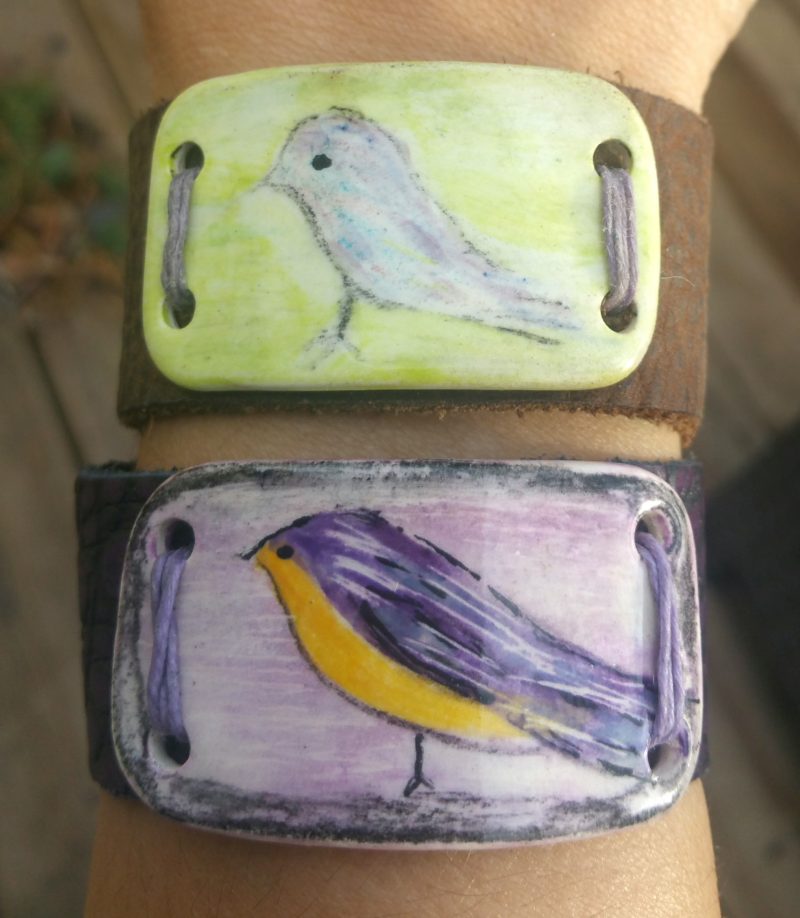
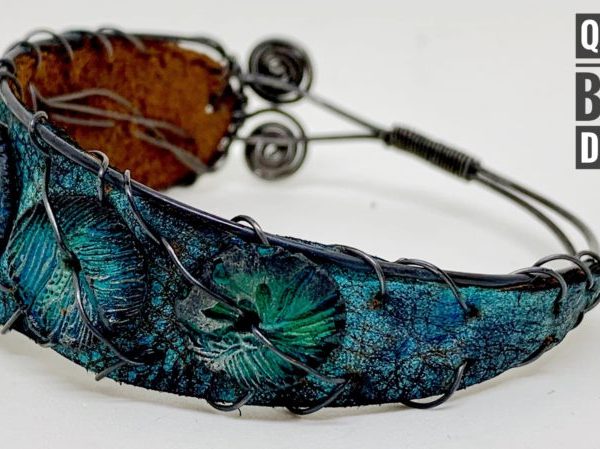
Good day to you all!! Today I wish to share a simple leather cuff bracelet tutorial with you all. I made the one in the bottom of the photo a long time ago and wear often! I love it!! Often the simplest things are my favourite things!

Supplies needed:
Flat leather magnetic clasp – (search that in Etsy and various styles, sizes, and finishes will come up – choose what best suits you and your design)
Leather in whatever texture or color suits your design – (PeggySueAlso on Etsy has a fantastic selection of various styles and sells them in small sections – check out photo below to see the styles I purchased from her)
Good strong glue– E-6000 brand is my go to.
Waxed Linen cord – I have used both 2 ply and 4 ply with success – again this is easy to find on Etsy in various thickness and color
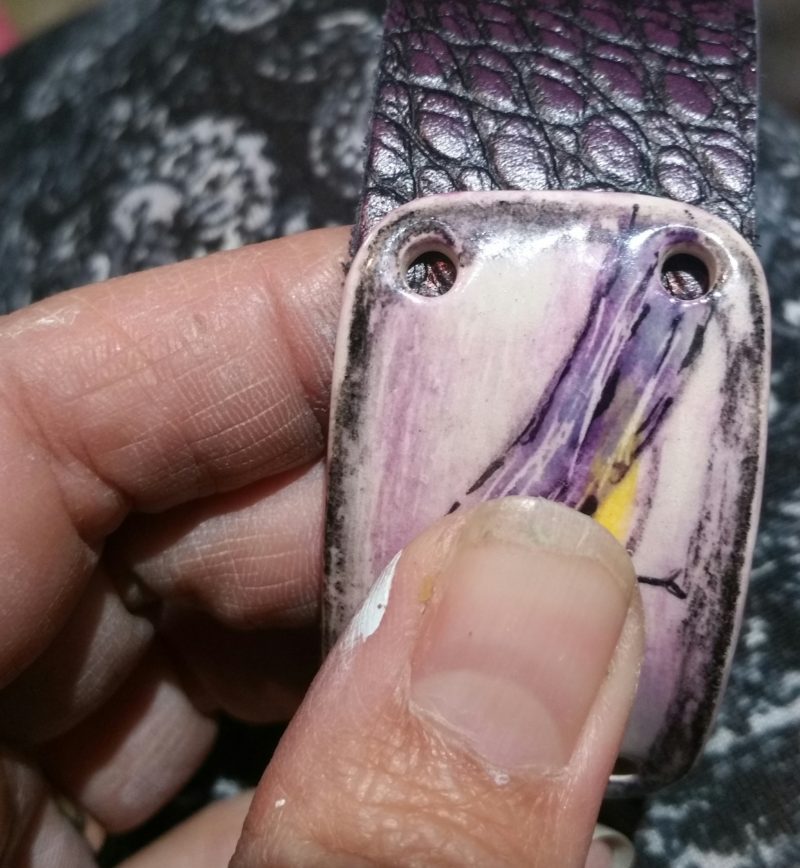
Curved bracelet bar with 4 holes (I make these out of ceramic over at artisticaos but you can use any other art bead that has the same shape – keep in mind the 4 holes make it easy to attach for this particular project but with a little creativity you attach something that only has two holes.
Tools
Leather hole punch – (small hole)
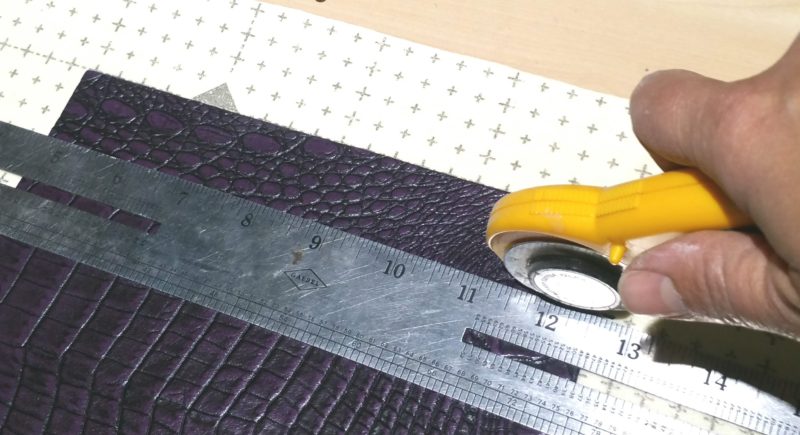
Metal ruler and a blade or rotatory cutter – to cut leather with cutting mat underneath (you could use scissors but it is less ideal – the best way to get the most even cut is a rotary cutter with a metal ruler.
Here is my selection of leather. I love all the various styles and textures available!

Getting Started
Start off by measuring the width. This will be the width needed to fit perfectly into your claps. Mark out that measurement and cut your leather. The length you go with will be your desired length depending on your wrist and how you like bracelets to fit. Take into consideration how much length your clasp takes up as well.
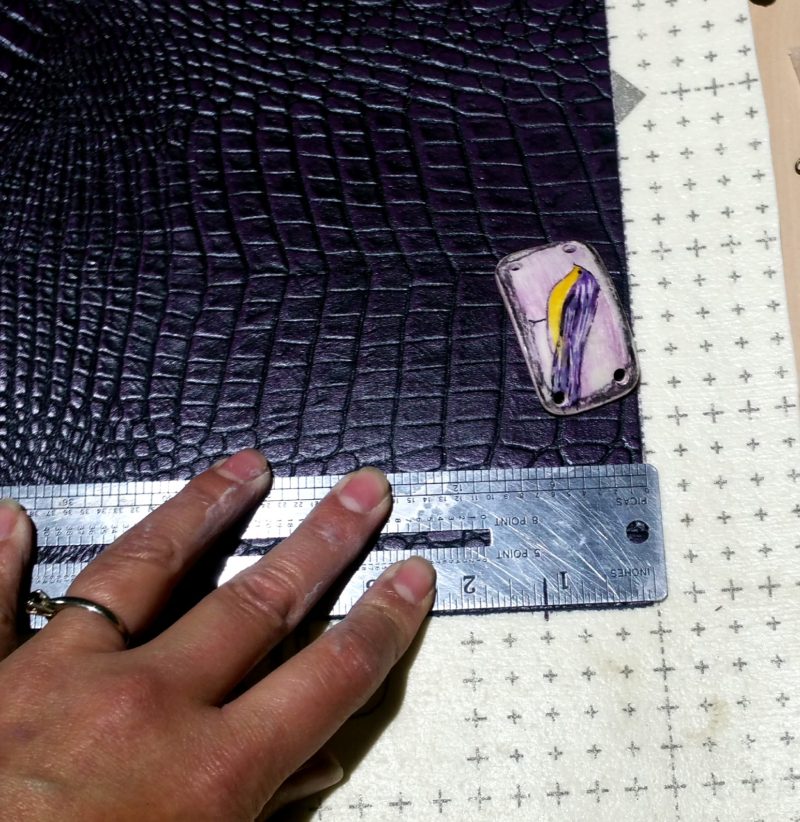
Measure and cut your leather using the rotary cutter along the edge of the metal ruler.
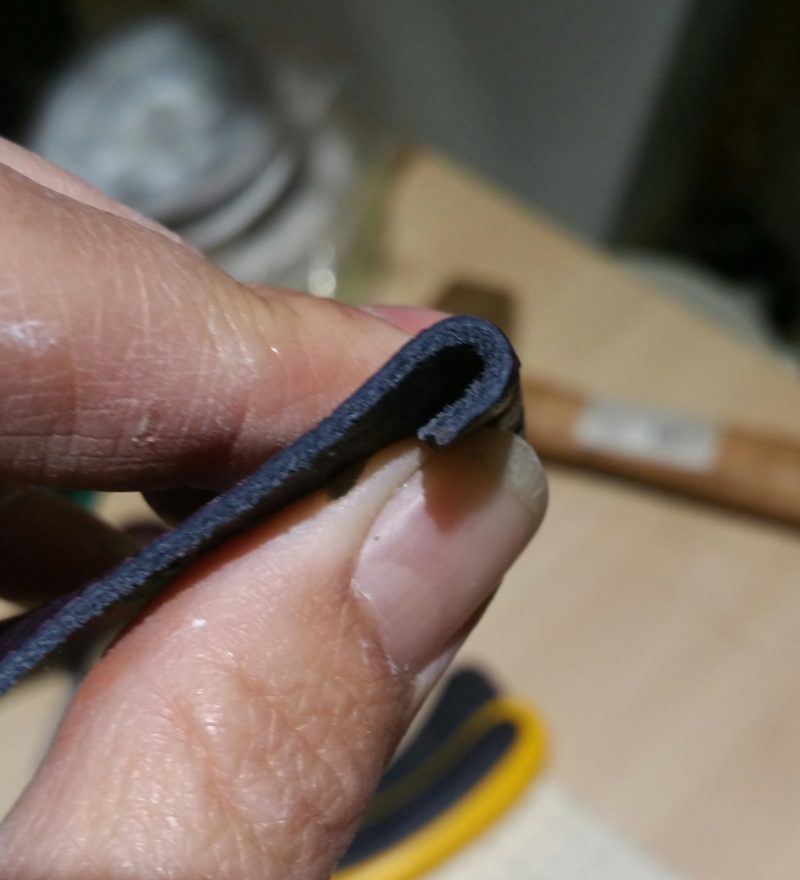
depending on the leather thickness you may need to fold the leather in order to fit it tightly into the clap end where it will get glued. For this one I needed to fold the tip that is glued because my leather was very thin.
Glue – don’t hold back! We need to make sure the leather is well glued into the clasp so that the bracelet will hold up well over time! I put glue on the tip of the leather, under the tip because I was folding it and in the clasp where the leather was going.
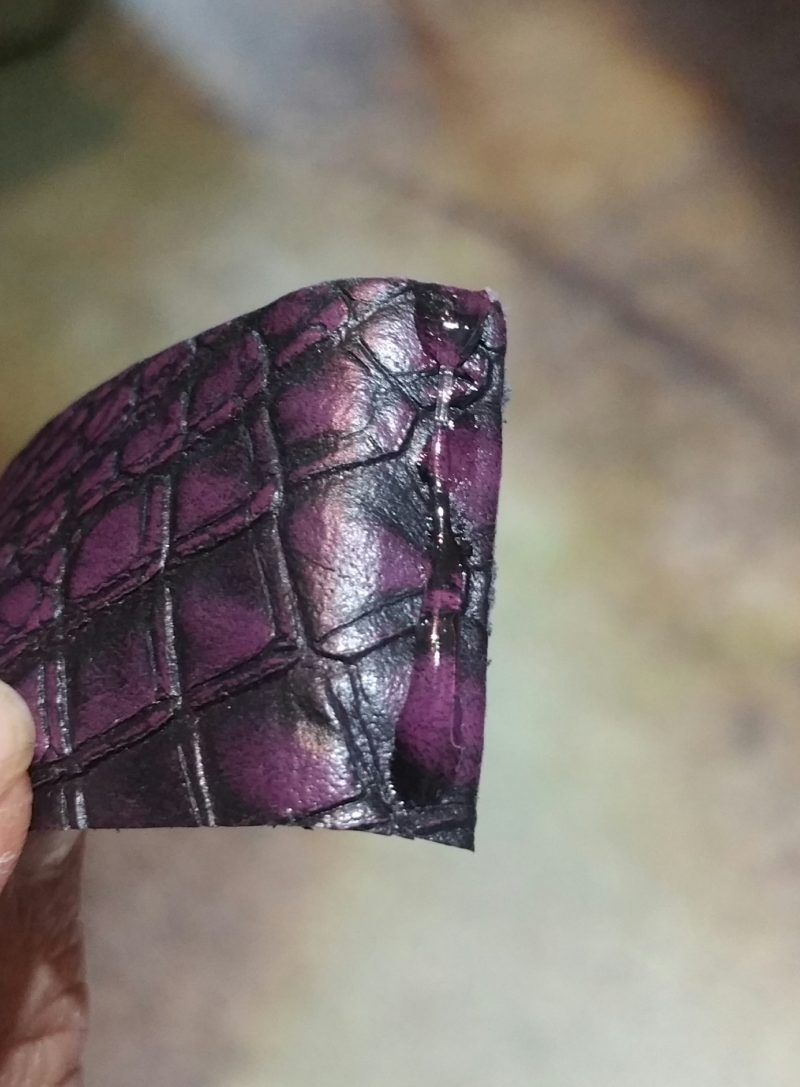
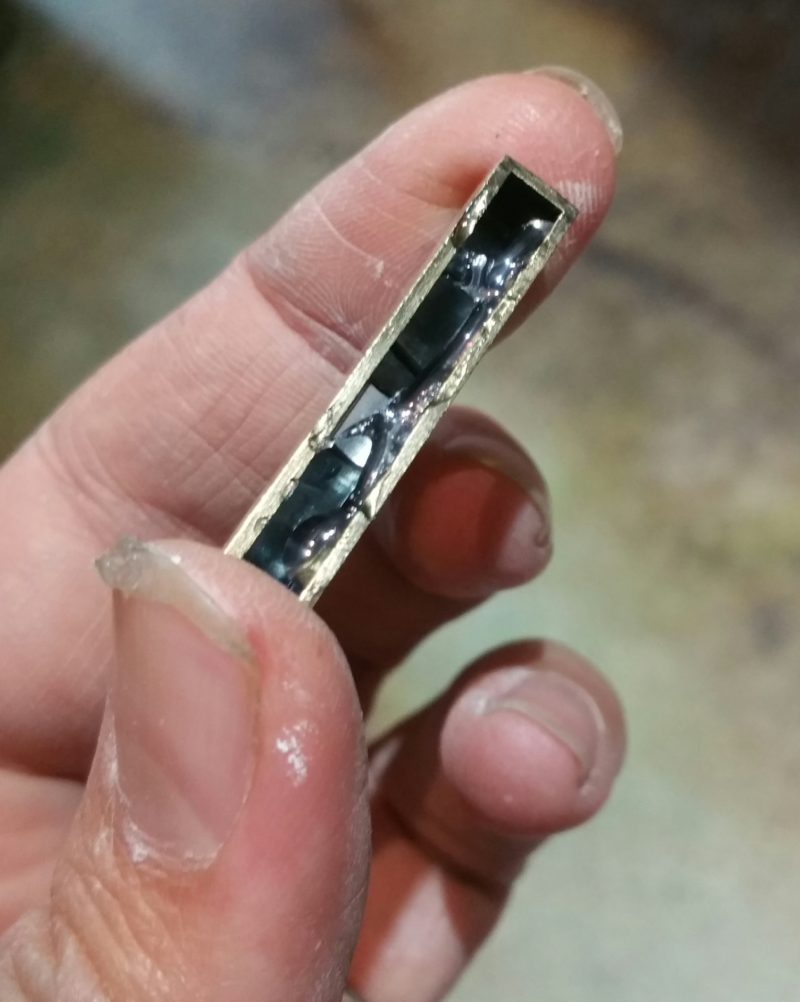
After gluing everything nice and snug, leave it to dry. You may need to do a little glue clean up on your piece if glue ended up in places it should not have. Right away before glue dries you can wipe it off the metal and for getting it off the leather – scrape it with a sharp blade.
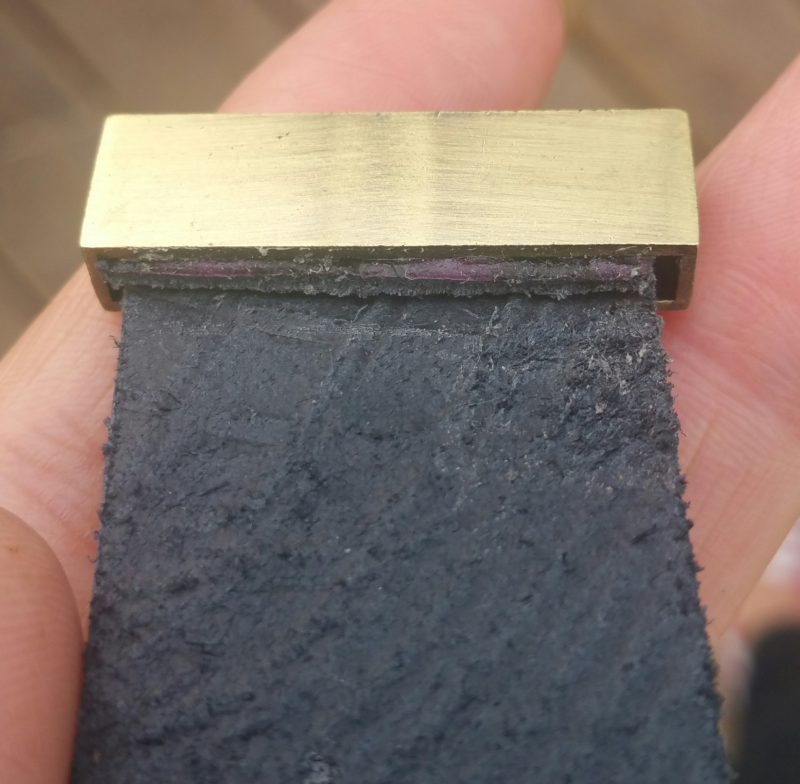
Now you should have something like this. Ideally you could wait for the glue to dry but I am often impatient and keep going.
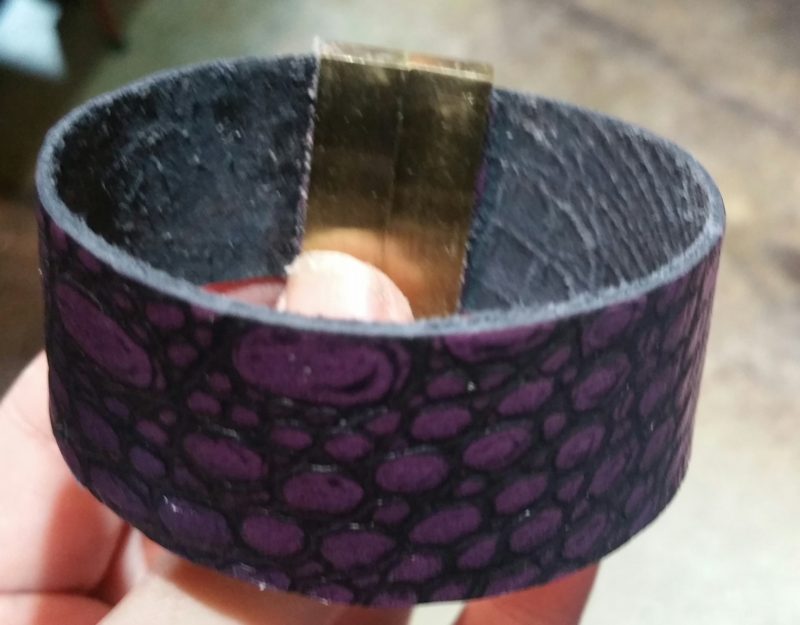
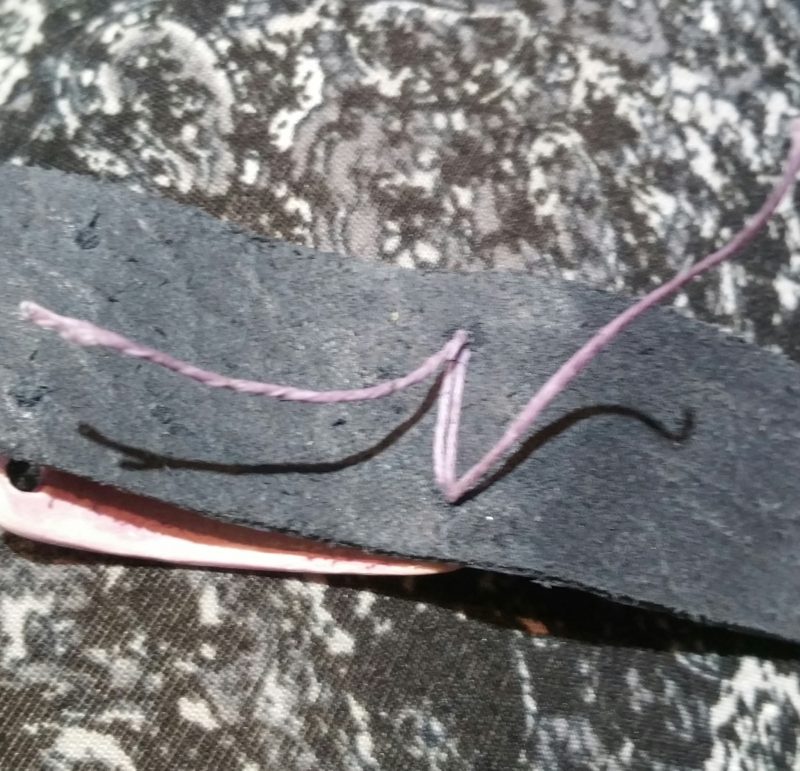
Center your bracelet bar on the bracelet and use a marker to mark out the holes. Then use a small hole leather punch to punch holes where you marked.
Then begin tying the waxed cord through the bracelet bar and the leather to tie it on. Once you have gone through it a couple times, pull it tight and tie a few tight knots. Waxed cord is the very best for this because it does a great job holding the knot! You can also add a small dab of glue to your knot to help secure it even further!
That is is it! Once it dry it is all ready to wear! I find these bracelets come together quite quickly! I hope some of you have been inspired to give this idea a try!
Wishing you inspiration in everyday!!
Terri
artisticaos
Katherine Thompson
December 13, 2017 at 8:05 amI agree I also love the simple stuff and leather. Those birds are adorable but where did they come from?