
If you’ve never worked with seed beads or bead weaving, even the smallest projects can seem a little daunting. All those teeny tiny beads, where do you begin?! Today, I’d like to introduce you to bead weaving by starting with one of the most basic and easy-to-do stitches, Spiral Stitch. And, of course, in true Art Bead Scene fashion, we’re gonna jazz it up by adding a few handmade art beads to the mix! If you follow the instructions below, you’ll be able to create this one-of-a-kind bead woven bracelet in about an hour and a half. I call it Art Bead Spiral.
 Oh, and if you don’t have the exact materials that I’ve used, please feel free to swap out any color seed bead and any kind of art bead you have on hand. Let’s get started!
Materials:– 3 Elaine Ray 7mm cube beads in Patina color.
– 5 grams size 11 matte brown Japanese glass seed beads. (A)
– 3 grams size 11 galvanized dark blue gray Czech glass seed beads (B)
– 3 grams size 11 opaque cream Czech glass seed beads (C)
– 1 small antique brass lobster clasp
– 2 6mm closed antique brass jump rings
– 3-5 6mm open antique brass jump rings
– 1 larger seed bead in a contrasting color (this will serve as your stop bead)
– Wildfire or Fireline beading thread (5 feet length)
– Size 12 beading needle
Terms: (these will help you as you follow the instructions)
Pass Through: to move the needle through the bead in one direction (i.e. from left to right)
Pass Back Through: to move the needle back through the bead in the opposite direction (i.e. from right to left)
Spiral Rope:1. Begin by threading your needle and pulling about 2′ of thread through the eye. String the larger seed bead onto your thread and pass your needle through the bead again. Pull the thread tight and slide the bead towards your needle leaving a 6″ tail. (Fig.1)
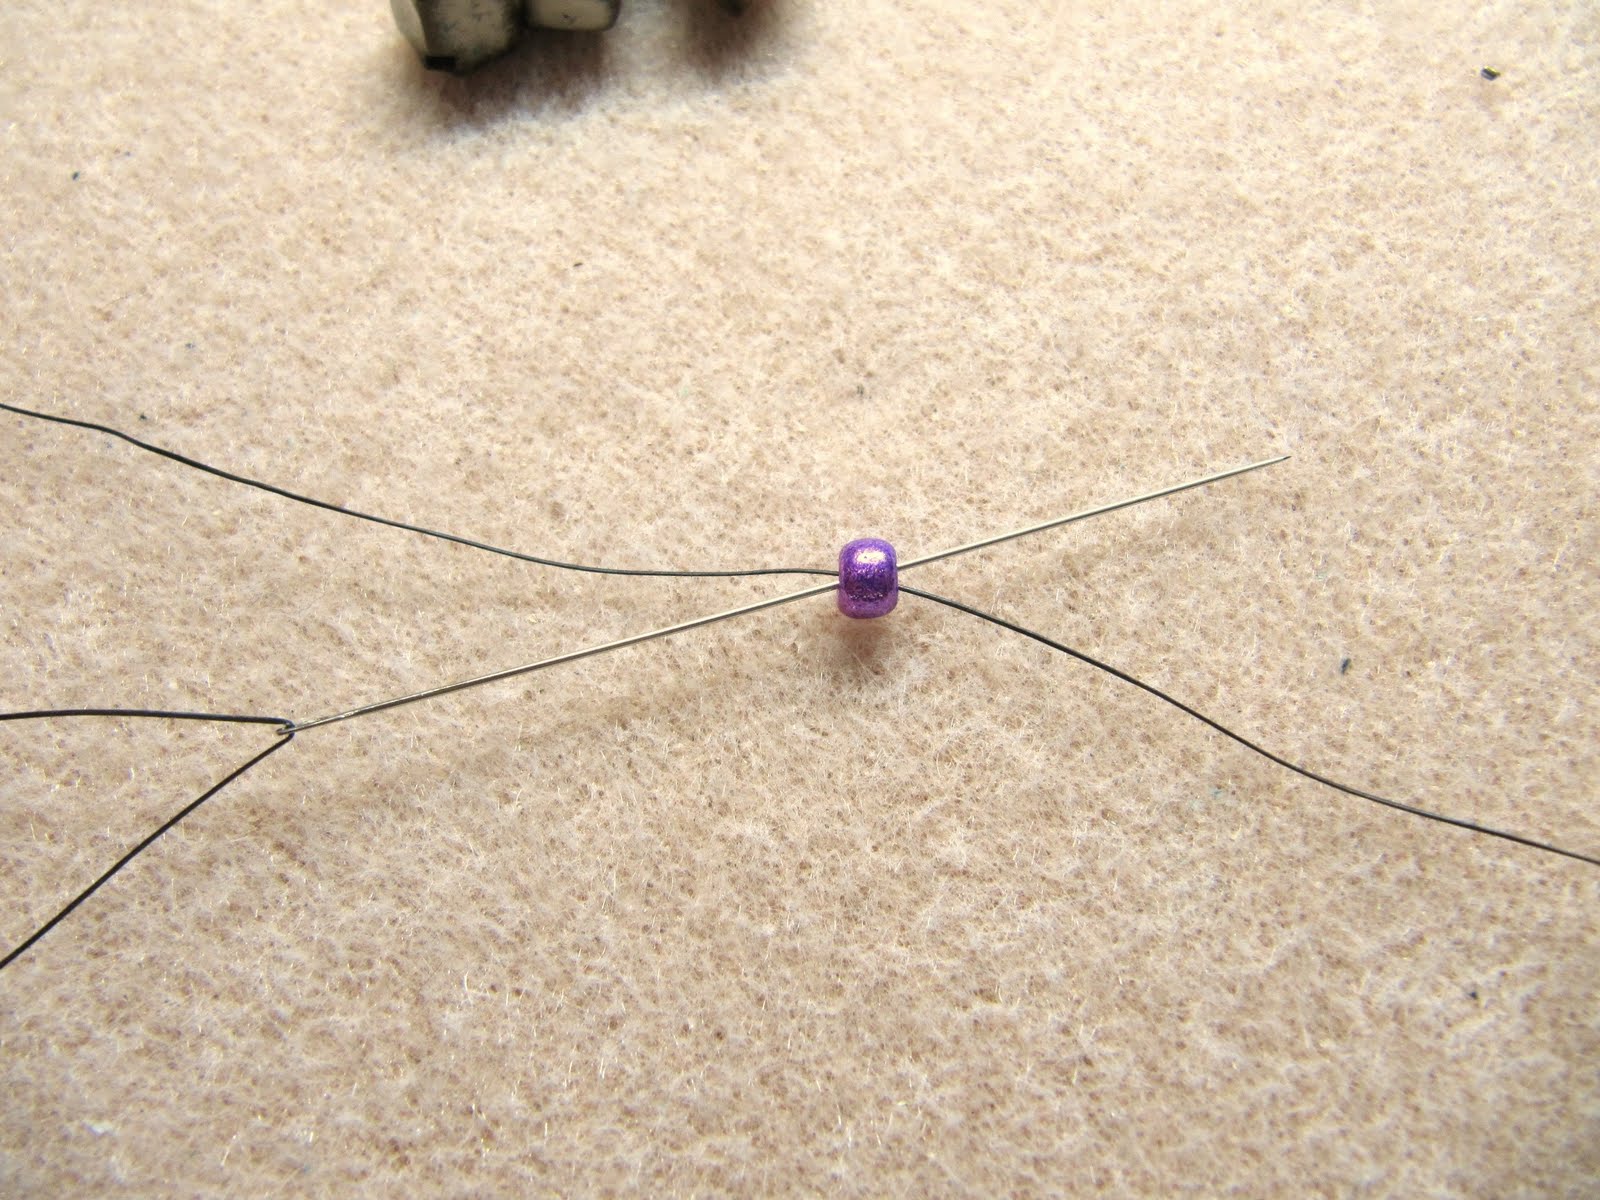 Fig.1
Fig.1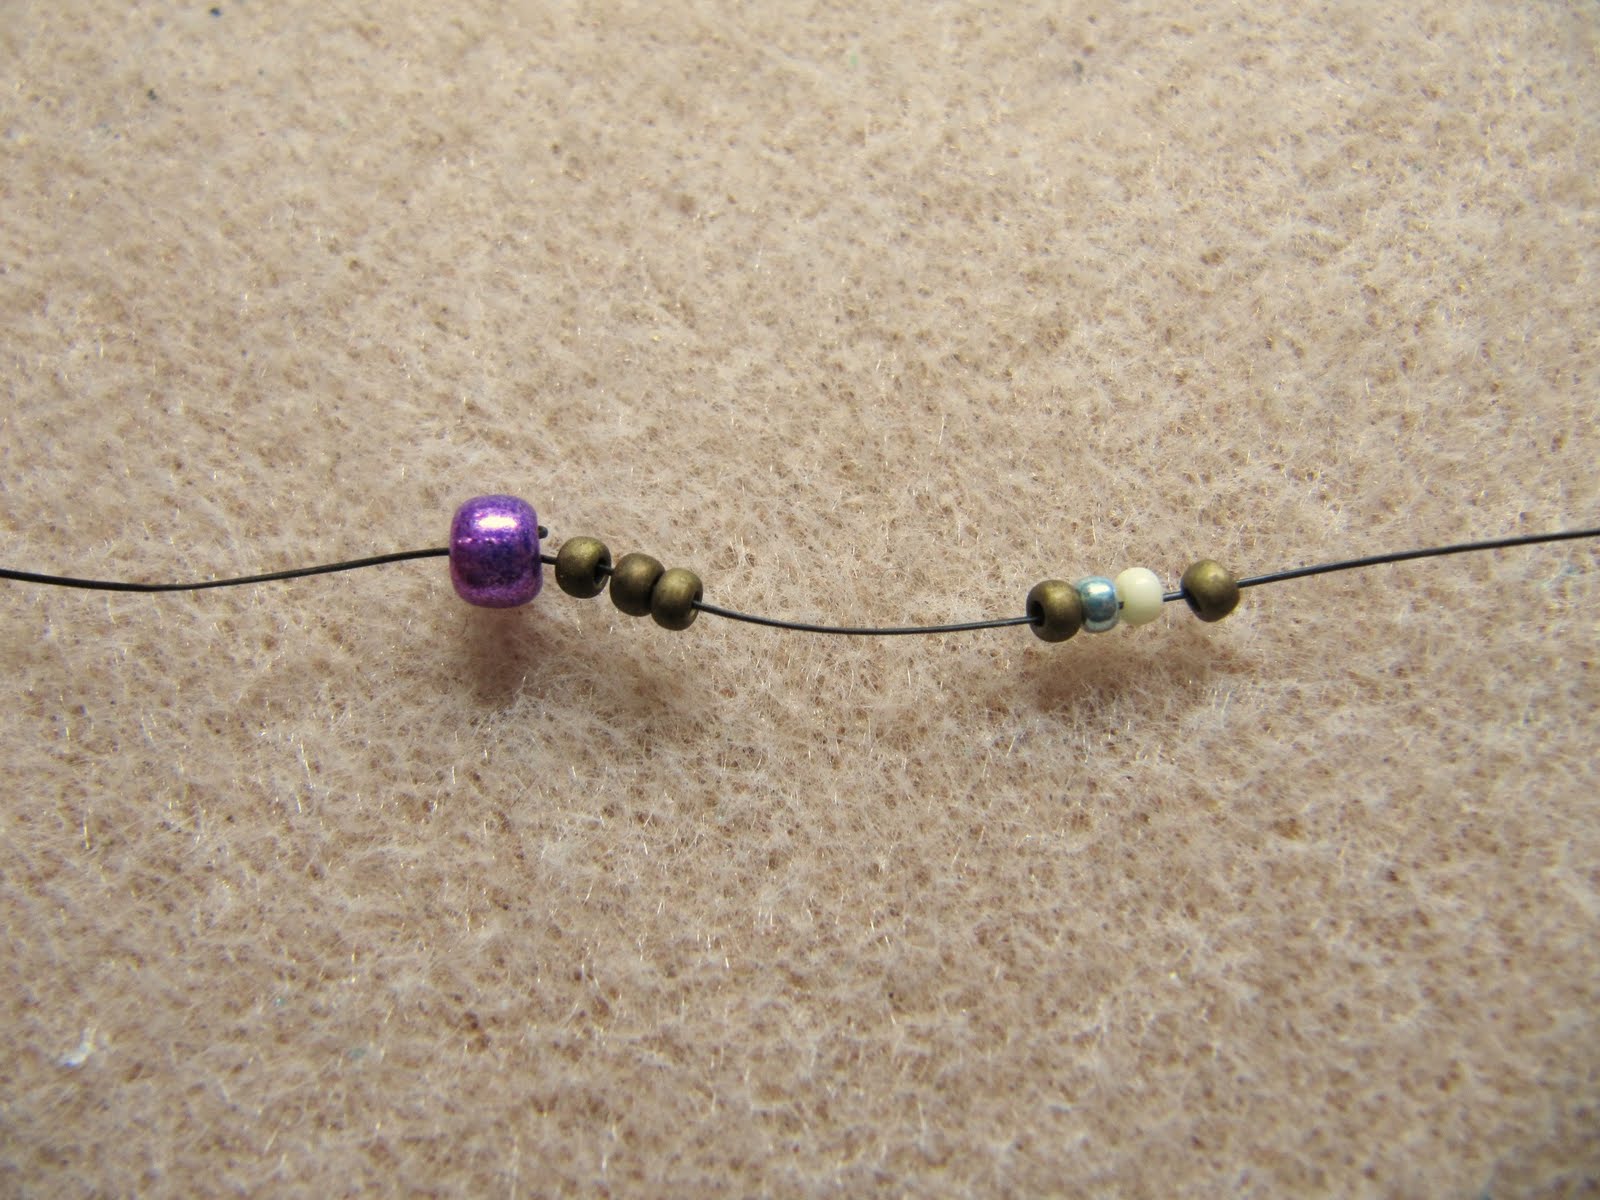 Fig. 2
 Fig. 3
 Fig. 4
 Fig. 5
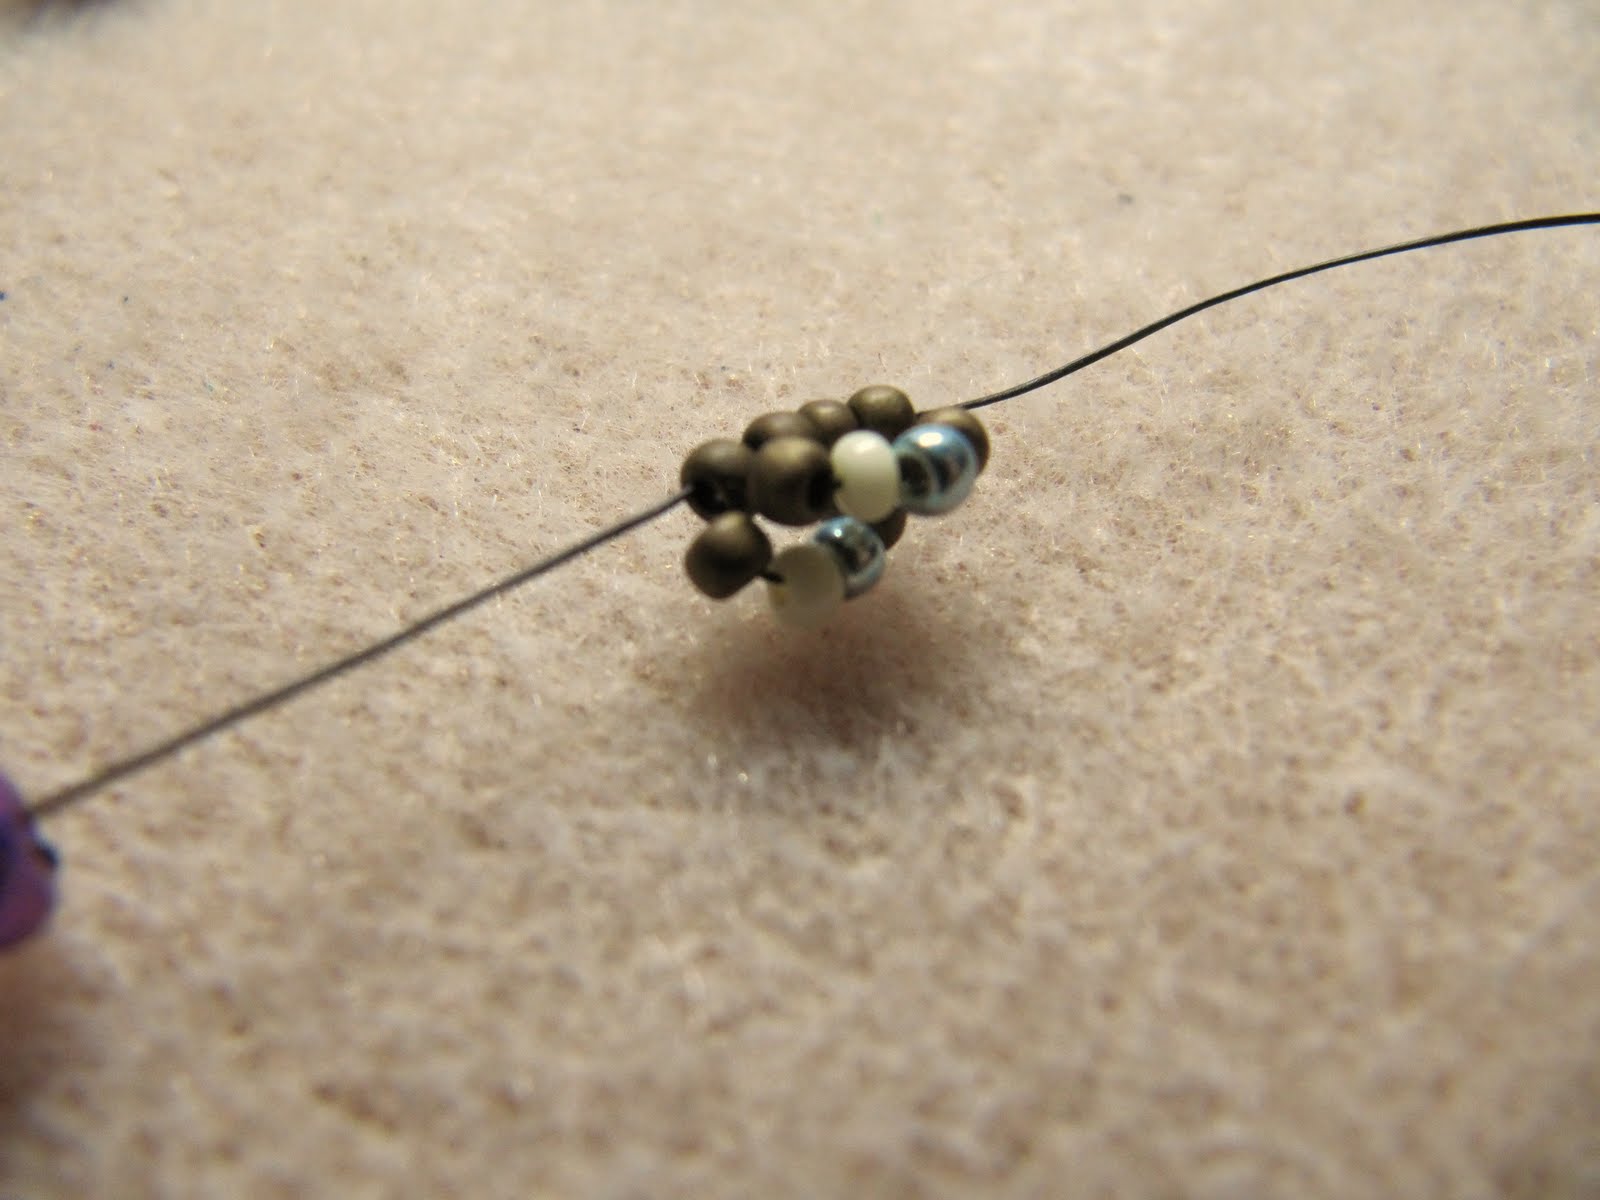 Fig. 6
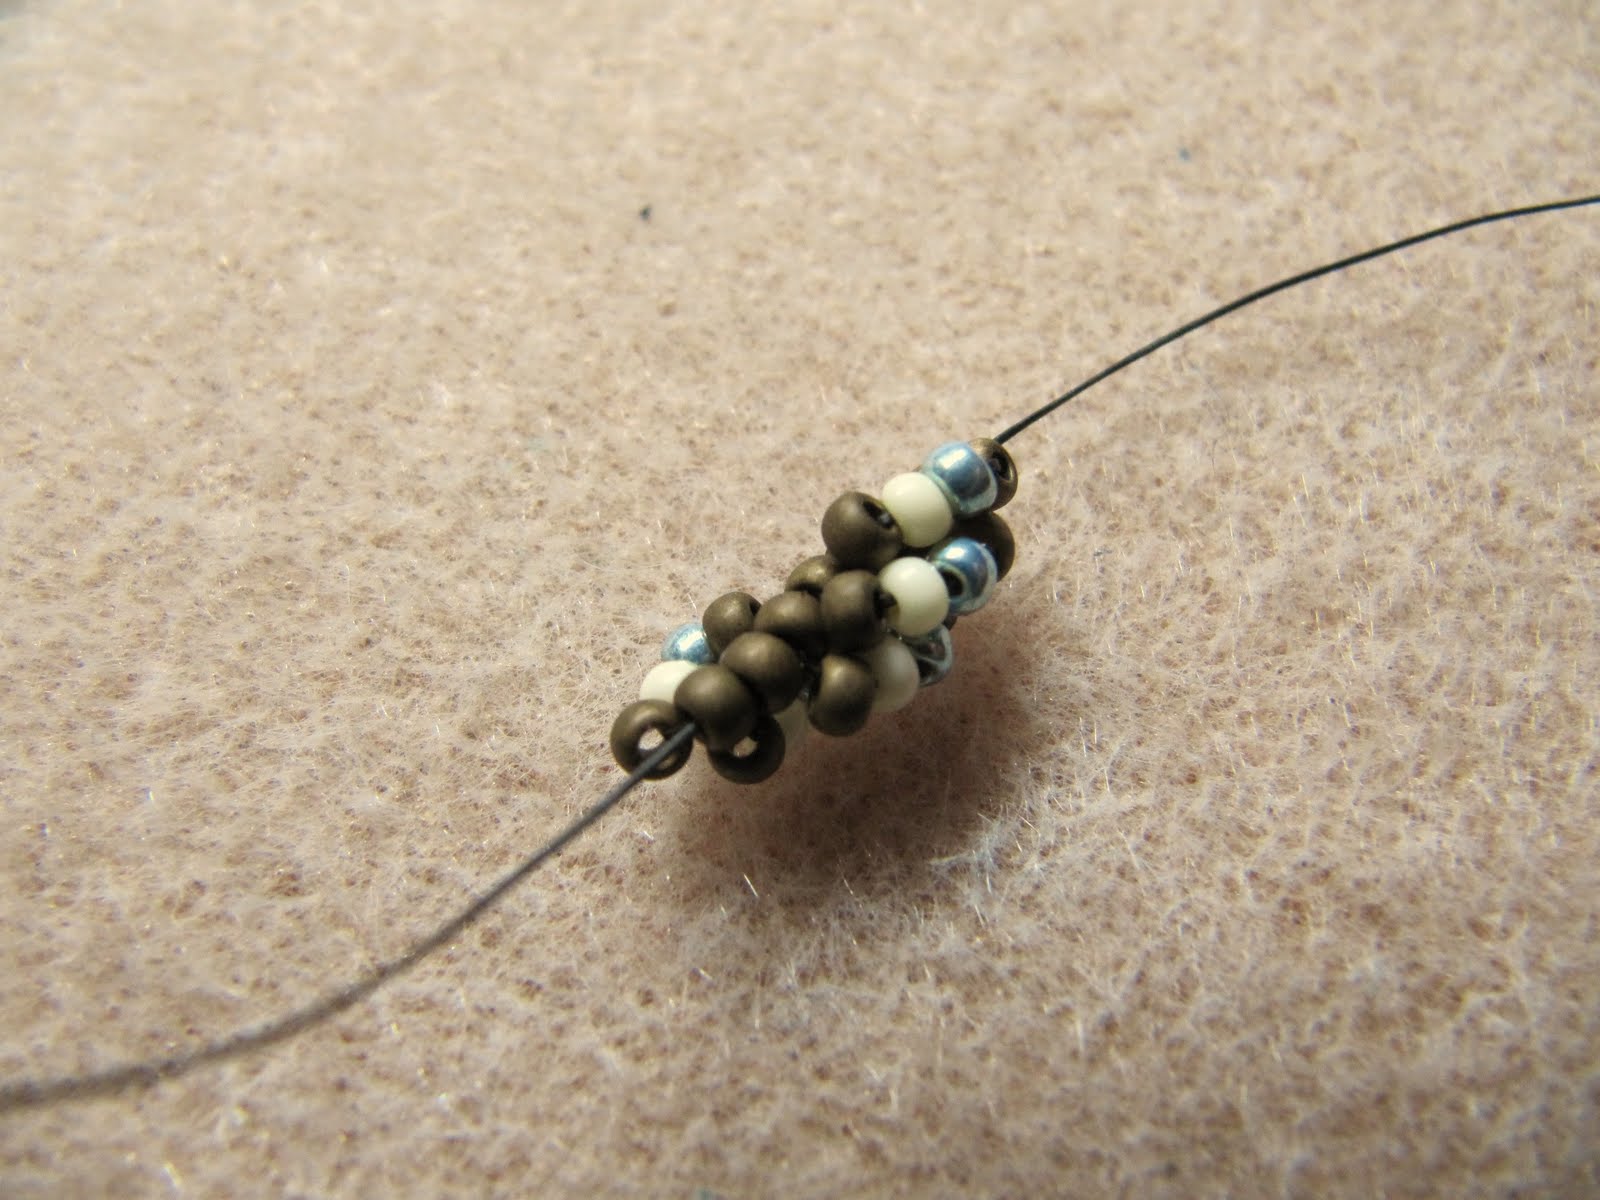 Fig. 7
 Fig. 8
3. Add another cube bead and another 3/4″ of spiral rope.
4. Add your final cube bead.
5. Add another 2 1/4″ of spiral rope. This will complete the beadwoven portion of your bracelet.
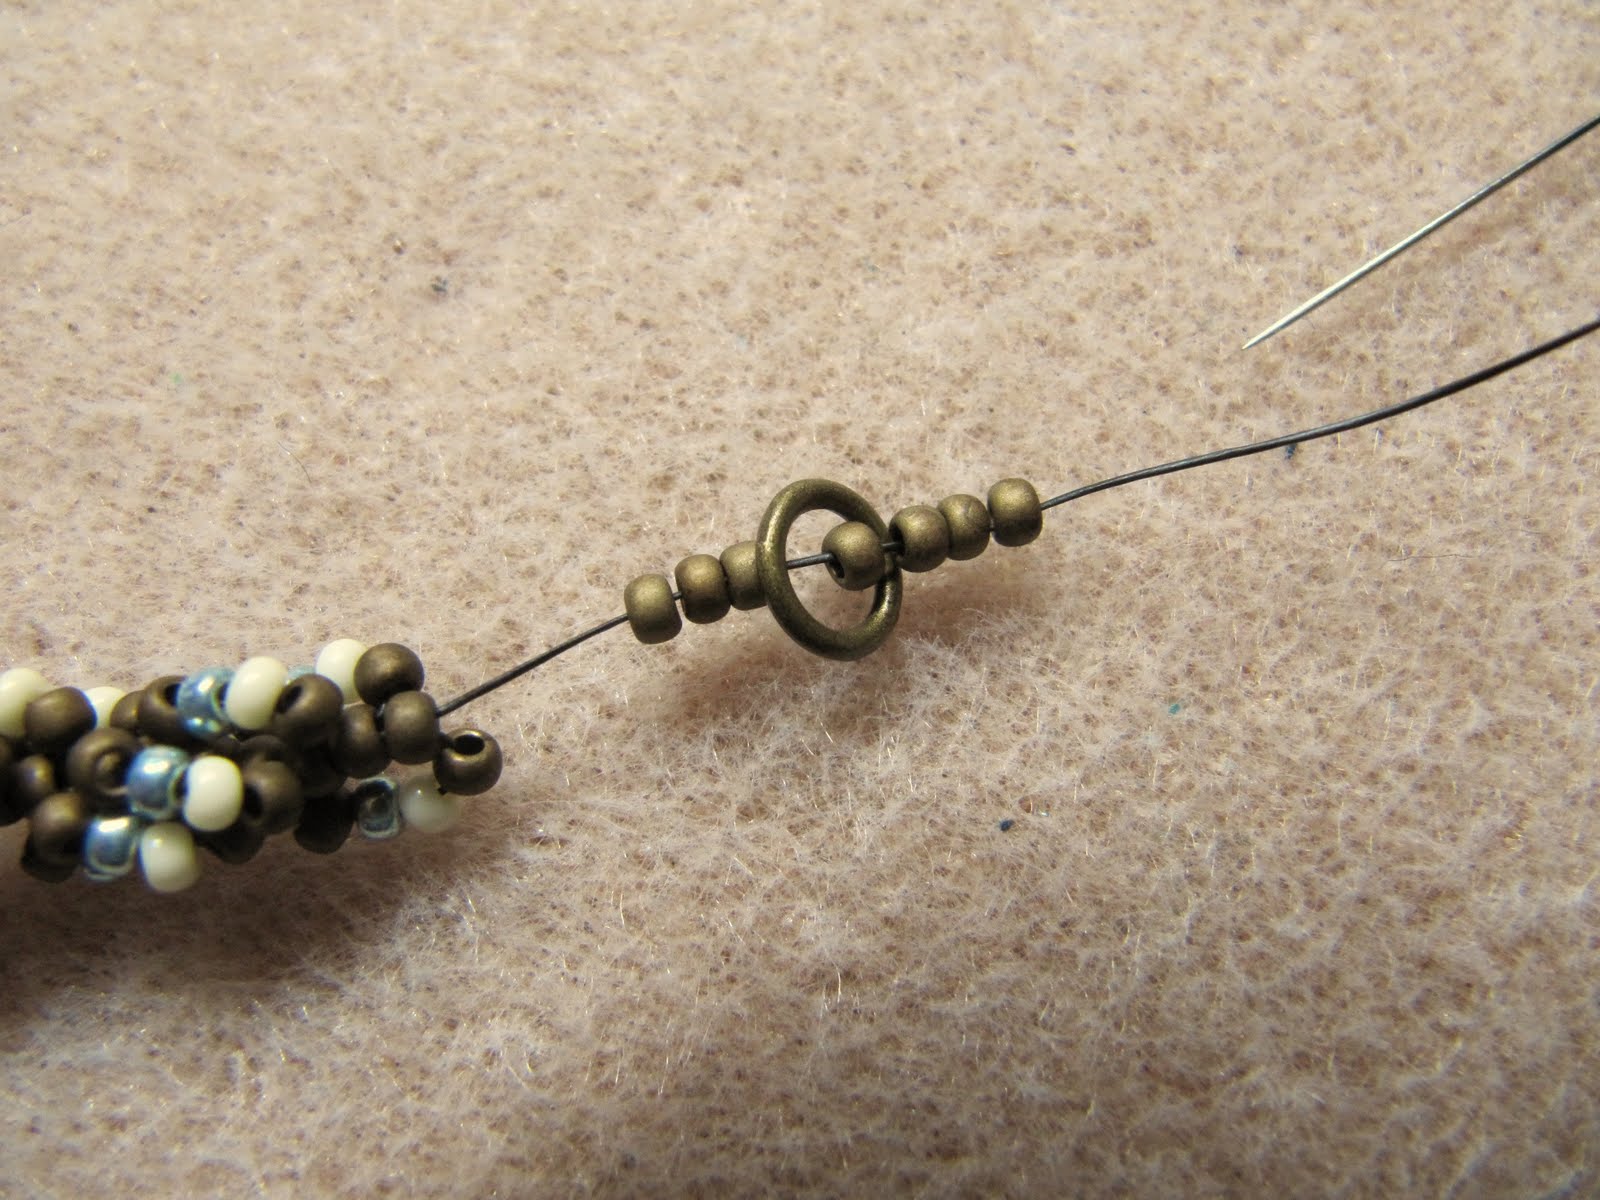 Fig. 9
 Fig.10
 Fig. 11
 Fig. 12
6. Complete step 5 again. Pass back through three more beads, pull through and trim the thread.
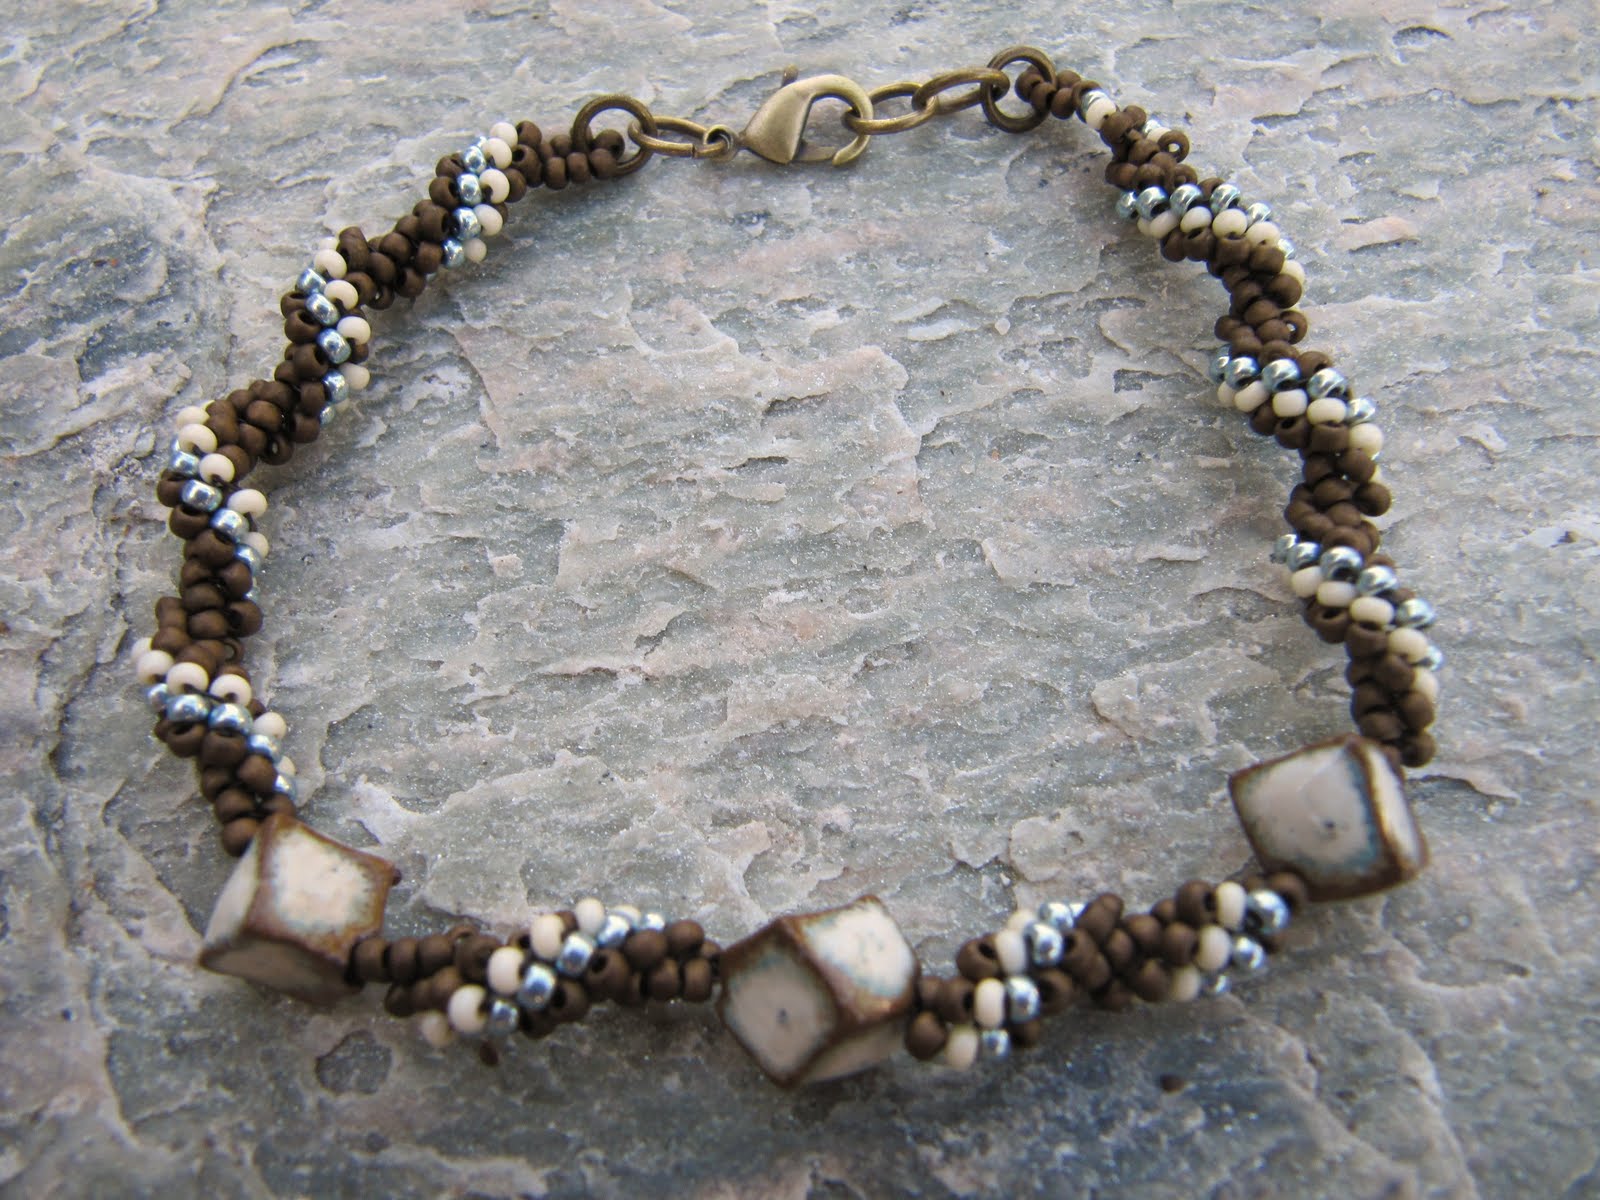 Congratulations! You have your first Spiral Rope bracelet with some pretty cool art beads added in! From here, the variations are endless. Try using larger beads or beads in different colors. Add larger art beads, add more art beads, or complete more spiral rope to create a necklace.
 This is a variation on the technique you just learned. This bracelet features two spiral ropes and Elaine Ray’s almond shaped art beads. I added a copper leaf toggle to mimic the shape of the almond beads.
Jeannie
April 15, 2010 at 12:24 pmThanks Marcie, the instructions and pictures are very easy to follow. Very impressive bracelets.
CraftCrave
April 15, 2010 at 2:20 pmJust a quick note to let you know that a link to this post will be placed on CraftCrave today [15 Apr 02:00pm GMT]. Thanks, Maria
maryharding
April 15, 2010 at 4:04 pmThose are beautiful bracelets. Thanks so much for doing a seed bead tutorial. I haven't done this kind of spiral before but I think I can do it. I look forward to trying.
Christine's Beadworks
April 15, 2010 at 9:46 pmGreat tutorial and one of my all time favorite stitches.
Mary T Designs
April 16, 2010 at 1:16 amThis was very easy to follow. Great work illustrating the technique.
Patty
April 16, 2010 at 6:06 pmAwesome! I find my willpower for the itty bitty beads to be slowly slipping away, and one day soon I will submit to the desire to do what my eyes can only dream of doing.
Eve
April 16, 2010 at 8:16 pmVery beautiful bracelet, love the one with the copper leaf toggle. Thanks for this post!
Beadweaving 101
April 17, 2010 at 4:20 pmGreat photos and instructions. Very easy to follow!
Elaine Ray
April 17, 2010 at 10:36 pmThese are wonderful!!!!!! Thanks so much for sharing with us. I love to see how designers use my beads – you give me ever lasting inspiration!
Elaine Ray
pinky
April 18, 2010 at 1:40 pmAwesome
Linda Landig
April 18, 2010 at 5:17 pmGreat turoial–I've made spiral weave bracelets before, but haven't incorporated art beads. Definately plan to do this!
HJC Editor
January 30, 2011 at 6:34 amYour tutorial is an awesome inspiration! Many thanks for sharing. I would like to feature your designs at http://www.handmade-jewelry-club.com/
Contact me here if you have a concern.
Jane
http://diylessons.org/
Diana Barreras
October 20, 2015 at 11:06 amI would love to try this tutorial but I don't understand why I can't print it. Can someone please explain?