
One of the most consistent issues we face as jewellery/component/bead makers is photography, taking nice clean shots are a a good representation of our work that at the same time give our work added appeal. In the past I have written about using props and flatlay photography, today I want to talk to you about lighting.
I am sure that you already know the importance of a well lit photo, whether you shoot with an smartphone or DSLR the issues remain the same, too sunny and it can wash out your shots and put shadows where you don’t want them, too dark and you lose detail and your photos look a bit gloomy.
So, without the need to buy professional lighting there are a few things you can do to improve your shots.
- If you’re taking your photos outside and you’re not using a light tent or anything to diffuse the light, a bright overcast day is best, the clouds act as a diffuser and help to soften any harsh shadows.

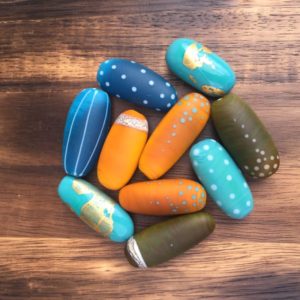
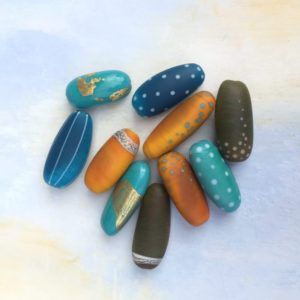
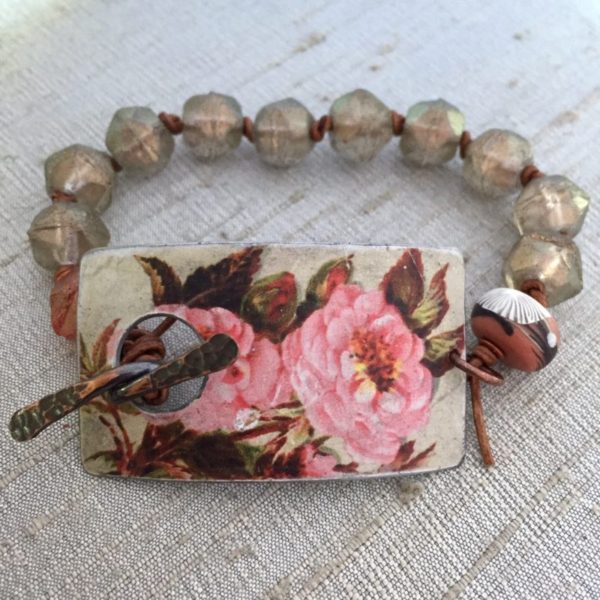
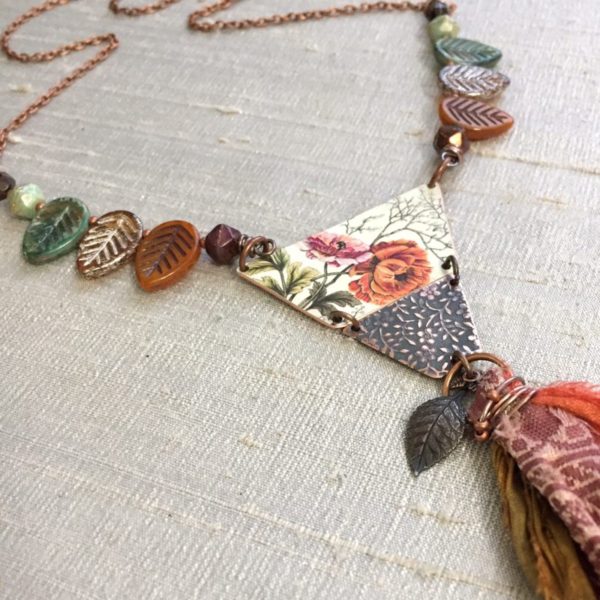
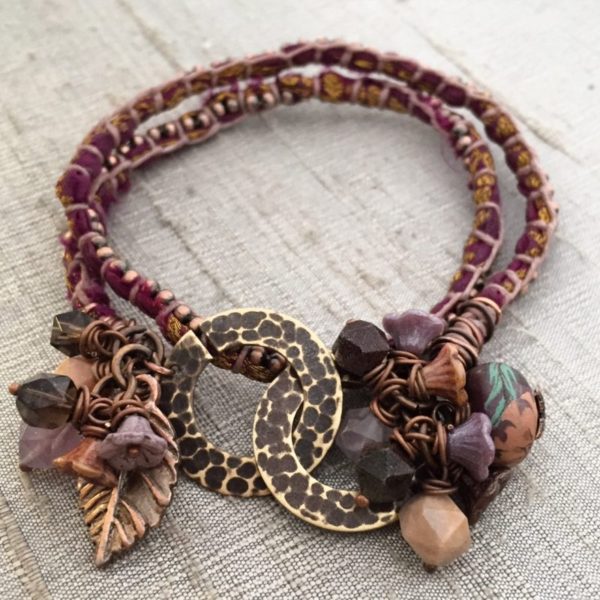
2. consider your background, if you’re shooting against white it may end up looking a little washed out, you can see from the following two photos that the beads pop out more against a dark background and really show off their colours. Play about with different things, in these photos I have just used two cheap kitchen chopping boards, one has been painted and the other I lightly scorched with a kitchen blow torch and then waxed to achieve an aged wood effect. You could also use wallpaper, slate tiles, floor tile, or patio stone, try out different things, take a photo against each and compare them
3. Use your camera settings to get the right light. When using a DSLR learn about the manual settings they will make a big difference to getting the light right in your shots. Even if you only shoot using a smart phone there are things you can do to help, the quickest and simplest example I can offer is the brightness setting on the iPhone
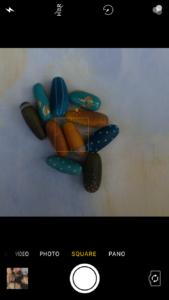 You can see in this first shot that its way to dark. If I touch my finger to the screen to focus just above the focus box is a little sunshine symbol, by holding my finger on that and sliding I can tell the lens to allow more light in and end up with a lighter brighter shot, this saves me from using the flash and creating shadows where I don’t want them to be.
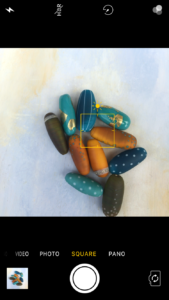
I hope these photography tips have helped you, the best advice I can offer is enjoy taking the photos, have fun trying out new backgrounds and lighting ideas (the internet is full of them) we live in a digital age with the ability to take a million shots and delete all the ones that don’t work for us.
All of the photos in this post have been taking using an iPhone 7 and natural light.
You can see more of my work at Soul Silver on Etsy
And follow me on Facebook here Soul Silver on Facebook
Erin Prais-Hintz
September 19, 2017 at 1:16 pmSuch great tips! I didn’t know about the brightness setting on the iPhone. I don’t have one anymore, but I use my LG G4 camera phone exclusively. I agree on the light vs dark backgrounds. I almost always go back to my tried and true stack of old worn leather bound books or a series of slate tiles that I rotate in and out because their patterns and textures are so great! I just picked up a wood palette sign base from Michaels. It is painted distressed white, but I am considering making half of it a darker color for different looks. Thanks for sharing! Enjoy the day! Erin
Terri Del Signore
September 19, 2017 at 9:35 pmGreat tips!! I always admire your photography!!
Sally Sutherland
September 20, 2017 at 3:42 amThanks Terri and Erin!
Erin I am such a sucker for old wood, I do tend to use white backgrounds and professional lighting for my bead photos online, primarily to try and show off accurate colours, but, when it comes to arty shots my distressed chopping boards are my go-to!